
Bonsai is the art of growing miniature trees in containers. One of the key components of bonsai is choosing the right pot. While there are many options available in stores, making your own bonsai pot from clay can be a rewarding and creative process.
Clay pots offer several advantages for bonsai trees. They provide stability and weight, which help to anchor the tree and prevent it from being knocked over. Additionally, clay pots are porous and allow water to evaporate more slowly, which helps to maintain a consistent level of moisture for the tree’s roots.
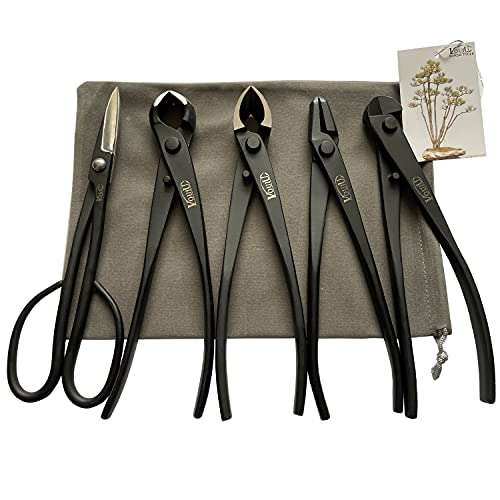
To make a bonsai pot from clay, you will need a few essential tools and materials. These include clay, a rolling pin, a wooden mold or template for shaping the pot, a carving tool for adding details, and a kiln or oven for firing the pot. Additionally, it’s helpful to have a damp cloth on hand to keep the clay moist while working.
The first step in making a bonsai pot is to knead the clay to make it soft and pliable. Once the clay is ready, roll it out into a flat sheet using a rolling pin. Then, place the wooden mold or template on top of the clay and carefully press it down to cut out the desired shape and size for the pot. Use the carving tool to add any decorative details, such as lines or patterns, to the pot.

After shaping and carving the pot, it must be fired in a kiln or oven to harden the clay. Follow the manufacturer’s instructions for firing temperatures and times, as these can vary depending on the type of clay used. Once the pot has been fired and cooled, it can be painted or glazed to add color and protect the clay.
In conclusion, making a bonsai pot from clay is a creative and rewarding process that allows you to customize the pot to perfectly complement your bonsai tree. By following these steps and using your imagination, you can create a unique and beautiful pot that will enhance the overall aesthetic of your bonsai display.
Choosing the right clay for your bonsai pot
When it comes to making a bonsai pot from clay, selecting the right type of clay is crucial. The clay you choose will impact not only the aesthetics of the pot but also its ability to provide a suitable environment for your bonsai tree.
Here are some factors to consider when choosing clay for your bonsai pot:
- Porosity: Bonsai pots need to have good drainage to prevent waterlogged roots. Porous clay allows excess water to drain out of the pot, keeping the roots healthy. Look for clay that has the right balance of porosity, allowing for adequate moisture retention without causing waterlogging.
- Durability: Bonsai pots should be able to withstand outdoor conditions without cracking or breaking easily. Choose clay that is durable and can withstand temperature changes and exposure to sunlight.
- Texture: The texture of the clay can affect the appearance of the pot. Some bonsai enthusiasts prefer pots with a smooth surface, while others like a more rough texture. Consider the overall aesthetic you are trying to achieve and select clay with a suitable texture.
- Colour: Clay comes in a variety of colours, ranging from earth tones to vibrant hues. Choose a colour that complements the style and foliage of your bonsai tree. Remember that lighter colours may show dirt more easily, while darker colours can make the tree stand out.
- Availability: Depending on your location, certain types of clay may be more readily available than others. Research local pottery supply stores or online sources to find clay that suits your needs.
Experimenting with different types of clay can also be a fun way to explore various styles and techniques in bonsai pot making. Don’t be afraid to try different clays and see how they enhance the overall beauty of your bonsai tree.
Shaping the clay to create a unique bonsai pot
Once you have prepared your clay by wedging it properly, you can begin shaping it to create your very own unique bonsai pot. This process requires patience and precision, as the shape and size of your pot can greatly affect the overall aesthetic of your bonsai.
1. Begin by dividing your clay into manageable portions. This will make it easier to work with and ensure that you have enough clay for your desired pot size.
2. Take one portion of clay and start kneading it gently. This will help to remove air bubbles and make the clay more pliable.
3. Using your hands, start shaping the clay into a rough form of your desired pot shape. You can use your imagination or refer to existing bonsai pots for inspiration.
4. Once you have achieved the rough shape, use a damp sponge or your fingers to smooth out any imperfections and refine the details.
5. Pay attention to the thickness of the walls, ensuring that they are consistent throughout. Thin walls may result in cracks while thick walls can make the pot look bulky.
6. Use a wooden or metal tool to create drainage holes at the bottom of the pot. Proper drainage is crucial for the health of your bonsai tree.
7. Finally, let your pot dry slowly and naturally. This can take several days or even weeks, depending on the size and thickness of your pot. Avoid rushing the drying process, as it can lead to cracks or other structural issues.
Remember, each bonsai pot is a unique piece of art, so don’t be afraid to experiment with different shapes and designs. With practice and patience, you will be able to create a beautiful and functional bonsai pot that complements the beauty of your bonsai tree.
Decorating your bonsai pot with intricate designs
Once you have created your bonsai pot from clay, you may wish to add some decorative designs to enhance its visual appeal. Decorating your bonsai pot can be a fun and creative process that allows you to put your personal touch on your creation. Here are some ideas for adding intricate designs to your bonsai pot:
|
1. Carving: Carving intricate patterns or designs into the surface of your bonsai pot can create a beautiful and unique look. You can use carving tools or even a small knife to carefully etch designs into the clay. Popular designs include traditional Japanese motifs, such as cherry blossoms or dragonflies. |
2. Painting: Painting your bonsai pot is another way to add intricate designs. You can use acrylic paints or ceramic glaze to add colours and patterns. Consider using a fine paintbrush to create detailed designs, such as delicate flowers or swirling patterns. Remember to let the paint or glaze dry thoroughly before handling the pot. |
|
3. Appliques: Adding clay or ceramic appliques can give your bonsai pot a three-dimensional look. You can shape small pieces of clay into flowers, leaves, or other decorative elements and attach them to the surface of the pot using clay slip or glue. This technique allows for endless possibilities in terms of design and creativity. |
4. Stenciling: Using stencils is an easy way to create intricate designs on your bonsai pot. You can find pre-made stencils at craft stores or create your own by cutting out shapes from acetate or cardboard. Simply place the stencil on the pot and use a sponge or brush to apply paint or glaze over the cut-out areas. |
|
5. Embossing: Embossing is a technique that involves creating raised designs on the surface of your bonsai pot. You can use embossing powders or clay to add texture and depth to your designs. Simply apply the embossing powder or clay to the desired area and heat it with a heat gun or kiln until it melts or hardens. |
6. Decoupage: Decoupage is a technique where paper or fabric is adhered to the surface of an object using a special glue or decoupage medium. You can use decorative papers, such as Japanese washi paper or delicate fabric, to add intricate designs to your bonsai pot. Remember to seal the decoupaged surface with a clear varnish for protection. Must-Have
Mod Podge Dishwasher Safe Sealer Glue Versatile and durable for crafting projects
This all-in-one Mod Podge sealer is perfect for decoupage projects that need to withstand dishwashers. The quick-drying formula provides a glossy finish, making clean-up a breeze with just soap and water.
|
Remember to let your creativity shine when decorating your bonsai pot. Experiment with different techniques and designs to achieve the desired look. The key is to have fun and create a pot that reflects your personal style and vision.
Curing and maintaining your clay bonsai pot
After creating your bonsai pot from clay, it is important to properly cure and maintain it to ensure its longevity and functionality. Here are some steps to follow:
1. Curing the pot
- Allow the clay bonsai pot to dry naturally for a few days.
- Once it is dry to the touch, place it in a cool and dry area for several weeks to cure fully.
- Avoid exposing the pot to extreme temperatures or direct sunlight during the curing process, as it can cause cracks or warping.
2. Sealing the pot
Applying a sealant to your clay bonsai pot can help protect it from moisture and enhance its durability. Here’s how:
- Clean the pot thoroughly to remove any dirt or debris.
- Choose a suitable sealant, such as a clear acrylic or epoxy sealant, and apply it evenly to the inside and outside of the pot using a brush or sponge.
- Allow the sealant to dry completely before using the pot.
3. Maintaining the pot
To keep your clay bonsai pot in optimal condition, follow these maintenance tips:
- Regularly clean the pot using a soft brush or cloth to remove any dirt or dust.
- Avoid using harsh chemicals or abrasive materials that can damage the pot’s surface.
- Inspect the pot for any signs of cracks or damage, and repair them promptly to prevent further deterioration.
- Store the pot in a cool and dry place when not in use to prevent moisture buildup and potential damage.
By properly curing and maintaining your clay bonsai pot, you can ensure its longevity and enjoy its beauty for years to come.