Do you want to keep your outdoor spaces clean and tidy? A water broom can be a practical and effective tool for cleaning driveways, patios, and sidewalks. With a few simple materials and some basic skills, you can create your own water broom at home. This DIY project is not only cost-effective but also environmentally friendly, as it reduces water consumption compared to traditional power washing methods.
Step 1: Gather the Materials
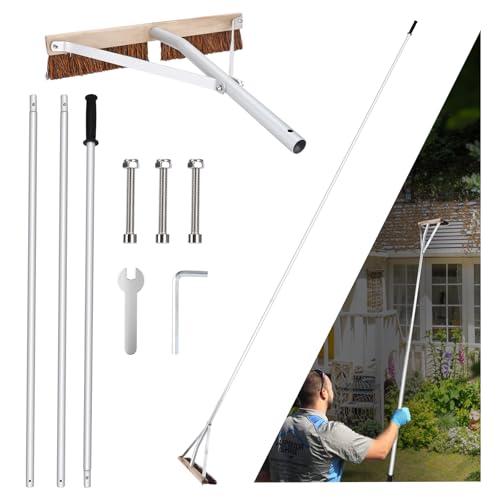
Before you start making your water broom, gather all the necessary materials. You will need a broom head with sturdy bristles, PVC pipes and fittings, a hose connector, and zip ties or hose clamps. These materials can be easily found at your local hardware store or online. Choose a broom head that is wide enough to cover a large area but still manageable to handle.
Tip: If you want to repurpose an old broom, make sure the bristles are in good condition and have enough stiffness to effectively clean the surface.
What is a water broom?
A water broom is a cleaning tool that is used to remove dirt, debris, and stains from outdoor surfaces, such as driveways, patios, and sidewalks. It is designed to be attached to a garden hose and uses the force of the water to sweep away dirt and grime. The water broom typically has multiple nozzles or spray jets that direct the water in a wide path, making it an efficient and effective way to clean large areas quickly.

The water broom is similar to a regular broom, but instead of bristles, it has water jets. These jets spray water at high pressure, which helps to dislodge and remove stubborn dirt and stains. The water broom is also equipped with a handle and wheels, making it easy to maneuver and control.
Using a water broom has several advantages over traditional cleaning methods. It requires less physical effort, as the water does most of the work. It also saves time, as it can clean a large area in a fraction of the time it would take with a regular broom or hose. Additionally, the water broom helps to conserve water, as it uses less water than a hose alone.
Water brooms are commonly used by homeowners, landscapers, and commercial cleaners to keep outdoor areas clean and presentable. They are especially useful for removing dirt, leaves, grass clippings, and other debris that can accumulate on hard surfaces.
| Benefits of using a water broom: |
| 1. Quick and efficient cleaning of large areas |
| 2. Less physical effort compared to traditional cleaning methods |
| 3. Helps to conserve water |
| 4. Versatile tool for removing various types of outdoor debris |
Benefits of using a water broom
A water broom is a simple yet effective tool for cleaning outdoor surfaces. It offers several benefits compared to traditional brooms and hoses:
- Efficient cleaning: A water broom uses a high-pressure stream of water to remove dirt, debris, and stuck-on grime from surfaces. It can clean large areas quickly and thoroughly.
- Water conservation: Unlike hoses or pressure washers, water brooms use less water while providing effective cleaning. They are designed to distribute water evenly and efficiently, reducing wastage.
- Time-saving: With a water broom, you can complete cleaning tasks in less time compared to using a traditional broom or hose. The broad cleaning path and high-pressure water stream make it easier to remove dirt.
- Versatility: Water brooms are suitable for cleaning various outdoor surfaces, including driveways, sidewalks, decks, patios, and garage floors. They can be used on different materials such as concrete, brick, wood, and pavers.
- Reduced physical strain: The design of a water broom minimizes the need for strenuous scrubbing or bending. It allows you to clean standing upright, reducing strain on your back and knees.
- Improved safety: Water brooms help to improve safety by removing slippery substances like algae and moss from outdoor surfaces. Clean and dry surfaces reduce the risk of slips and falls.
- Eco-friendly: Using a water broom instead of harsh chemicals for cleaning is a more environmentally friendly option. It reduces the introduction of harmful substances into the environment and helps to maintain the cleanliness of water sources.
In conclusion, a water broom offers efficient cleaning, water conservation, time-saving, versatility, reduced physical strain, improved safety, and eco-friendly benefits. It is a valuable tool for maintaining clean and safe outdoor surfaces.

Materials needed
To make a water broom, you will need the following materials:
| 1. | A broom head |
| 2. | A handle |
| 3. | PVC pipe |
| 4. | End cap |
| 5. | Nozzle |
| 6. | Hose connector |
| 7. | Hose |
| 8. | Clamps |
| 9. | Drill |
| 10. | Screws |
Make sure you have all these materials before you start making your water broom.
List of materials
Before you start making a water broom, you’ll need to gather the following materials:
- A broom head
- A pressure washer
- A garden hose
- A water supply source
- A water broom attachment
- A set of nozzles
- A wrench
- Metal clamps
- Electrical tape
- A bucket
- Soap solution or cleaning detergent
Once you have all these materials ready, you can proceed to the next steps of assembling and using your water broom.
Step-by-step instructions
Follow these simple steps to make your own water broom:

Step 1:
Gather all the necessary materials and tools. You will need:
- A broom head
- Several PVC pipes
- Connectors
- Drill
- Hose
- Hose connector
- Water source
Step 2:
Start by assembling the PVC pipes and connectors. Connect the pipes to create a T-shape using the connectors. This will serve as the base of your water broom.
Step 3:

Attach the broom head to the top of the PVC T-shape. Make sure it is securely fastened.
Step 4:
Using a drill, create multiple holes on the surface of the broom head. These holes will allow the water to flow through and clean the surface effectively.
Step 5:
Connect one end of the hose to a water source and the other end to the hose connector on the PVC T-shape.
Step 6:
Turn on the water source and adjust the water pressure according to your needs.
Step 7:
Hold the water broom firmly and start sweeping the surface you want to clean. The water will flow through the holes on the broom head, effectively cleaning the area.
Note: Make sure to use the water broom on surfaces that can handle water, such as driveways or patios. Avoid using it on delicate surfaces or indoors.
By following these steps, you can easily create your own water broom and make your cleaning tasks more efficient.
Step 1: Prepare the broom handle
Before you can start making your water broom, you will need to prepare the broom handle. The broom handle will serve as the main base for your water broom, so it is important to ensure it is sturdy and secure.
Materials needed:
| 1 broom handle | 1 drill machine | 1 drill bit (appropriate size) | 1 sandpaper |
To prepare the broom handle:
- Start by examining the broom handle for any rough edges or splinters. If you notice any, use sandpaper to smoothen them out.
- Once the broom handle is smooth, determine the desired length of your water broom. You can cut the broom handle to your preferred length using a saw.
- After cutting the broom handle, use sandpaper to sand the newly cut end to ensure it is smooth.
- Next, take the drill machine and attach the appropriate sized drill bit.
- Locate the center of the broom handle and mark it with a pencil. This is where you will drill a hole for attaching the water nozzle.
- Carefully drill a hole into the broom handle at the marked spot. Be sure to drill straight and deep enough for a secure attachment.
- Once the hole is drilled, use sandpaper to sand the inside of the hole to remove any rough edges.
- Your broom handle is now prepared and ready for the next steps in creating your water broom.
By following these steps to prepare your broom handle, you will have a solid base for your water broom and ensure its durability. Now you can move on to the next step in the process – attaching the water nozzle.
Step 2: Attach the water nozzle
Once you have your broomstick and PVC pipe assembly, the next step is to attach the water nozzle. To do this, you will need a few additional materials:
- A water nozzle with a threaded end
- Teflon tape
- An adjustable wrench
Begin by wrapping the threaded end of the water nozzle with Teflon tape. This will help create a tight seal and prevent any leaks. Make sure to wrap the tape in a clockwise direction to ensure it stays in place when screwing it onto the PVC pipe.
Next, take the threaded end of the water nozzle and screw it onto the opposite end of the PVC pipe assembly. Use an adjustable wrench to tighten the connection, making sure it is secure but not overly tight. Be careful not to overtighten, as this can cause damage to the PVC pipe.
Once the water nozzle is securely attached, turn on the water supply to test for any leaks. Inspect the connection and tighten if necessary.
With the water nozzle in place, you are now ready to move on to the next step: attaching the broom bristles.
Step 3: Connect the water source
Once you have assembled the broom handle and attached the bristles, it’s time to connect the water source to your water broom. This step will allow the water to flow through the broom and create the desired pressure for cleaning.
Start by locating the water inlet of the water broom. It is usually located at the base of the broom head and is designed to connect to a standard garden hose.
Connect one end of your garden hose to the water inlet of the broom head. Make sure the connection is secure and tight to avoid any water leakage.
Next, find a suitable water source, such as an outdoor faucet or a hose spigot. Attach the other end of your garden hose to the water source. Again, ensure a tight connection to prevent any water loss.
Once the water source is connected to the water broom, turn on the water supply and check for any leaks. Adjust the water flow if necessary.
It’s important to note that the water broom works best with a constant water supply. So, make sure the water source is always turned on while using the broom for effective cleaning.
With the water source connected and functional, you are now ready to move on to the next step and start using your water broom to clean various surfaces!