

Are you tired of using a broom with a loose handle or a broken one? Attaching a new handle to your broom is a simple task that can be done in a few easy steps. In this article, we will guide you through the process of attaching a broom handle, so you can continue to keep your floors clean without any hassles.
Step 1: Choose the Right Handle
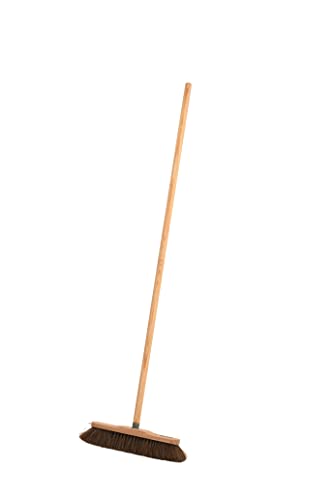
Before you start, it’s important to select a suitable handle for your broom. Look for a handle that is sturdy, durable, and the right length for your comfort. Handles made of materials such as wood or metal are recommended for their strength and longevity.
Note: If you are replacing the handle of an existing broom, make sure to measure the diameter of the broom head to ensure a proper fit.
Step 2: Prepare the Broom Head
The next step is to prepare the broom head for the new handle. Remove the old handle if it is still attached to the broom head. Clean the broom head thoroughly to remove any dirt, debris, or adhesive residue. A clean surface will ensure a secure attachment of the new handle.
Step 3: Attach the New Handle
Now it’s time to attach the new handle to the broom head. Apply a small amount of wood glue or adhesive to the end of the handle. Insert the handle into the hole or socket on the broom head. Make sure the handle is inserted fully and securely.
Note: If the handle has a screw or other fastening mechanism, follow the manufacturer’s instructions for attaching it to the broom head.
Step 4: Allow Time to Dry
After attaching the handle, allow sufficient time for the glue or adhesive to dry and set. This will ensure a strong and stable connection between the handle and the broom head. Follow the recommended drying time specified by the manufacturer of the adhesive.
With these simple steps, you can easily attach a new handle to your broom and continue to use it for effective sweeping. Remember, a properly attached handle will make your cleaning tasks easier and more efficient. Enjoy a clean and tidy home with your newly attached broom handle!
Tips for Properly Attaching a Broom Handle
Attaching a broom handle may seem like a simple task, but doing it correctly can make a big difference in the longevity and effectiveness of your broom. Follow these tips to ensure proper attachment of your broom handle:
1. Choose the Right Handle
Before attaching a new broom handle, make sure you select one that is the appropriate length and material for your needs. Consider the type of broom head and the surfaces you will be sweeping to determine the best handle for the job.
2. Prepare the Broom Head
Check the broom head for any debris or damage. Clean it off and make sure there are no obstructions that could prevent a secure attachment. If there are any loose bristles, trim them down to ensure a tight fit.
3. Align the Handle
Insert the broom handle into the designated opening on the broom head. Make sure the handle is aligned straight and fully inserted so that it reaches the bottom of the attachment point. This will provide stability and prevent the handle from wobbling or breaking.
4. Secure the Handle
Depending on the type of broom head, there may be different ways to secure the handle. It might involve tightening screws, using a wingnut, or applying adhesive. Follow the manufacturer’s instructions or use the appropriate tool to secure the handle tightly to the broom head.
By following these tips, you can ensure that your broom handle is securely attached, allowing you to sweep with ease and efficiency. A properly attached broom handle will not only make your cleaning tasks easier but also extend the lifespan of your broom.
Step-by-Step Guide to Attaching a Broom Handle
Attaching a handle to a broom is a simple process that allows you to conveniently use the broom for sweeping and cleaning. Follow these easy steps to attach a broom handle:
Step 1: Gather Materials
Before starting, make sure you have the necessary materials. You will need a broom head, a broom handle, and a screwdriver. Ensure that the broom handle is of the appropriate length for your desired use.
Step 2: Insert the Handle
Take the broom head and locate the hole where the handle will be inserted. Hold the broom head upside down, with the hole facing upwards. Then, take the broom handle and align it with the hole.
Insert the broom handle into the hole, making sure it goes in straight and all the way through. Apply firm but gentle pressure to secure the handle in place.
Step 3: Secure with Screws
Once the handle is inserted, look for the screw holes located near the base of the broom head. Take the screwdriver and insert the screws into these holes.
Tighten the screws securely to ensure that the broom handle is firmly attached to the broom head. Make sure the handle does not wobble or move when pressure is applied.
And that’s it! You have successfully attached a broom handle. Now you can use your broom for all your sweeping and cleaning needs.
Materials Needed to Attach a Broom Handle
Attaching a broom handle is a simple process that requires a few basic tools and materials. Before you begin, gather the following items:
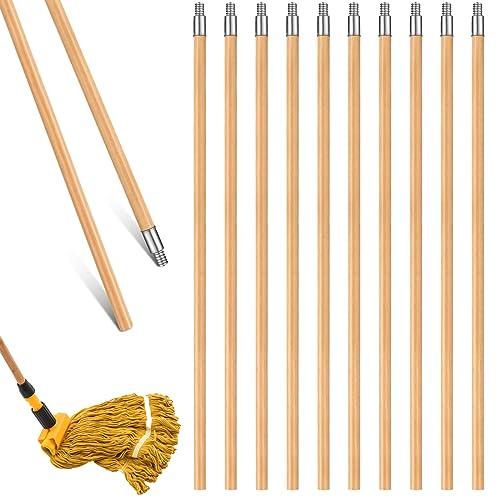
1. Broom Handle
Choose a broom handle that is the correct length for your needs. Handles can be made from various materials such as wood or metal. Make sure the handle has a smooth, even surface to ensure a secure attachment.
2. Broom Head
A broom head is the part of the broom that connects to the handle. It may already be attached to the handle or sold separately. If it is sold separately, make sure you have the appropriate broom head that matches your handle.
3. Screwdriver or Drill
Depending on the type of attachment on your broom handle, you will need either a screwdriver or drill to secure the handle to the broom head. Check the attachment method before gathering your tools.
4. Screws or Bolts
If your broom handle requires screws or bolts to attach to the broom head, make sure you have the appropriate size and type. It is important to use screws or bolts that are long enough to secure the handle but not too long that they protrude through the other side.
5. Optional: Adhesive or Epoxy
If you want extra reinforcement for your broom handle attachment, you can use adhesive or epoxy. This can provide added strength and durability, especially for heavy-duty use. Make sure to follow the instructions on the adhesive or epoxy packaging for proper application.
By gathering these materials, you will have everything you need to successfully attach a broom handle. Ensuring you have the right tools and materials will make the process easier and help create a secure and long-lasting attachment.
Benefits of Properly Attached Broom Handles
Attaching a broom handle properly is crucial for a number of reasons. A secure and well-attached handle not only enhances the broom’s performance but also prevents accidents and improves longevity.
1. Improved Control
When a broom handle is properly attached, it allows for better control and maneuverability. Whether you are sweeping large areas or tackling tight corners, a secure handle ensures that you can effectively guide the broom without any wobbling or loosening.
2. Reduced Strain
A properly attached broom handle helps reduce strain on your hands, wrists, and arms. With a stable grip, you can achieve efficient sweeping motions without putting excessive force on your joints. This can be particularly beneficial if you have to sweep for extended periods of time.
A secure handle also minimizes the risk of the broom slipping or twisting unexpectedly, which can result in strained muscles or even accidents.
Overall, taking the time to properly attach your broom handle can make your cleaning tasks more comfortable and easier to complete.