If you own a motorcycle, chances are you know the importance of regular maintenance. One part that may need attention over time is the front fork seals. These seals prevent oil from leaking and ensure that your front suspension works smoothly. Over time, these seals can wear out and need to be replaced. Instead of taking your bike to a mechanic, you can save money and do this task yourself. In this article, we will guide you through the step-by-step process of changing front fork seals on a motorcycle.
Step 1: Gather the Necessary Tools and Parts
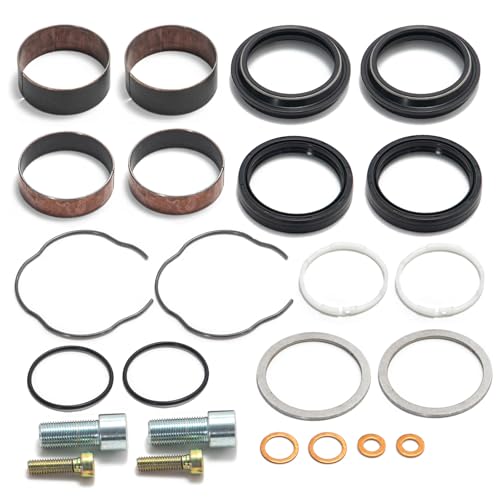
Before you start, make sure you have all the tools and parts you need. You will need a socket set, a torque wrench, a seal driver or a PVC pipe that fits the diameter of your fork tube, a fork oil seal kit, a fork oil, a clean cloth, and a bucket or a drain pan.
Pro Tip: It is always a good idea to consult your motorcycle’s service manual to ensure you have the correct tools and parts for your specific model.
How to Replace Motorcycle Front Fork Seals – Step-by-Step Guide
Replacing the front fork seals on your motorcycle is an important maintenance task that ensures optimal performance and safety. Over time, the seals may wear out or develop leaks, causing oil to leak out and affecting the suspension’s performance. In this step-by-step guide, we will walk you through the process of replacing the front fork seals on your motorcycle.
Step 1: Gather the necessary tools and materials
Before you start, make sure you have all the necessary tools and materials. You will need a socket set, Allen wrenches, a shop rag or towel, a fork seal driver tool, new fork seals, and fork oil. Refer to your motorcycle’s owner’s manual for the specific tools and materials required.
Step 2: Elevate your motorcycle
Use a motorcycle stand or lift to elevate your motorcycle, ensuring it is stable and secure. This will make it easier to access the front fork and perform the seal replacement.
Step 3: Remove the front wheel
Using the appropriate socket or wrench, remove the axle and loosen the pinch bolts on the front fork, allowing you to remove the front wheel. Make sure to support the wheel as you remove it to prevent any damage.
Step 4: Remove the front fork
Remove the front fork by loosening the clamp bolts and sliding it out of the triple tree. Be cautious as the fork may still contain fork oil, which can leak out during this process.
Step 5: Remove the old fork seals
Using a seal pick or a small screwdriver, carefully remove the old fork seals from the top of the fork tube. Be gentle to avoid damaging the fork tube surface. Clean any residual oil or debris from the fork tube using a shop rag or towel.
Step 6: Install the new fork seals
Apply a thin layer of fork oil to the new fork seals to provide lubrication during installation. Use a fork seal driver tool to carefully install the new seals onto the fork tube, ensuring they are securely seated at the top of the tube.
Step 7: Reassemble the front fork
Reinsert the front fork into the triple tree and tighten the clamp bolts. Insert the front wheel, securing it with the axle and tightening the pinch bolts. Check your motorcycle’s owner’s manual for specific torque values.
Step 8: Refill with fork oil
Using a funnel and the appropriate fork oil, refill the front fork to the recommended level. Refer to your motorcycle’s owner’s manual for the correct amount and viscosity of fork oil.
Step 9: Test the front fork
Once the front fork is reassembled and refilled with oil, test the suspension by bouncing the front end of the motorcycle. Check for any leaks or abnormal behavior. If necessary, adjust the fork oil level or consult a professional mechanic for further assistance.
Step 10: Repeat the process for the other side
If your motorcycle has dual front forks, repeat the entire process for the other side to ensure that both forks’ seals are properly replaced and functioning correctly.
By following this step-by-step guide, you can replace the front fork seals on your motorcycle and maintain optimal suspension performance. It is important to perform this maintenance task regularly to ensure your ride remains safe and enjoyable.
Tools and Materials
Before you begin changing the front fork seals on your motorcycle, you will need to gather some tools and materials. Here is a list of items you will need:
- Socket set
- Hex key set
- Fork seal driver
- Screwdriver
- Seal pick
- Wrench set
- Fork oil
- Clean rags
- Container to drain the fork oil
- Soft mallet or hammer
- Shop manual specific to your motorcycle model
Make sure you have all of these tools and materials before you begin the fork seal replacement process. Having the necessary equipment will make the process much smoother and easier.
Preparation
Before you begin changing the front fork seals on your motorcycle, it’s important to gather all the necessary tools and equipment. This will ensure that you have everything you need to complete the task efficiently and safely. Here is a list of items you should have on hand:
- Socket set
- Allen wrench set
- Seal driver set
- Flat-head screwdriver
- Shop towels
- Fork oil
- New fork seals
- Suspension fluid syringe
Before starting the procedure, it’s essential to clean the area around the front fork seals thoroughly. This will prevent any debris or dirt from entering the fork tubes during the seal replacement process. You can use a shop towel or a lint-free cloth to wipe away any dirt or grime.
It’s also a good idea to review your motorcycle’s owner manual for any specific instructions or guidelines related to changing front fork seals. This will ensure that you follow the manufacturer’s recommendations and avoid any potential mistakes or damage.
Once you have gathered all the necessary tools and cleaned the area, you’re ready to proceed with changing the front fork seals on your motorcycle.
Seal Replacement Process
Replacing the front fork seals on your motorcycle is an important maintenance task that should be done regularly to ensure proper suspension performance. Here is a step-by-step guide on how to replace the seals:
1. Gather the necessary tools and materials:
- Fork seal driver
- Seal cleaning tool
- Fork oil
- Safety goggles
- Socket set
- Screwdriver set
- Shop towels
2. Prepare your motorcycle:
Before starting the seal replacement process, make sure your motorcycle is securely placed on a center stand or lift. This will provide stability and ease of access to the front fork assembly.
3. Remove the front forks:
Using your socket set and screwdriver set, carefully remove the front forks from your motorcycle. Refer to your motorcycle’s service manual for specific instructions on how to remove the forks.
4. Drain the fork oil:
Once the front forks are removed, drain the fork oil into a suitable container. Make sure to dispose of the oil properly according to local regulations.
5. Remove the old seals:
Using the seal cleaning tool, carefully remove the old fork seals from the front fork assembly. Be gentle to avoid damaging the forks.
6. Clean the fork tubes:
Thoroughly clean the fork tubes using shop towels and make sure there is no dirt or debris left on the surface.
7. Install the new seals:
Apply a small amount of fork oil to the new seals and slide them onto the fork tubes. Use the seal driver to carefully tap the seals into place. Make sure they are seated properly.
8. Reassemble the front forks:
Reinstall the front forks onto your motorcycle, following the reverse order of removal. Make sure all bolts and fasteners are tightened to the specified torque values.
9. Refill with fork oil:
Fill the front forks with the recommended amount of fork oil, as specified in your motorcycle’s service manual. Use a funnel for ease of pouring.
10. Test the suspension:
Once the seal replacement process is complete, test the suspension by gently compressing and rebounding the front forks. Check for any oil leaks and ensure the forks move smoothly.
By following these steps, you can replace the front fork seals on your motorcycle and maintain optimal suspension performance.