If you are looking for a fun and easy craft project, making mini pom poms with a fork is the perfect solution. Whether you want to add a cute embellishment to a hat or scarf, or create a garland for a special occasion, mini pom poms are versatile and can be used in many different ways.
One of the great things about making mini pom poms with a fork is that you don’t need any special tools or equipment. All you need is a fork (preferably with four prongs) and some yarn in the color of your choice. You can use any type of yarn, depending on the look and texture you want to achieve. The process is simple and can be done in just a few minutes.
To start, take your fork and wrap the yarn around the prongs. Make sure to leave a small tail of yarn hanging down, as this will be used later to secure the pom pom. The more times you wrap the yarn around the prongs, the thicker and fuller your pom pom will be. You can experiment with different amounts of yarn to create different sizes and densities of pom poms.
Once you have wrapped the yarn around the prongs to your desired thickness, use a small piece of yarn to tie a tight knot around the center of the wrapped yarn. You can do this by sliding the piece of yarn between the prongs and the wrapped yarn, and then tying a secure knot. This will hold the pom pom together and prevent it from unraveling.
After you have tied the knot, carefully slide the wrapped yarn off the prongs of the fork. Then, take a sharp pair of scissors and cut through all the loops of yarn. Be careful not to cut the piece of yarn that you used to tie the knot, as this will be used to attach the pom pom to your project. Once you have cut through all the loops, you will have a fluffy ball of yarn.
Finally, give your pom pom a little trim to even out the edges and make it look neat and tidy. You can trim it as much or as little as you like, depending on the look you want to achieve. And that’s it – you have successfully made a mini pom pom with a fork! Now you can use your pom pom to add a touch of fun and whimsy to any craft project.
Step-by-Step Guide to Making a Mini Pom Pom with a Fork
Mini pom poms are a fun and colorful accessory that can be used for various crafts and projects. Making a mini pom pom can be a simple and enjoyable process, especially when using a fork! This step-by-step guide will walk you through the process of making a mini pom pom using a regular dining fork.
Materials Needed:
- A fork
- Yarn in your chosen color
- Scissors
Instructions:
| Step | Description |
|---|---|
| 1 | Start by choosing the color of yarn you want to use for your mini pom pom. Cut a long piece of yarn, around 6-8 inches, and set it aside for later. |
| 2 | Hold the fork firmly in your non-dominant hand and wrap the yarn around the outer prong of the fork. Make sure to leave a small tail of yarn hanging to secure the pom pom later. |
| 3 | Continue wrapping the yarn around the outer prong of the fork in a back-and-forth motion. Make sure to wrap the yarn tightly, but not too tight that it distorts the shape of the fork. |
| 4 | Repeat the wrapping process with more layers of yarn until you achieve the desired fullness for your mini pom pom. |
| 5 | Once you’re satisfied with the fullness, carefully and still holding the yarn in place, take the long piece of yarn you set aside earlier and insert it between the middle prong and the outer prong of the fork. |
| 6 | Secure the long piece of yarn tightly by tying a double-knot around the wrapped yarn. This will create the center of the mini pom pom and hold the yarn together. |
| 7 | Slide the wrapped yarn off the fork gently, taking care not to unravel it. Make sure to keep the long piece of yarn you just tied in the previous step accessible. |
| 8 | Hold the long piece of yarn securely and use a pair of sharp scissors to cut through the loops of the wrapped yarn, separating them and creating the pom pom shape. |
| 9 | After cutting through all the loops, give your mini pom pom a gentle shake to fluff it up and even out any uneven ends. |
| 10 | Trim the pom pom to your desired shape and length, making sure all the ends are relatively even. |
| 11 | Your mini pom pom is now ready to be used! You can attach it to accessories, use it for home decor, or incorporate it into any craft project. |
Now that you have learned how to make a mini pom pom with a fork, you can let your creativity run wild and make colorful pom poms in various sizes and styles!
Gather Your Materials
Before you begin making your mini pom pom, gather all of the necessary materials. Here’s what you’ll need:
A fork |
You’ll need a regular-sized fork from your kitchen. This will be used to wrap the yarn around and create the mini pom pom. |
Yarn |
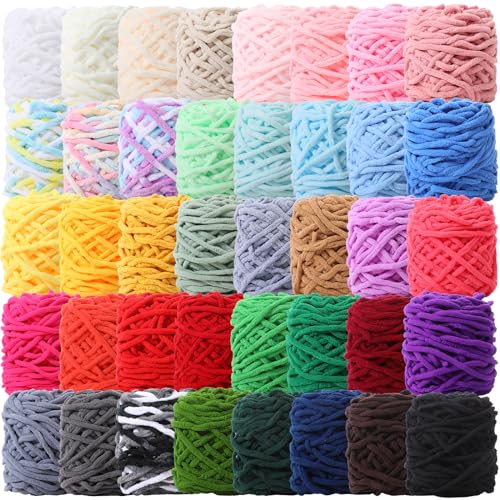
Choose the color of yarn you want for your mini pom pom. You can use any type of yarn, such as acrylic or wool. Make sure you have enough yarn to wrap around the fork several times. |
Scissors |
You’ll need a pair of sharp scissors to cut the yarn and finish the mini pom pom. |
Once you have gathered all of these materials, you’ll be ready to start making your mini pom pom using a fork!
Prepare the Fork
To make a mini pom pom with a fork, you will need a standard-sized eating fork. Make sure it is clean and dry before starting the process.
If you wish to add some color to your pom pom, you can use colored yarn or wool. Choose a color that you like and get a small amount of it.
Hold the fork with the tines facing downwards and the handle in your hand. This will be the base for creating the pom pom.
Warning: Be careful while handling the fork to avoid any injuries.
Start Making the Pom Pom
Once you have gathered all your materials, it’s time to start making the mini pom pom using a fork. Follow these simple steps:
- Take a fork and wrap the yarn around the prongs. Make sure to leave a long tail of yarn hanging loose.
- Continue wrapping the yarn around the fork until you have reached your desired thickness for the pom pom.
- Once you are satisfied with the thickness, take the long tail of yarn and thread it through the middle prongs of the fork.
- Tie a tight double knot around the wrapped yarn, ensuring that the yarn is secured in place.
- Carefully slide the yarn off the fork, holding onto the knot to keep it from unraveling.
- Use a pair of scissors to cut the loops of yarn on both ends. Be careful not to cut the long tail of yarn used to tie the knot.
- Fluff and trim the pom pom to even out the shape and make it look more rounded.
And there you have it – a mini pom pom made with a fork! You can attach it to a keychain, a hairpin, or use it for various craft projects. Get creative and have fun!