

If you own a motorcycle, regular maintenance is crucial to keep it running smoothly and efficiently. One important maintenance task is changing the fork seals. Fork seals play a vital role in keeping the suspension system functioning properly, and over time, they can wear out and start leaking. If you notice oil leaking from your forks or experience a loss of suspension performance, it’s time to replace the fork seals. While it may seem like a daunting task, with the right tools and knowledge, you can do it yourself.
When changing fork seals, there are several things you need to consider. Firstly, you’ll need to gather the necessary tools and supplies. This includes a fork seal driver, a seal bullet or a piece of PVC pipe, a fork oil level tool, a socket set, a torque wrench, a fork oil, and of course, the new fork seals. Make sure to check your motorcycle’s service manual for the specific fork seal size and oil capacity required for your model.

Before starting the process, it’s crucial to clean the area around the fork seals thoroughly. Any dirt or debris can cause damage to the new seals. Additionally, it’s recommended to invest in a fork oil seal cleaning tool, which allows you to remove any debris or excess oil from the fork tubes. Once the forks are clean, you can begin the process of removing the old seals.
Preparing for Fork Seal Replacement
When it comes to replacing fork seals, it’s important to be well-prepared to ensure a successful and efficient process. Here are some essential steps to take before starting the fork seal replacement:
1. Gather the necessary tools:
Before you begin, make sure you have all the required tools on hand. Some of the common tools you may need include a socket set, torque wrench, seal driver, fork oil, and a seal cleaning tool.
2. Find a suitable workspace:
Choose a well-lit and clean workspace where you can comfortably work on the fork seals. It’s important to have enough space to lay out your tools and parts without any obstructions.
3. Elevate the motorcycle:
Use a center stand or a paddock stand to elevate the front end of the motorcycle. This will make it easier to work on the forks and ensure stability during the seal replacement process.
4. Remove the front wheel:
Before you can access the fork seals, you’ll need to remove the front wheel. Refer to your motorcycle’s manual for specific instructions on how to remove the wheel safely.
5. Drain the fork oil:
Use a drain pan to catch the fork oil as you remove the drain screws. Once the oil is drained, clean the area around the forks and inspect for any signs of damage or wear.
6. Loosen the fork caps:
Loosen the fork caps carefully using a socket and wrench. Be cautious as there may still be some residual pressure in the forks.
7. Remove the fork tubes:
Slide the fork tubes down and out of the triple clamps. Take extra care not to damage any of the surrounding parts or the fork tubes themselves.
8. Clean the fork tubes:
Thoroughly clean the fork tubes using a seal cleaning tool to remove any dirt or debris that could potentially damage the new fork seals.
9. Inspect and replace other components:
While you have the forks disassembled, it’s a good idea to inspect other components such as bushings, dust seals, and guide bushings. If any of these parts show signs of wear or damage, it’s best to replace them at the same time as the fork seals.
10. Install the new fork seals:
Once you have completed all the necessary inspections and preparations, carefully install the new fork seals using a seal driver. Make sure to follow the manufacturer’s instructions for the correct installation technique.
By following these steps and taking the time to prepare properly, you can increase the likelihood of a successful fork seal replacement. Remember to always refer to your motorcycle’s manual for specific instructions and torque specifications.
Essential Tools and Materials
When it comes to changing fork seals, there are several essential tools and materials that you will need. These tools will help you successfully complete the task and ensure that your fork seals are properly installed. Here are the essential tools and materials you will need:
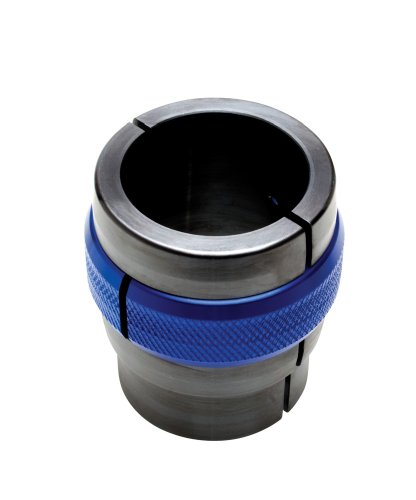
- Fork Seal Driver: A fork seal driver is a tool that will help you properly install the fork seals without causing any damage. It is designed to fit over the fork tube and provide even pressure during installation.
- Fork Oil: Fork oil is an important component when changing fork seals. It helps to lubricate the seals and ensures smooth operation of the forks. Make sure to use the recommended type and amount of fork oil for your specific motorcycle model.
- Fork Oil Level Gauge: A fork oil level gauge is used to measure the correct amount of fork oil that needs to be added to the forks. It is a simple tool that ensures the forks are filled with the right amount of oil, which is crucial for optimal performance.
- Fork Cap Wrench: A fork cap wrench is needed to loosen and tighten the fork caps when removing or installing fork seals. This tool helps you safely and securely remove the fork caps without causing any damage.
- Fork Seal Bullet Tool: A fork seal bullet tool is a small plastic tool that helps guide the fork seal into the fork tube without causing any damage. It ensures that the fork seal is properly aligned and seated during installation.
- Clean Rags or Towels: It is important to have clean rags or towels on hand to wipe away any excess fork oil or dirt during the fork seal replacement process. This will help keep everything clean and prevent any contamination.
- Suspension Fluid Cleaner: A suspension fluid cleaner can be used to clean the fork tubes and remove any dirt or debris before installing the new fork seals. This will help ensure a clean and smooth surface for the seals to properly adhere to.
- Socket Set: A socket set is a versatile tool that you will need to remove and install various components of your front forks. Make sure to have the appropriate socket sizes for your specific motorcycle model.
- Torque Wrench: A torque wrench is necessary to properly tighten the fork caps and other components to the manufacturer’s recommended torque specifications. This will help ensure that everything is securely fastened and prevent any potential issues.
Having these essential tools and materials on hand will make the process of changing fork seals much easier and less time-consuming. It is important to have the right tools for the job to ensure that the fork seals are properly replaced and your motorcycle’s suspension system functions optimally.
Step-by-Step Guide to Fork Seal Replacement
Replacing fork seals on your motorcycle is an important maintenance task that can greatly improve the performance and handling of your bike. Follow these step-by-step instructions to ensure a proper fork seal replacement:
Step 1: Gather the necessary tools and materials
Before you begin, make sure you have all the tools and materials you need. This may include a fork seal driver, fork oil, new seals, a socket set, a torque wrench, and a shop manual specific to your motorcycle model.
Step 2: Elevate the motorcycle
Use a motorcycle stand or lift to elevate the front end of your bike. This will make it easier to access the fork tubes and remove the front wheel.
Step 3: Remove the front wheel
Loosen the axle pinch bolts and remove the axle nut. Carefully slide out the front wheel, taking care not to damage the brake rotor or fender. Set the wheel aside in a safe place.
Step 4: Remove the fork tubes
With the front wheel out of the way, loosen the triple clamp bolts and lower the fork tubes. Once the fork tubes are loose, slide them out of the triple clamps and remove them from the bike.
Step 5: Drain the fork oil
Flip the fork tubes upside down and allow the old fork oil to drain out completely. You may need to pump the fork tubes a few times to ensure all the oil is removed.
Step 6: Remove the old fork seals
Using a fork seal driver or a flat-head screwdriver, carefully pry out the old fork seals from the fork tubes. Take care not to scratch or damage the inner surface of the fork tubes.
Step 7: Install the new fork seals
Apply a thin layer of fork oil to the new fork seals and carefully insert them into the fork tubes. Use a fork seal driver or a PVC pipe of the appropriate diameter to press the seals into place.
Step 8: Reassemble the forks
Slide the fork tubes back into the triple clamps and tighten the triple clamp bolts. Install the front wheel by sliding the axle through the forks and tightening the axle nut and pinch bolts.
Step 9: Refill the fork tubes with fresh oil
Refer to your motorcycle’s shop manual for the recommended fork oil capacity and viscosity. Pour the appropriate amount of fork oil into each fork tube, taking care not to overfill.
Step 10: Test the forks
Bounce the front end of your motorcycle a few times to distribute the fork oil evenly and check for any leaks or abnormalities. If everything looks and feels good, you’re ready to hit the road!
Following these steps will ensure a proper fork seal replacement, which can greatly improve the performance and handling of your motorcycle. If you’re unsure about any of these steps, consult a professional mechanic or refer to your motorcycle’s shop manual for further guidance.