
When it comes to cycling, a fork is an essential part of any bike. It connects the front wheel to the frame, providing stability and control while riding. However, over time, forks can become hardened and lose their ability to absorb shocks and vibrations, making your ride uncomfortable and unsafe. But fear not! In this article, we will guide you through the process of repairing a hardened fork, restoring it to its former glory.
Step 1: Assessing the Damage
The first step in repairing a hardened fork is to assess the extent of the damage. Look for any visible signs of wear and tear, such as cracks or dents. Inspect the fork for any loose or damaged parts, such as the crown race, steerer tube, or dropouts. It is important to identify the cause of the hardening before proceeding with the repair.
Step 2: Cleaning and Lubricating
Once you have assessed the damage, it’s time to clean and lubricate the fork. Remove the front wheel and detach the fork from the frame. Use a degreaser and a brush to clean off any dirt, grime, or old lubricant. Pay special attention to the areas where the fork moves and pivots, such as the dropouts and the steerer tube. After cleaning, apply a fresh coat of lubricant to ensure smooth movements.
Step 3: Replacing Parts
If you have identified any damaged or worn-out parts during the assessment, it is crucial to replace them. This may include replacing the crown race, steerer tube, or dropouts. Consult the manufacturer’s instructions or seek professional help if you are unsure about the replacement process. Make sure to use high-quality replacement parts to ensure the longevity and performance of your fork.
Step 4: Reassembly and Adjustment
After replacing any necessary parts, it’s time to reassemble the fork and adjust it to the correct settings. Reattach the fork to the frame, making sure all bolts and screws are properly tightened. Adjust the suspension and damping settings according to your preference and riding style. Take your bike for a short test ride to ensure everything is working smoothly before embarking on longer rides.
By following these steps, you can repair your hardened fork and make your cycling experience enjoyable once again. Remember to regularly maintain and inspect your fork to prevent future damage and prolong its lifespan. So grab your tools and get ready to breathe new life into your bike’s fork!
Understanding the Problem
Before attempting to repair a hardened fork, it is important to understand the nature of the problem and what may have caused it. A hardened fork typically occurs when the material of the fork, usually made of metal, becomes stiff and inflexible, making it difficult or impossible for the fork to function properly.
There are several potential causes for a hardened fork. The main reason is usually wear and tear, as forks are subject to constant use and pressure. Over time, the repeated stress on the fork can cause it to harden and lose its flexibility. Another possible cause is exposure to extreme temperatures or environmental conditions, which can weaken the material and lead to hardening.
Other factors that can contribute to a hardened fork include improper maintenance, such as neglecting to lubricate the fork regularly or failing to address any signs of damage or wear. Additionally, using the fork for tasks or loads that exceed its intended capacity can put extra strain on the material and contribute to hardening.
To determine if a fork is indeed hardened, it is important to look for certain signs. These may include a fork that is difficult to move or adjust, a lack of smoothness in the fork’s movements, or visible signs of damage, such as cracks or bends in the material. If any of these signs are present, it is likely that the fork has become hardened and will require repair.
Examination of the Damage
Before attempting any repairs on a hardened fork, it is important to thoroughly examine the damage to determine the extent and severity. This examination will help you understand the best course of action to take in order to effectively repair the fork.
Start by inspecting the fork for any visible cracks, fractures, or deformations. Look for any signs of damage, such as bent or broken prongs, chips, or dents. Check the integrity of the fork by applying gentle pressure to different points and observing any excessive movement or instability.
Next, carefully examine the surface of the fork for any signs of corrosion or rust. These can indicate long-term damage or improper maintenance. Look for any areas where the protective coating may have worn off, exposing the metal to the elements.
Take note of any abnormalities in the metal, such as discoloration, pitting, or roughness. These can be signs of stress, fatigue, or material defects. Additionally, inspect the welds and joints for any signs of cracking or separation.
It is important to approach the examination with a critical eye and to document all findings. Take clear photographs or make detailed sketches of the damage. This documentation will be helpful when discussing the repairs with a professional or referring to it later during the repair process.
Identifying the Cause
When repairing a hardened fork, it is crucial to first identify the cause of the fork failure. There could be several reasons why a fork becomes hardened, and identifying the root cause is essential for a successful repair. Here are some common causes to consider:
1. Overheating
One of the most common causes of hardened forks is overheating. When a fork is exposed to extreme temperatures or prolonged heat, the material can become brittle and hardened. This can be caused by improper welding techniques, excessive friction, or exposure to a high-heat environment.
2. Material Defects
Another cause of hardened forks can be material defects. It is possible for the steel used in the fork to have imperfections or impurities that cause it to harden and become brittle over time. These defects can occur during the manufacturing process or due to improper handling and storage of the fork.
3. Improper Maintenance
If a fork is not properly maintained and lubricated, it can lead to hardening. Lack of regular maintenance can cause the fork to experience increased friction and wear, which can result in hardening of the material. It is important to follow the manufacturer’s recommended maintenance schedule and use the appropriate lubricants to prevent this issue.
4. Incorrect Material Selection
Using the wrong type of material for the fork can also lead to hardening. Certain types of steel are more prone to hardening than others, and using the wrong material can result in premature failure of the fork. It is crucial to consult with a professional or refer to the manufacturer’s specifications to ensure the correct material is used.
By identifying the cause of the hardened fork, you can take the appropriate steps to repair and prevent future failures. It is important to consult with a professional or experienced technician to determine the best course of action for your specific situation.
Preparing for the Repair
Before you start repairing a hardened fork, it’s important to gather all the necessary tools and materials. Having everything at hand will make the repair process smoother and more efficient.
Tools
Here are the essential tools you will need:
- Adjustable wrench
- Hex wrench set
- Chain whip
- Cassette lockring tool
- Pedal wrench
- Chain tool
- Tire lever
- Screwdrivers (both flathead and Phillips)
- Hammer
- Torque wrench
Make sure that all the tools are in good condition and functioning properly. If you are missing any of the tools, it’s advisable to purchase or borrow them before you start the repair.
Materials
In addition to the tools, you will also need the following materials:
- New fork seals
- New o-rings
- Grease
- Threadlocker
- Cable ties
Check if you have all the necessary materials to complete the repair. It’s crucial to use high-quality materials to ensure the longevity and effectiveness of the repair.
Once you have gathered all the tools and materials, find a clean and well-lit workspace where you can comfortably work on the repair. Clear any clutter and organize your tools and materials for easy access during the repair process. This will help you stay focused and avoid unnecessary delays.
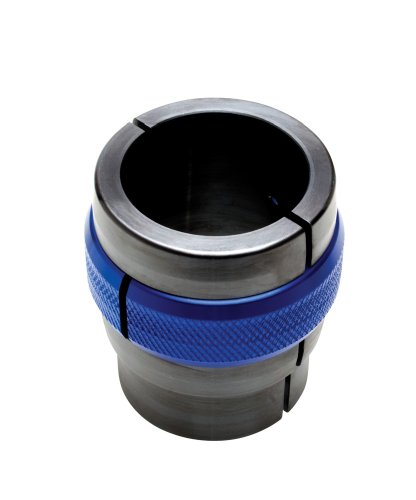
Gathering the Necessary Tools
Before you begin repairing a hardened fork, it is essential to gather all the necessary tools. This will ensure that you have everything you need to complete the repair process smoothly and efficiently.
1. Fork Suspension Oil
The first tool you will need is fork suspension oil. This oil is specifically designed for lubricating the internal components of a fork and ensuring smooth movement and performance. Make sure to choose the right type and viscosity of oil for your fork model.
2. Fork Seal Kit
In most cases, repairing a hardened fork will require replacing the fork seals. Therefore, it is crucial to have a fork seal kit that includes all the necessary seals and o-rings. This kit will ensure a proper seal and prevent oil leakage.
| Tool | Description |
|---|---|
| Socket Wrench Set | A socket wrench set is essential for removing and installing fork components. It includes various socket sizes to fit different bolts and nuts. |
| Allen Wrench Set | An Allen wrench set is necessary for working with hexagonal bolts commonly found on fork components. |
| Needle Nose Pliers | Needle nose pliers help in gripping and maneuvering small components during the repair process. |
| Shop Towel | A shop towel is useful for wiping off excess oil, dirt, or debris during the repair process. |
| Fork Suspension Pump | If your fork has adjustable air suspension, a suspension pump is necessary for adding or removing air as needed. |
Having these tools readily available will ensure that you can tackle any repairs needed to restore your hardened fork to optimal performance.
Removing the Fork from the Bike
Before you can begin repairing a hardened fork on your bike, you will need to remove it from the frame. Here are the steps to safely remove the fork:
Step 1: Gather the necessary tools
Make sure you have the following tools ready before starting:
- Allen wrench set
- Adjustable wrench
- Screwdriver
Step 2: Loosen the stem bolts
Using an Allen wrench, loosen the stem bolts that secure the handlebars to the fork. This will allow you to remove the handlebars later on.
Step 3: Remove the front brake
Using an Allen wrench or a screwdriver, carefully remove the bolts that hold the front brake in place. Once the bolts are removed, you can detach the brake from the fork.
Step 4: Loosen the headset cap
At the top of the fork, there will be a headset cap that is held in place by a bolt. Loosen this bolt using an Allen wrench or an adjustable wrench. Once loose, you can remove the cap.
Step 5: Remove the fork from the frame
With the headset cap removed, you can now slide the fork out of the frame. Be careful not to damage any cables or other components as you remove the fork.
Once the fork is removed, you can proceed with repairing or replacing it as needed. Remember to follow the manufacturer’s instructions and consult a professional if you are unsure about any steps.
Repairing the Harden Fork
Repairing a hardened fork can be a complex task, but with proper knowledge and tools, it can be accomplished successfully. Here are some steps to help you repair a hardened fork:
Step 1: Inspect the fork
Start by inspecting the hardened fork for any visible damage or signs of wear. Look for cracks, dents, or bending that may affect the performance of the fork. If you find any major damage, it is recommended to replace the fork entirely.
Step 2: Disassemble the fork
To repair a hardened fork, you will need to disassemble it first. This can be done by loosening the bolts that hold the fork to the bike frame. Use the appropriate tools and take care not to damage the fork or other components.
Step 3: Clean the fork
Once the fork is disassembled, it is important to clean it thoroughly. Remove any dirt, grease, or debris that may have accumulated on the fork. Use a mild detergent and water to clean the fork, making sure to rinse it well and dry it completely before proceeding.
Step 4: Identify the problem
Examine the hardened fork closely to identify the specific problem that needs to be repaired. It could be a worn-out seal, damaged bushings, or a malfunctioning damper. Once you have identified the issue, you can proceed with the necessary repairs.
Step 5: Replace or repair the damaged parts
If you find any damaged or worn-out parts during the inspection, replace them with new ones. Ensure that you use high-quality replacement parts that are specifically designed for your fork model. Alternatively, you can repair certain components if they are repairable, following manufacturer guidelines or seeking professional assistance if necessary.
Step 6: Reassemble the fork
After the necessary repairs or replacements have been made, it’s time to reassemble the hardened fork. Follow the reverse order of disassembly, carefully tightening the bolts to the recommended torque values. Double-check that all components are properly aligned and secure.
Step 7: Test the fork
Before taking your bike for a ride, it is important to test the repaired fork to ensure it is functioning correctly. Compress and rebound the fork several times, listening for any unusual noises or feeling any excessive resistance. If the fork feels smooth and responsive, you can consider the repair job successful.
Remember that repairing a hardened fork requires a certain level of technical expertise, and it may be best to consult a professional bike mechanic if you are unsure or uncomfortable with the repair process.
Overall, with the right tools and knowledge, repairing a hardened fork is a viable option that can extend the life of your bike and improve its performance.


