If you own a 1997 Fatboy motorcycle and need to replace or repair the lower forks, it’s important to know how to properly remove them. The lower forks play a crucial role in the suspension system of your bike, so it’s essential to follow the correct procedure to prevent any damage or accidents. In this guide, we will walk you through the step-by-step process of removing the lower forks on your 97 Fatboy, ensuring that you can safely and effectively complete the task.
Step 1: Gather the necessary tools
Before you begin, make sure you have all the tools you will need for the job. This may include a socket set, a torque wrench, a rubber mallet, and other standard tools. It’s always a good idea to double-check the specific requirements for your motorcycle model, as different bikes may require slightly different tools.
Step 2: Lift the front of the motorcycle
Using a motorcycle jack or a similar lifting tool, carefully lift the front end of your Fatboy off the ground. This will allow you to access and remove the lower forks more easily. Make sure the bike is secure and stable before proceeding.
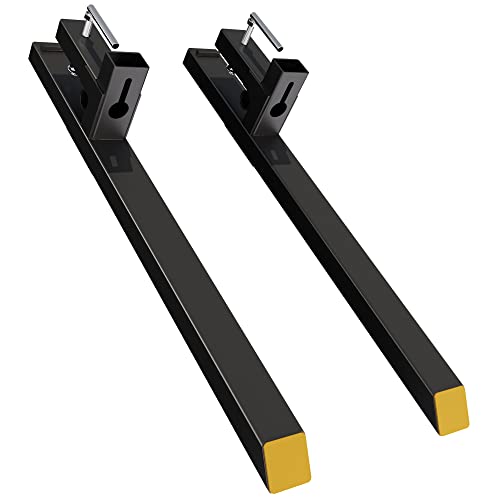
![SMT-Set Drop-In Fork Lowering Kit Compatible With Harley 41mm Touring Softail 94-03 [B0789CZP7L]](https://m.media-amazon.com/images/I/41aajUiHN1L._SS520_.jpg)
Step 3: Loosen the pinch bolts
Locate the pinch bolts on the lower forks, which are used to secure the front wheel. Using an appropriately-sized socket or wrench, loosen the pinch bolts on both sides of the bike. Be careful not to fully remove them, as they will still be holding the lower forks in place.
Continue reading the article to learn the remaining steps on how to remove the lower forks on your 97 Fatboy and successfully complete your repair or replacement.
Overview of Lower Forks on 97 Fatboy
The lower forks on a 97 Fatboy are an important component of the motorcycle’s suspension system. They connect the front wheel to the frame and provide support and stability while riding. Understanding the construction and function of the lower forks is crucial for proper maintenance and removal.
Construction
The lower forks are made up of two main parts: the lower sliders and the fork tubes. The lower sliders are usually made of aluminum or steel and house the front wheel axle. The fork tubes are long metal cylinders that provide the necessary movement for the forks to compress and extend.

Inside the fork tubes, there are springs and dampers that help absorb shock and provide a smooth ride. These components work together to ensure that the motorcycle responds well to bumps and vibrations on the road.
Function
The primary function of the lower forks is to absorb the impact from the road surface and transmit them to the motorcycle’s frame. This helps to maintain stability and control while riding. The lower forks also play a role in steering, as they allow the front wheel to pivot and turn smoothly.
During the removal process, the lower forks need to be properly supported to prevent any damage to the motorcycle or injury to the person working on it. It is important to follow the manufacturer’s guidelines and use the appropriate tools to safely remove the lower forks.
In conclusion, the lower forks of a 97 Fatboy are an integral part of the motorcycle’s suspension system, providing stability, control, and a smooth ride. Understanding their construction and function is essential for proper maintenance and removal.
Step-by-Step Guide to Removing Lower Forks
If you own a 1997 Fatboy and need to remove the lower forks for maintenance or repair, follow these step-by-step instructions:

Step 1: Gather the necessary tools and equipment
Before you begin, make sure you have the following items:
- A socket set
- A wrench
- A torque wrench
- A motorcycle lift or jack
- A clean workspace with sufficient lighting
Step 2: Elevate the motorcycle
Using a motorcycle lift or jack, elevate your Fatboy so that the front wheel is off the ground. This will provide you with the necessary space to work on the lower forks.
Step 3: Loosen the fork caps
Using a socket set or wrench, loosen the fork caps located at the top of the forks. Be cautious when loosening them as they may be under pressure from the fork springs.
Step 4: Remove the front wheel
Using a socket set, remove the axle nut and slide the front wheel out of the forks. Set the wheel aside in a safe place.
Step 5: Loosen the lower pinch bolts
Locate the lower pinch bolts on the bottom of each fork leg. Using a socket set or wrench, loosen these bolts to free the forks from the front fork sliders.

Step 6: Remove the forks
With the pinch bolts loosened, gently slide the forks out of the fork sliders. Be cautious when removing them to avoid damaging the fork seals or other components.
Step 7: Inspect and clean
Once the lower forks are removed, take the opportunity to inspect them for any signs of damage or wear. Clean them thoroughly with a suitable cleaner and a soft cloth.
Step 8: Reinstall or replace the lower forks
If you are reinstalling the same forks, follow the reverse order of steps to reinstall them back into the front fork sliders. If you are replacing them, consult the manufacturer’s instructions for proper installation.
Step 9: Torque the pinch bolts and fork caps
Using a torque wrench, tighten the lower pinch bolts to the manufacturer’s recommended torque specification. Similarly, torque the fork caps to the specified value.
Once you have completed these steps, your lower forks should be successfully removed or replaced. Remember to double-check all connections and ensure everything is properly tightened before taking your bike out for a ride.
Tips for Removing Lower Forks on 97 Fatboy
If you need to remove the lower forks on your 97 Fatboy for maintenance or upgrades, here are some useful tips to guide you through the process:
1. Gather the necessary tools: Before you start, make sure you have all the tools you’ll need, such as a socket set, Allen wrenches, a torque wrench, and a fork seal driver.
2. Secure the motorcycle: Park your Fatboy on a flat, stable surface and use a motorcycle lift or jack to elevate the front end. This will provide better access to the lower forks.
3. Loosen the axle pinch bolts: Using the appropriate socket or Allen wrench, loosen the axle pinch bolts located on the bottom of the fork legs. This will allow you to remove the axle later on in the process.
4. Remove the front wheel: Once the axle pinch bolts are loosened, carefully remove the front wheel from the lower forks. Make sure to have a support or assistant to hold the wheel as you remove it to prevent it from falling and causing damage.
5. Disconnect the brake caliper: Now, depending on the setup of your Fatboy, you may need to disconnect the brake caliper from the lower fork leg. This can usually be done by removing the caliper bolts and sliding the caliper off the rotor.
6. Loosen the fork cap: Use an appropriate socket or wrench to loosen the fork cap located at the top of the upper fork tube. Make sure to do this slowly and be cautious of any pressure build-up in the fork assembly.
7. Remove the fork from triple trees: Once the fork cap is loosened, carefully slide the fork out from the triple trees. Be gentle and take your time to avoid damaging any components.
8. Replace or service the lower fork: Now that you have removed the lower fork, you can proceed with any necessary maintenance or upgrades. This may include replacing fork seals, installing new springs, or cleaning and lubricating the fork internals.
9. Reassemble everything: After completing the necessary work on the lower fork, follow the reverse order of the removal process to reassemble everything. This includes sliding the fork back into the triple trees, tightening the fork cap, reconnecting the brake caliper if necessary, and reinstalling the front wheel.
10. Test and adjust: Once you have reassembled everything, take your Fatboy for a test ride. Make sure to test the front suspension and brakes to ensure everything is working properly. If needed, adjust the fork preload or other settings to optimize the handling and performance of your motorcycle.
Following these tips will help ensure a smooth and successful process of removing the lower forks on your 97 Fatboy. Remember to consult your motorcycle’s service manual for specific instructions and torque specifications to ensure proper installation and safety.
Common Mistakes to Avoid When Removing Lower Forks
Removing the lower forks on a 97 Fatboy can be a challenging task, but with the right knowledge and tools, it can be accomplished successfully. However, there are several common mistakes that people make during this process that can lead to a less than desirable outcome. To ensure a smooth removal process and avoid any costly mistakes, it is essential to be aware of these common errors and how to avoid them.
1. Not Supporting the Motorcycle Properly
One common mistake is not supporting the motorcycle properly before attempting to remove the lower forks. It is crucial to use a sturdy and secure motorcycle lift or stand to prevent the bike from falling or tipping over during the removal process. Failing to do so can result in damage to the motorcycle and potential injury to the person performing the removal.
2. Forgetting to Loosen Triple Tree Clamps
Another mistake to avoid is forgetting to loosen the triple tree clamps before attempting to remove the lower forks. The triple tree clamps hold the forks in place and must be loosened to allow for easy removal. Forgetting to loosen these clamps can make the removal process difficult and potentially damage the forks or other components.
3. Rushing the Removal Process
When removing the lower forks, it is crucial to take your time and not rush the process. Rushing can lead to mistakes, such as not properly disconnecting cables or forgetting to remove certain components. It is essential to follow the manufacturer’s instructions carefully and double-check all steps to ensure a successful removal.
4. Using Improper Tools
Using improper tools can also lead to mistakes and potentially damage the forks or other components. It is important to use the correct tools recommended by the manufacturer to ensure a safe and successful removal process. Using tools that are not designed for the job can cause stripped bolts, bent parts, and other complications.
5. Failing to Label or Document Parts
Lastly, a common mistake is failing to label or document the parts during the removal process. It is important to label or document each part as it is removed to ensure proper reassembly later. Failing to do so can result in confusion and potentially installing parts incorrectly.
By avoiding these common mistakes and following proper removal procedures, you can successfully remove the lower forks on a 97 Fatboy without any complications. Remember to take your time, use the correct tools, and support the motorcycle properly to ensure a smooth and successful removal process.