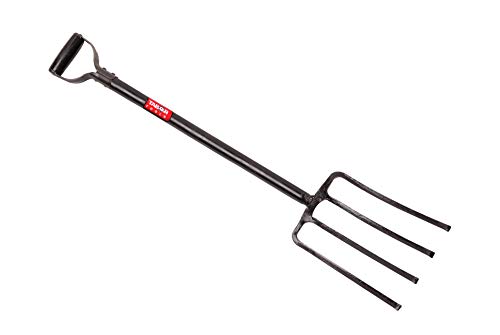
Digging in the garden can be a therapeutic activity, allowing you to connect with nature and create a beautiful outdoor space. But what happens when your trusty garden fork becomes bent or misaligned?
Using a bent or misaligned garden fork can be frustrating and inefficient, making it difficult to dig and causing unnecessary strain on your body. However, with a few simple steps, you can easily straighten your garden fork and get back to enjoying your gardening tasks.
Step 1: Assess the Damage
Before you can begin straightening your garden fork, it’s important to assess the extent of the damage. Look for any obvious bends or misalignments in the tines or the handle. This will help you determine the best course of action for repairing your fork.
Note: If the damage is severe or the fork has any cracks, it may be time to invest in a new one to ensure your safety while gardening.

Step 2: Apply Heat
To straighten a garden fork, heat is your best friend. Using a blowtorch or a large flame, carefully heat the bent area of the fork until it becomes red-hot. This will make the metal more pliable and easier to straighten.
Caution: Always exercise extreme caution when using fire or heat sources. Make sure to wear protective gloves and work in a well-ventilated outdoor area.
Step 3: Use Pressure to Straighten
Once the bent area is heated, use a pair of pliers or a vice grip to apply pressure and gently straighten the fork. Slowly and gradually work the metal back into its original shape, taking care not to apply too much force and risk damaging the fork further.

Tip: If the tines are misaligned, you can also use the heat and pressure method to adjust their position and alignment.
Step 4: Cool Down and Inspect
After straightening the fork, let it cool down completely, either by leaving it in a shaded area or by dousing it with water. Once the fork is cool, inspect it for any remaining bends or misalignments. Repeat steps 2 and 3 if necessary.
Important: Always make sure that the fork is completely cool before using it, as working with a hot tool can be dangerous.
By following these steps, you can easily straighten your garden fork and get back to enjoying your gardening tasks with ease and efficiency. Remember to take the necessary safety precautions and, if needed, consult a professional for further assistance.

How to Straighten a Garden Fork
If you have a garden fork that has become bent or misshapen, don’t worry! With a few simple steps, you can easily straighten it out and get it back to its original shape. Here’s how:
- Inspect the fork: Before attempting to straighten the fork, carefully examine it to determine the areas that need fixing. Look for any bends, twists, or deformations.
- Apply heat: Using a blowtorch or heat gun, heat the bent area of the fork. The heat will make the metal more malleable and easier to manipulate.
- Straighten the fork: Use a pair of pliers or a vice grip to carefully straighten the bent sections of the fork. Apply steady pressure and make gradual adjustments until you have achieved the desired results.
- Check for cracks: While straightening the fork, keep an eye out for any cracks in the metal. If you find any, it may be best to retire the fork and invest in a new one for safety reasons.
- File and sand: After straightening the fork, use a file and sandpaper to smooth out any rough edges or burrs that may have formed during the process.
- Protect the fork: To prevent further damage and keep your garden fork in good condition, apply a protective coating or paint to the metal. This will help prevent rust and corrosion.
- Store properly: When not in use, store your garden fork in a dry and secure place to ensure its longevity. Hanging it on a wall or using a storage rack are good options.
By following these steps, you can easily straighten your garden fork and continue using it for all your gardening needs. Remember to exercise caution when applying heat and manipulating the metal to avoid injury. Happy gardening!
Tools and Materials for Straightening a Garden Fork
When it comes to straightening a garden fork, having the right tools and materials is essential. Here are some of the items you will need:
1. Vice Grips: These sturdy grip pliers are ideal for clamping the fork securely in place while you work on straightening it.
2. Hammer: A regular household hammer or a rubber mallet can be used to gently straighten any bent tines of the garden fork.

3. Heat Source: To make the metal more pliable, you may need a heat source such as a propane torch or a blowtorch.
4. Protective Gear: Safety should always come first, so make sure to have gloves and safety glasses to protect your hands and eyes while working on the garden fork.
5. Block of Wood: Placing a block of wood between the hammer and the fork can help distribute the force evenly and prevent damage to the metal.
6. Lubricating Oil: It’s a good idea to have some lubricating oil on hand to apply to any rusty or stiff parts of the garden fork.
With these tools and materials, you should be well-equipped to straighten your garden fork effectively. Remember to take your time and work slowly and carefully to avoid any further damage.
Step-by-Step Guide: How to Straighten a Garden Fork
If your garden fork has become bent or uneven, it may not be as effective in loosening soil or digging. Straightening a garden fork can help restore its functionality and prolong its lifespan. Here is a step-by-step guide on how to straighten a garden fork:
Materials You Will Need
- Adjustable wrench
- Hammer
- Vice grips
- A sturdy workbench or table
- Safety goggles
Step 1: Inspect the Fork
Before you begin straightening the fork, carefully inspect the extent of the damage. Identify the specific areas that are bent or misaligned.
Step 2: Secure the Fork
Using vice grips, securely clamp the fork to a sturdy workbench or table. Make sure it is tightly held in place and won’t move during the straightening process.
Step 3: Apply Pressure
Locate the bent area of the fork and place the adjustable wrench on the opposite side of the bend. Apply gradual pressure in the opposite direction of the bend to start straightening the fork. Be careful not to apply too much pressure at once to avoid breaking the tines.
Step 4: Hammer Technique
If the adjustable wrench alone is not enough to straighten the fork, you can use a hammer to gently tap on the bent area. Place a block of wood over the fork to protect it from direct hammer blows. Slowly tap on the wood while observing the fork’s straightening progress.
Step 5: Test and Adjust
After each attempt at straightening, release the fork from the vice grips and inspect the progress. If necessary, repeat steps 3 and 4 until the fork is straightened to your satisfaction.
Step 6: Final Checks
Once you are satisfied with the fork’s straightness, visually inspect the entire fork to ensure that there are no other bent or misaligned areas. If any additional adjustments are needed, repeat the previous steps as necessary.
Step 7: Clean and Store
After the fork is straightened, clean off any dirt or debris and store it properly to prevent further damage. Consider applying a protective coating, such as rust-resistant paint, to extend the lifespan of the garden fork.
Following these steps will help you straighten a garden fork and restore its functionality. Remember to exercise caution and wear safety goggles throughout the process to protect your eyes from any potential flying debris.
Tips and Tricks for Straightening a Garden Fork
If your garden fork has become bent or misaligned, it’s important to straighten it before using it again. Here are some helpful tips and tricks to get your garden fork back in shape:
1. Assess the Damage
Before attempting to straighten your garden fork, carefully examine the extent of the damage. Determine if the prongs are slightly bent or completely misaligned. This will help you decide on the best approach to straighten it.
2. Apply Heat
If the prongs of the garden fork are only slightly bent, you can try applying heat to make them more malleable. Use a blowtorch or heat gun to heat the bent area of the prongs until they become red-hot. Once heated, carefully use pliers or a vice grip to apply pressure and straighten the prongs. Be cautious when working with heat and always wear protective gloves.
If the prongs are severely misaligned, it’s best to avoid the heat method as it may weaken the metal.
3. Use a Hydraulic Press
If the prongs of the garden fork are significantly misaligned, you may need to use a hydraulic press to straighten them. Place the garden fork prongs in the press and slowly apply pressure until they are straightened. This method may require professional help if you don’t have access to a hydraulic press.
Remember to use caution when operating machinery and always follow safety guidelines.
These tips and tricks should help you straighten your garden fork and get it ready for use again. Make sure to take proper precautions and, if needed, seek professional assistance. A straight garden fork will make your gardening tasks much easier and more efficient.
Safety Precautions when Straightening a Garden Fork
When straightening a garden fork, it is important to follow certain safety precautions to prevent accidents and injuries. Here are some guidelines to keep in mind:
- Wear protective gloves to protect your hands from any sharp edges or splinters on the garden fork.
- Always work in a well-ventilated area to avoid inhaling any dust or debris.
- Use a sturdy workbench or a solid surface to provide stability when straightening the garden fork.
- Ensure that the garden fork is clean and free of any dirt or rust before attempting to straighten it.
- Be cautious of any potential hazards in the surrounding area, such as loose tools or objects that may cause tripping or accidents.
- Use proper tools, such as pliers or a vise, to straighten the garden fork. Avoid using excessive force or using tools that are not designed for this purpose.
- Take regular breaks to avoid straining your muscles or feeling fatigued during the straightening process.
- Keep children and pets away from the work area to prevent them from getting injured.
- If you are unsure about straightening the garden fork yourself, consider seeking professional assistance to ensure the job is done safely and effectively.
By following these safety precautions, you can minimize the risk of accidents and injuries when straightening a garden fork. Remember to prioritize your safety and take the necessary steps to protect yourself throughout the process.