Changing the fork springs on a dirt bike can make a significant difference in the performance and handling of the bike. Whether you’re looking to improve the suspension, adjust the ride height, or fine-tune the bike to your preferences, swapping out the fork springs is a necessary process.
Step 1: Gather the necessary tools and equipment
Before starting the process, you’ll need a few tools and equipment. This includes a motorcycle stand or lift, a socket set, a torque wrench, a spring compressor (if required), new fork springs, and fork oil.
Step 2: Prepare your dirt bike
Park your dirt bike on a level surface and use a motorcycle stand or lift to elevate the front wheel off the ground. This will make it easier to remove the forks and replace the springs. Make sure to follow the manufacturer’s instructions for using the stand or lift.

Step 3: Remove the forks
Using a socket set, carefully remove the bolts that secure the front wheel to the fork. Disconnect the brake caliper and speedometer cable if necessary. Once everything is disconnected, slide the forks out of the triple clamps and place them on a clean work surface.
Step 4: Replace the fork springs
Using a spring compressor, carefully remove the spring retainer cap and the old fork springs from the forks. Replace them with the new fork springs, making sure they are properly seated and aligned. Reinstall the spring retainer cap and tighten it according to the manufacturer’s specifications.
Step 5: Reassemble the forks

Carefully reassemble the forks by sliding them back into the triple clamps and securing them with the bolts. Reconnect the brake caliper and speedometer cable if necessary. Make sure all connections are tight and secure.
Step 6: Refill with fork oil
Using the appropriate fork oil for your dirt bike, carefully refill the forks to the manufacturer’s recommended level. Make sure to follow the correct procedure for filling and bleeding the forks to ensure proper performance.
Step 7: Test and adjust
Once you’ve completed the replacement process, take your dirt bike for a test ride to see how the new fork springs have improved the performance and handling. If necessary, make any further adjustments to achieve the desired results.

By following these steps and taking the time to properly change the fork springs on your dirt bike, you can enjoy a smoother and more controlled ride on various terrains. Remember, if you’re not confident in performing these tasks yourself, it’s always best to seek assistance from a professional mechanic or experienced rider.
How to Change Fork Springs on a Dirt Bike
Changing the fork springs on a dirt bike is an important maintenance task that can greatly improve the bike’s performance and handling. With the right tools and a little patience, you can easily replace the fork springs yourself. Follow these steps to get started.
Step 1: Gather the necessary tools and materials
Before you begin, make sure you have the following tools and materials:
- Socket wrench
- Allen wrench set
- Fork oil
- Fork spring compressor tool
- New fork springs
Step 2: Remove the front tire and fairings
To access the fork springs, you’ll need to remove the front tire and fairings. Use your socket wrench to loosen the bolts and carefully remove the tire and fairings, setting them aside in a safe place.
Step 3: Drain the fork oil
Next, locate the drain screws on each fork leg and use your Allen wrench to loosen and remove them. Be sure to have a drain pan handy to catch the fork oil as it drains out. Once the oil has been completely drained, replace the drain screws.

Step 4: Remove the fork caps
Using your socket wrench or Allen wrench, carefully loosen and remove the fork caps. These caps are typically located at the top of the fork tubes and may require some force to remove. Once the caps are off, set them aside.
Step 5: Install the fork spring compressor tool
Attach the fork spring compressor tool to the fork tube. This tool will allow you to compress the old fork spring and remove it safely. Follow the manufacturer’s instructions for proper installation.
Step 6: Remove the old fork springs
With the fork spring compressor tool in place, slowly compress the old fork spring until it is loose enough to remove. Carefully slide the old spring out of the fork tube and set it aside.
Step 7: Install the new fork springs
Take the new fork springs and carefully slide them into the fork tubes, making sure they are seated properly. Use the fork spring compressor tool to compress the new springs if necessary.
Step 8: Reassemble the fork tubes
Once the new fork springs are in place, reattach the fork caps and tighten them securely. Replace the front tire and fairings, ensuring that all bolts and screws are tightened properly.
Step 9: Refill with fork oil
Finally, refill each fork leg with the recommended amount of fork oil. Use a funnel to pour the oil into the fork tubes and replace the drain screws once you’ve finished.
Following these steps will help you successfully change the fork springs on your dirt bike. Remember to consult your bike’s owner’s manual for specific instructions and recommended fork spring specifications. Happy riding!
Tools and Materials Needed
Before you start changing the fork springs on your dirt bike, make sure you have the following tools and materials handy:
- Socket wrench set
- Allen wrench set
- Suspension fork oil
- Fork seal driver
- Fork spring compressor
- Screwdriver
- Shop towels
- Torque wrench
- Safety glasses
- Gloves
Having these tools and materials ready will ensure a smooth and efficient fork spring change process. It’s important to use the correct tools to avoid damaging any parts of your dirt bike’s suspension system.
Step 1: Remove the Front Wheel
The first step in changing the fork springs on a dirt bike is to remove the front wheel. This will give you easier access to the forks and make the process much easier.
Start by loosening the axle nut on the front wheel using a socket wrench. Once it is loose, use a bike stand to lift the front of the dirt bike off the ground. This will allow you to easily remove the wheel.
Step 1.1: Loosen the Axle
Place the socket wrench on the axle nut and turn it counterclockwise to loosen it. You may need to use some force if it is on tight.
Step 1.2: Lift the Front of the Bike
Once the axle is loosened, place a bike stand under the frame of the dirt bike near the front wheel. Slowly lift the front of the bike off the ground using the bike stand until the front wheel is off the ground.
Once the front wheel is off the ground, you can now proceed to the next step in changing the fork springs on your dirt bike.
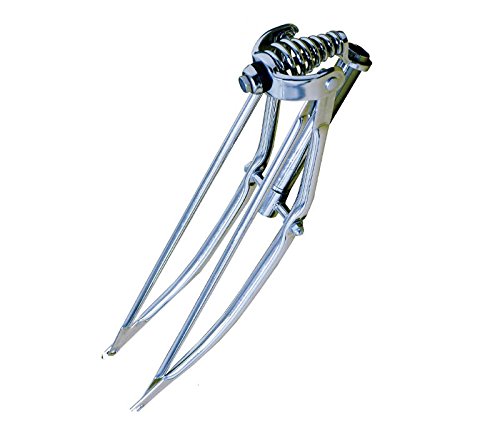
Step 2: Remove the Forks
Once you have loosened the triple clamp bolts, it’s time to remove the forks from the bike. Follow these steps:
- Use a stand or lift to keep the bike stable and off the ground.
- Locate the pinch bolts on the bottom of the fork legs. These bolts secure the forks to the axle.
- Using a wrench or socket, loosen the pinch bolts on both fork legs.
- Once the pinch bolts are loosened, you can remove the axle nut and axle from the front wheel.
- With the axle removed, gently lower the front wheel to the ground.
- Now, you can remove the fork caps or top bolts. These are typically located on top of the fork tubes.
- Using a socket or wrench, loosen and remove the fork caps.
- With the fork caps removed, carefully slide the forks out of the triple clamps.
- Make sure to support the forks as you slide them out to prevent them from falling and getting damaged.
- Once the forks are out of the triple clamps, you can remove the dust seals and fork springs.
Remember to keep all the parts organized and in a safe place as you will need to reinstall them later. With the forks removed, you can move on to the next steps in replacing the fork springs on your dirt bike.
Step 3: Disassemble the Forks
Before you can change the fork springs on your dirt bike, you will need to disassemble the forks. This process involves removing the front wheel, loosening the triple clamp bolts, and separating the fork tubes. Here’s how to do it:
- Start by securing your dirt bike in a stable position. You can use a bike stand or a lift to elevate the front end of the bike.
- Next, remove the front wheel by loosening the axle nut with a wrench. Once the nut is loose, slide the wheel out from the fork legs and set it aside.
- Using a socket wrench or an allen key, loosen the triple clamp bolts that secure the fork tubes to the bike’s frame. You will typically find these bolts on the top and bottom of the clamp.
- Once the bolts are loose, slide the fork tubes out of the triple clamp and handlebar mounts. Be careful not to damage any wires or cables that may be connected to the forks.
- With the fork tubes removed, you can now separate them by loosening the pinch bolts located at the bottom of each tube. These bolts keep the tubes together, and by loosening them, you can separate the inner and outer tubes.
Now that you have disassembled the forks, you can proceed to the next step of changing the fork springs. It is important to follow the manufacturer’s instructions or consult a professional if you are unsure about any part of this process.
Step 4: Replace the Fork Springs
Replacing the fork springs on your dirt bike is an important part of maintaining and optimizing the suspension performance. Upgrading or replacing the fork springs can improve the handling and overall ride experience of your bike.
Gather the Necessary Tools and Materials
Before you begin, make sure you have all the required tools and materials. Here’s a list of what you’ll need:
| 1. | New fork springs |
| 2. | Fork oil |
| 3. | Fork seal driver |
| 4. | Fork cap wrench |
| 5. | Fork spring compressor |
| 6. | Torque wrench |
Step-by-Step Guide
- Start by elevating the front of your dirt bike using a stand or by propping it up securely.
- Remove the front wheel and loosen the triple clamp bolts to separate the fork tubes from the handlebars.
- Drain the fork oil by removing the fork caps and turning the forks upside down. Make sure to catch the old oil in a suitable container.
- Use a fork spring compressor to compress the fork springs, allowing you to remove the fork caps and the top of the fork tubes.
- Take out the old fork springs and replace them with the new ones. Ensure that the new springs are suitable for your bike’s weight and intended use.
- Reassemble the fork tubes, fork caps, and tighten them to the manufacturer-recommended torque using a torque wrench.
- Refill the forks with fresh fork oil, following the manufacturer’s recommended oil weight and level.
- Reinstall the front wheel and tighten the triple clamp bolts securely.
- Lower the bike from the stand and test the suspension to ensure it is functioning properly.
It’s essential to consult your bike’s owner’s manual or a professional mechanic for specific instructions and torque specifications. Following these steps will help you replace the fork springs on your dirt bike effectively and ensure optimum suspension performance.