Handlebar fork stem extension is a useful accessory for cyclists who want to adjust the height of their handlebars for a more comfortable riding position. This extension allows you to raise or lower the handlebars to your desired height, providing a better fit for your body and reducing discomfort during long rides.
Before fitting the handlebar fork stem extension, you will need to gather a few tools: an Allen key, a wrench, and possibly a torque wrench, depending on the specific model of your extension. It’s important to read the manufacturer’s instructions and recommendations for your particular handlebar fork stem extension to ensure proper installation.
To begin, loosen the bolts on your current stem using the Allen key or wrench. Gently remove the stem from the fork steerer tube. Carefully clean any dirt or debris from both the fork steerer tube and the handlebar fork stem extension. This will ensure a smooth and secure fit.
Next, insert the handlebar fork stem extension into the fork steerer tube, making sure it is aligned properly. Tighten the bolts on the extension using the Allen key or wrench, being careful not to over-tighten. It’s a good idea to periodically check the tightness of these bolts to ensure they remain secure during your rides.
Once the handlebar fork stem extension is securely in place, you can attach your handlebars to the extension. Again, make sure the handlebars are aligned properly and tighten the bolts to secure them in place. Test the stability of the handlebars and make any necessary adjustments before going for a ride.

By fitting a handlebar fork stem extension, you can easily customize the height of your handlebars to suit your individual needs and preferences. This simple installation process can greatly enhance your cycling experience, providing a more comfortable and enjoyable ride.
How to Install Handlebar Fork Stem Extension: Step-by-Step Guide
If you want to raise the height of your handlebars and achieve a more comfortable riding position, installing a handlebar fork stem extension is a great solution. This step-by-step guide will walk you through the process of fitting a handlebar fork stem extension to your bike.
Step 1: Gather the necessary tools
Before you start, make sure you have all the tools you need for the installation. You will need an Allen wrench set, a torque wrench, and a handlebar fork stem extension that is compatible with your bike.
Step 2: Remove the handlebar bolts
Use the appropriate size of Allen wrench to remove the bolts that hold the handlebars in place. Set the bolts aside in a safe place, as you will need them later.
Step 3: Insert the handlebar fork stem extension
Insert the handlebar fork stem extension into the steerer tube of the fork. Make sure it is aligned properly and level with the bike frame. Tighten the bolt on the top of the extension using the appropriate size of Allen wrench.

Step 4: Align the handlebars
Once the handlebar fork stem extension is securely in place, position the handlebars so that they are comfortable and aligned with your riding position. Use a torque wrench to tighten the bolts that hold the handlebars to the extension to the manufacturer’s recommended torque setting.
Step 5: Test and adjust
Before you go for a ride, make sure to test the handlebar fork stem extension and adjust it if necessary. Pay attention to how it feels and make any minor adjustments to the handlebar position to achieve the desired comfort and control.
Following these steps will ensure a proper installation of a handlebar fork stem extension. Remember to always consult the manufacturer’s instructions for your specific bike and handlebar fork stem extension to ensure a safe and secure fit.
Gather the Necessary Tools and Materials
Before you begin fitting a handlebar fork stem extension, it’s essential to gather all the necessary tools and materials. Having everything at hand will make the installation process smoother and more efficient.
Tools:
- Allen wrench set: You will need a set of Allen wrenches to loosen and tighten screws and bolts.
- Adjustable wrench: An adjustable wrench will be helpful in adjusting the stem extension to the right angle and tightening it securely.
- Screwdriver (if needed): Depending on your specific handlebar fork stem extension, you may need a screwdriver to secure certain parts.
Materials:
- Handlebar fork stem extension: Make sure to choose a stem extension that is compatible with your bicycle’s fork and handlebar.
- Spacer (if needed): Some stem extensions may require spacers to achieve the correct height and alignment.
- Grease: Applying a small amount of grease to the screws and bolts will help prevent rust and make them easier to tighten.
Having these tools and materials ready will ensure that you have everything you need to complete the handlebar fork stem extension installation successfully. It’s always a good idea to double-check the compatibility of the stem extension with your bicycle before proceeding.

Prepare the Bike and Remove the Current Handlebar
Welcome to our guide on how to fit handlebar fork stem extension! Before you begin, make sure you have all the necessary tools and equipment, such as a hex key set, a handlebar fork stem extension, and a bike stand or a secure place to rest your bike.
Step 1: Secure your bike
Find a suitable place to work on your bike, such as a bike stand or a secure surface where your bike won’t tip over. This will provide stability and safety as you make changes to your handlebar setup.
Step 2: Loosen the bolts
Locate the bolts that hold your current handlebars in place. These bolts may be on the side or on top of the stem. Use a hex key that fits the size of the bolts and loosen them by turning counterclockwise. You may need to use some force to break the initial grip.

Step 3: Remove the handlebar
Once the bolts are loosened, carefully lift the handlebar upward, separating it from the stem. Set the handlebar aside in a safe place where it won’t get damaged or cause any obstructions.
Step 4: Inspect the stem
Take a moment to inspect the stem for any dirt, debris, or damage. Clean and remove any obstructions to ensure a smooth installation of the handlebar fork stem extension.
Step 5: Align the extension
Take the handlebar fork stem extension and align it with the stem. Make sure it is facing the correct direction and that any logos or markings are oriented the way you desire.
Step 6: Tighten the bolts
Using the hex key, tighten the bolts on the handlebar fork stem extension by turning them clockwise. Be sure to tighten them securely, but not overly tight. Over-tightening can damage the stem or strip the threads.
Congratulations! You have successfully prepared your bike and removed the current handlebar. Now you’re ready to proceed with fitting the handlebar fork stem extension.
Measure and Adjust the Stem Extension Length
Before installing the handlebar fork stem extension, it is important to measure and adjust its length to ensure a proper fit and comfortable riding position.
1. Measure the Current Stem Length
Begin by measuring the length of your current stem. Use a tape measure or ruler to measure the distance between the center of the handlebar clamp to the center of the steerer tube clamp. Make a note of this measurement.
2. Determine the Desired Stem Extension Length
Consider your riding style and preferences to determine the desired stem extension length. If you prefer a more upright riding position, you may want a longer stem extension. If you prefer a more aggressive and aerodynamic riding position, a shorter stem extension may be more suitable.
It is also important to consider your body proportions and comfort. If you experience any discomfort or strain while riding, adjusting the stem extension length can help alleviate these issues.
3. Choose the Appropriate Stem Extension
Based on the desired stem extension length, choose a stem extension that matches your specifications. Make sure to take into account the compatibility with your bike’s steerer tube diameter and handlebar clamp diameter.
| Stem Extension Length | Recommended Rider Height/Body Type |
|---|---|
| Short (less than 60mm) | Riders who prefer an aggressive riding position or have shorter upper bodies |
| Medium (60-100mm) | Riders of average height and body proportions |
| Long (more than 100mm) | Riders who prefer a more upright riding position or have longer upper bodies |
Consult with a professional bike shop or a knowledgeable cyclist if you are unsure about the appropriate stem extension length for your specific needs.
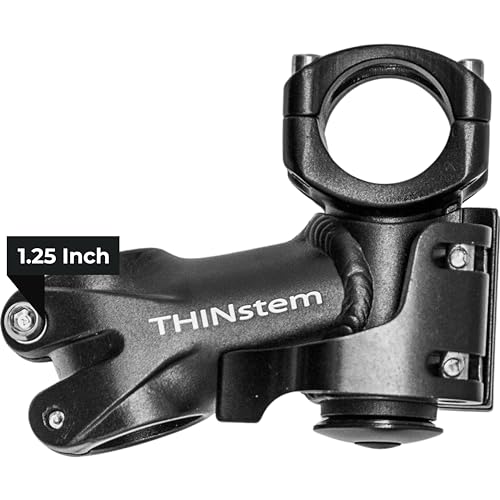
Install the Stem Extension onto the Fork Stem
Once you have gathered all the necessary tools and components, you can now begin installing the stem extension onto the fork stem. Follow these steps:
- Start by loosening the bolts on the front of the stem. Use an Allen wrench to do this.
- Slide the stem extension onto the fork stem. Make sure it is properly aligned and sits securely in place.
- Tighten the bolts on the front of the stem using an Allen wrench. Make sure they are secure, but not overly tightened.
- Check that the stem extension is straight and aligned with the fork stem. Adjust if necessary.
- Once you are satisfied with the position of the stem extension, tighten the bolts on the front of the stem fully using an Allen wrench.
- Double-check that all bolts are securely tightened and that the stem extension is firmly in place.
Once you have completed these steps, the stem extension should be installed onto the fork stem properly. You can now proceed with adjusting the handlebar height as desired and enjoy your ride with the new extended reach.
Securely Tighten the Stem Extension
Once the stem extension is properly aligned with the handlebar and fork, the next step is to securely tighten it in place. This is important for ensuring the stability and safety of your bike.
Start by tightening the bolt on the stem extension using a Allen wrench. Make sure to tighten it evenly and gradually to avoid any damage to the stem or handlebar. It is crucial not to overtighten, as this could lead to cracking or other damage.
After tightening the bolt, check the stem extension and handlebar for any additional movement. If you notice any play or looseness, you may need to further tighten the bolt. However, be careful not to overtighten as mentioned earlier.
Once you are satisfied with the tightness of the stem extension, give it a gentle shake to ensure it is secure. If it feels solid and there is no movement, then you have successfully tightened the stem extension.
It is always a good idea to periodically check the tightness of the stem extension, especially after riding on rough terrain or over time due to normal wear and tear. This will help ensure the stem extension remains secure and in the optimal position for your riding comfort and safety.
Reattach the Handlebar and Make Final Adjustments
Once you have securely attached the handlebar fork stem extension to your bicycle, it is time to reattach the handlebar and make final adjustments to ensure optimal performance and safety.
1. Position the handlebar
Before reattaching the handlebar, make sure to position it at a comfortable height and angle. This will help improve your riding posture and overall control of the bicycle. You can use the previous handlebar position as a reference or make adjustments based on your preferences.
2. Align the handlebar
Ensure that the handlebar is aligned properly with the front wheel. This can be done by standing in front of the bicycle and double-checking that the handlebar is parallel to the front wheel. Adjust the handlebar as needed to achieve proper alignment.
Tip: Using a level can help ensure that the handlebar is perfectly aligned.
3. Tighten the bolts
Once the handlebar is positioned and aligned correctly, use a wrench or an Allen key to tighten the bolts on the handlebar clamp. Make sure to tighten them evenly and securely to avoid any wobbling or slippage while riding.
It is a good practice to periodically check the tightness of the handlebar clamp bolts to ensure that they remain secure during your rides.
4. Test the handlebar
Before taking your bicycle for a ride, test the handlebar by gently turning it to both sides. Ensure that it moves smoothly without any excessive resistance or looseness. If you notice any issues, double-check the tightness of the bolts and make necessary adjustments.
5. Ride cautiously
After reattaching the handlebar and making all the necessary adjustments, it is important to ride your bicycle cautiously. Pay attention to how the handlebar feels and performs during your ride. Make any additional adjustments if needed. Remember, proper handlebar position and alignment are crucial for a safe and enjoyable riding experience.
Note: If you are unsure about making these adjustments yourself or lack the necessary tools, it is recommended to seek assistance from a professional bicycle mechanic.