
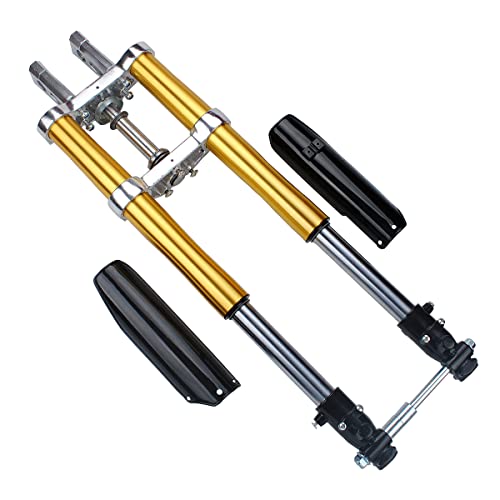


Girder forks are a classic and timeless design for motorcycle suspension. Originally used on early motorcycle models, they are still popular among motorcycle enthusiasts today. Girder forks provide a distinctive look and offer a smooth and controlled riding experience. If you are a motorcycle enthusiast and want to add a touch of vintage charm to your bike, learning how to make girder forks is a worthwhile project.
Before starting the process, it’s important to gather all the necessary materials and tools. You will need steel tubing, a cutting tool, a welding machine, a grinder, a file, and various other small components. It’s important to select high-quality materials that can withstand the stress and impact of motorcycle use.
The first step in making girder forks is to design and cut the steel tubing to the desired length. The length will depend on the size of your motorcycle and your personal preference. Once the tubing is cut, you will need to weld it together to create the fork shape. It’s important to ensure the welding is done accurately and securely to ensure the strength and safety of the forks.

After welding the tubing, you will need to shape and smooth the fork arms using a grinder and a file. This step requires precision and patience to achieve the desired shape and finish. Once the arms are shaped and smoothed, you can attach various small components, such as fork blades, axle mounts, and dampers, to complete the girder forks.
In conclusion, making girder forks for your motorcycle is a rewarding and fulfilling project that allows you to customize your bike and add a touch of classic style. By following the necessary steps and using the right materials and tools, you can create a set of girder forks that not only look great but also provide a smooth and controlled riding experience.
Section 1: Gathering the Materials
Before you start making your girder forks, it is important to gather all the necessary materials. Here is a list of the items you will need:
- A strong and durable steel pipe
- Two steel plates
- Angle grinder
- Welding machine
- Measuring tape
- Marker or pencil
- Safety goggles
- Welding gloves
- Ear protection
Make sure to choose a steel pipe that is thick enough to ensure strength and stability for your girder forks. The steel plates will be used to create the attachment points for the axle and wheel. The angle grinder and welding machine will be essential tools for cutting and welding the steel pipe and plates.
Before starting the construction process, gather all of these materials and make sure you have a safe and well-ventilated workspace. It is also important to wear the necessary safety gear, including safety goggles, welding gloves, and ear protection, to protect yourself during the construction process.
Section 2: Cutting and Shaping the Fork Blades
Once you have gathered all the necessary materials and tools, it’s time to start cutting and shaping the fork blades for your girder forks. Follow the steps below to ensure a proper fit and sturdy construction.
Step 1: Marking the Fork Blade Dimensions
Begin by measuring and marking the desired length of the fork blades on your steel or aluminum tubing. Use a tape measure and a marker to make accurate measurements. Remember to account for any additional length needed for the rake angle and axle location.
Next, use a protractor to measure and mark the angle at which the fork blades will meet the steering head tube. This angle should align with the desired rake angle for your front end.
Step 2: Cutting the Fork Blades
Now that you have marked the dimensions and angles, it’s time to cut the fork blades. Use a hacksaw or a cutoff wheel on an angle grinder to make clean and precise cuts.
Secure the tubing in a vise or use clamps to hold it steady while cutting. Start the cut by placing the blade of your chosen cutting tool on the mark and applying gentle pressure. Move the tool in a back-and-forth motion to create a clean and even cut.
Remember to wear appropriate safety gear, such as goggles and gloves, while cutting to protect yourself from any flying debris.
Step 3: Shaping the Fork Blades
Once the fork blades are cut to the desired length, it’s time to shape them to fit the steering head tube. This step requires careful attention to ensure a proper fit and functionality of your girder forks.
Using a belt sander or a file, carefully remove any burrs or rough edges from the cut ends of the fork blades. This will help prevent any sharp points that can cause injury.
Next, you will need to shape the fork blades to match the angle marked earlier. Use a combination of grinding tools, such as an angle grinder with a grinding wheel or a belt sander, to shape the ends of the fork blades to match the desired angle.
Step 4: Checking for Fit
Before moving on to the next steps of constructing the girder forks, it’s important to check the fit of the fork blades in the steering head tube. Insert the fork blades into the steering head tube and ensure they fit tightly and securely.
| Tip: | If the fork blades do not fit properly, you may need to make further adjustments by reshaping or trimming the ends until they fit snugly. |
|---|
Once you are satisfied with the fit, you can proceed with the remaining steps to complete your homemade girder forks.
Section 3: Welding and Assembling the Fork Assembly
Once you have prepared all the necessary components for the girder forks, the next step is to weld and assemble the fork assembly. This crucial step will ensure the structural integrity and functionality of the forks.
3.1 Welding the Fork Legs and Cross Members
Begin by aligning the fork legs and cross members according to the design specifications. Double-check that all measurements are accurate before proceeding with the welding process.
Using a proper welding technique and equipment, carefully join the fork legs and cross members together. Ensure that the welds are strong and free of any defects. It is recommended to perform multiple passes for added strength.
3.2 Attaching the Fork Blades
Next, securely attach the fork blades to the cross members. Use appropriate fastening methods such as welding or bolting, depending on your design preference and materials used.
If welding the fork blades, follow the same guidelines as in section 3.1 to ensure strong and defect-free welds.
If using bolts, make sure to select suitable and robust bolts that can withstand the fork’s load and vibrations. Tighten the bolts to the manufacturer’s recommended torque specifications.
Once the fork blades are securely attached, assess the overall alignment of the fork assembly to guarantee smooth operation and stability. Make any necessary adjustments before proceeding further.
3.3 Finishing Touches
After completing the welding and assembly process, inspect the entire fork assembly for any potential issues or imperfections. Check for any loose fasteners or misalignments that may need to be addressed.
If necessary, clean the welds and apply a suitable protective coating to prevent corrosion and maintain the forks’ longevity.

Finally, conduct a thorough test and ensure the fork assembly functions as intended. Make any required adjustments or corrections before putting the girder forks into actual use.
By following the steps outlined in this section, you will be able to weld and assemble the fork assembly successfully. Remember to prioritize safety, precision, and attention to detail throughout the process to achieve the desired results.
Section 4: Installing the Girder Forks on the Bike
Once you have finished fabricating the girder forks for your bike, it’s time to install them. Follow these steps to ensure a proper installation:
| Step 1: | Begin by placing the girder forks in position on the bike frame. Ensure that the fork tubes align with the head tube of the frame. |
| Step 2: | Secure the forks in place by tightening the clamp bolts located on the upper and lower triple trees. Use a torque wrench to ensure proper tightness and prevent over-tightening. |
| Step 3: | Attach the front wheel to the girder forks. Make sure it is properly centered and tighten the axle nut using a wrench. |
| Step 4: | Connect the front brake caliper to the designated mounting point on the girder forks. Secure it in place using the appropriate bolts. |
| Step 5: | Check the alignment of the girder forks by sitting on the bike and applying the front brakes. The forks should move smoothly without any interference or wobbling. |
| Step 6: | Adjust the suspension settings of the girder forks according to your preference and riding conditions. Refer to the manufacturer’s instructions for specific guidance. |
| Step 7: | Test the functionality of the girder forks by taking a short ride. Pay attention to the handling and stability of the bike. If any issues arise, make the necessary adjustments or consult a professional. |
By following these steps, you can successfully install girder forks on your bike. Remember to always prioritize safety and consult professional guidance if needed.
Section 5: Maintenance and Care of Girder Forks
Proper maintenance and care of girder forks are essential for ensuring their longevity and optimal performance. Here are some important guidelines to follow:
1. Regular Cleaning
It is important to clean your girder forks regularly to remove dirt, debris, and other particles that can accumulate on the forks. Use a soft cloth or sponge and mild detergent to clean the forks thoroughly. Avoid using harsh chemicals or abrasive materials that can damage the surface of the forks.
2. Lubrication
Lubrication plays a vital role in maintaining the smooth functioning of girder forks. Apply a suitable lubricant to the moving parts such as the pivot points and bushings. This will help reduce friction and ensure smooth operation. Be sure to use a lubricant recommended by the manufacturer for best results.
3. Inspection
Regularly inspect your girder forks for any signs of wear, damage, or misalignment. Check for cracks, dents, or bent components, as these can affect the performance and structural integrity of the forks. If any issues are detected, promptly address them to prevent further damage.
Make sure to inspect the various components of the girder forks, such as the legs, braces, and axle connections, to ensure they are secure and in good condition. Tighten any loose bolts or nuts as needed.
4. Adjustment
If you notice any changes in the handling or performance of your girder forks, it may be necessary to make adjustments. Consult the manufacturer’s instructions or seek professional guidance to properly adjust the fork settings. This will help maintain optimal performance and prevent any potential safety hazards.
5. Storage
When not in use, it is important to store your girder forks properly to protect them from damage. Find a clean and dry area to store the forks, preferably away from extreme temperatures and humidity. Use suitable covers or storage racks to prevent any accidental damage.
By following these maintenance and care guidelines, you can prolong the lifespan of your girder forks and ensure safe and efficient operation for years to come.


