
If you are an avid mountain biker, it is crucial to keep your forks properly inflated with air. This is because the air pressure in your MTB forks directly affects the performance and ride quality of your bike. Whether you are a beginner or an experienced rider, knowing how to put air in your MTB forks is an essential skill.
First and foremost, it is important to determine the recommended air pressure for your specific MTB forks. This information can usually be found in the manufacturer’s manual or on their website. The recommended air pressure is based on factors such as rider weight, riding style, and trail conditions. Maintaining the proper air pressure will optimize your bike’s suspension and ensure a smooth and controlled ride.
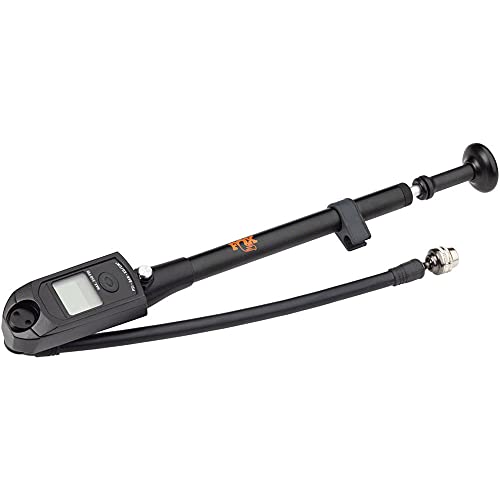
Next, you will need a shock pump specifically designed for MTB forks. These pumps have a high-pressure gauge and a specialized attachment for connecting to the air valve on your forks. Make sure the shock pump is compatible with your forks, as different forks may have different valve types.
Before connecting the shock pump, release any existing air pressure in the forks by pressing the air valve to deflate the forks completely. This will ensure accurate measurement and prevent any unwanted pressure buildup. Once the forks are fully deflated, connect the shock pump to the air valve securely.
Now comes the part where you need to add air to your MTB forks. Slowly pump the shock pump to increase the air pressure in the forks. It is important to add air in small increments and frequently check the pressure using the gauge on the pump. This will help you achieve the recommended pressure gradually and prevent over-inflation.
Once you have reached the desired air pressure, disconnect the shock pump from the air valve. It is crucial to properly seal the air valve to prevent any air leakage. Double-check the pressure using the pump’s gauge or a separate pressure gauge if available.
Remember to periodically check and adjust the air pressure in your MTB forks. Over time, the pressure may decrease due to air leakage or changes in temperature. Regular maintenance of your forks’ air pressure will ensure consistent performance and a great riding experience.
In conclusion, knowing how to put air in your MTB forks is a valuable skill for any mountain biker. By following the recommended air pressure guidelines and using a shock pump, you can maintain optimal suspension and ride quality. Regularly checking and adjusting the air pressure will ensure a smooth and controlled ride, allowing you to conquer challenging trails with confidence.
Checking the Air Pressure
Before inflating your MTB forks, it is important to check the current air pressure to ensure proper performance. To do this, follow these steps:
- Locate the air valve on your MTB forks.
- Remove the cap from the air valve.
- Attach a shock pump to the air valve.
- Pump the shock pump a few times to read the current air pressure on the gauge.
- Compare the current air pressure with the manufacturer’s recommended range.
- If the air pressure is too low, add air using the shock pump. If it is too high, release air by gently pressing the air valve.
- Once the desired air pressure is achieved, remove the shock pump and replace the cap on the air valve.
It is important to note that the air pressure in MTB forks can have a significant impact on the performance and ride quality of your bike. Regularly checking and adjusting the air pressure will help ensure a comfortable and efficient riding experience.
Why it’s Important to have the Right Pressure
Having the right pressure in your mountain bike forks is crucial for a smooth and controlled ride. The proper amount of air pressure ensures that the forks properly absorb impacts and bumps on the trail, helping to maintain traction and stability.
When the forks have too little pressure, they can bottom out easily, causing a harsh and uncomfortable ride. This can also lead to loss of control and increased risk of accidents. On the other hand, when the forks have too much pressure, they become stiff and rigid, reducing their ability to absorb shocks effectively.
Benefits of Proper Air Pressure:
- Improved Performance: With the right pressure, your forks can respond optimally to the terrain, providing a better overall riding experience.
- Enhanced Control: Properly pressurized forks help maintain traction, allowing you to navigate corners, descents, and obstacles with confidence.
- Reduced Fatigue: Riding with the correct pressure can minimize fatigue as the forks absorb impacts more effectively, reducing the strain on your arms and upper body.
- Prevention of Damage: Having the right pressure prevents excessive stress on the forks, reducing the risk of damage or premature wear.
It is important to note that the appropriate air pressure can vary depending on factors such as rider weight, riding style, and trail conditions. Therefore, it is advisable to consult the manufacturer’s guidelines or seek advice from a professional bike mechanic for the optimal pressure specific to your forks.
Regularly checking and adjusting the air pressure in your mountain bike forks is essential to ensure optimal performance and a safe riding experience. Investing the time to find and maintain the right pressure will greatly enhance your enjoyment and performance on the trails.
Tools Needed for Adding Air
Before you begin adding air to your MTB forks, it is important to gather the necessary tools. Here are the tools you will need:
- A suspension fork with an air valve
- A shock pump or a regular bicycle pump with an adapter
- A pressure gauge
- A rag or towel to wipe off any dirt or oil
Make sure you have all these tools handy before you start the process of adding air to your MTB forks. Having the right tools will ensure that you can properly adjust the air pressure and maintain the performance of your forks.
Step-by-Step Guide to Adding Air
Properly maintaining your MTB forks is essential for ensuring a smooth and responsive ride. One important aspect of fork maintenance is adding air to the suspension. Here is a step-by-step guide on how to add air to your MTB forks:
Step 1: Gather the Necessary Tools
Before you start, make sure you have all the tools you need. You will need a shock pump specifically designed for MTB forks, as well as a rag or towel to clean any dirt or debris from the valve before attaching the pump.
Step 2: Determine the Recommended Air Pressure
Refer to your fork manufacturer’s manual or website to find out the recommended air pressure for your specific fork model. This information is usually listed in PSI (pounds per square inch) or BAR (atmospheric pressure).
Step 3: Prepare the Fork
Clean the valve area using a rag or towel to remove any dirt or debris. This will help ensure a good seal once the pump is attached. Make sure the fork is fully extended by bouncing it a few times or compressing it manually.
Step 4: Attach the Pump
Take the shock pump and attach it firmly to the valve on your fork. Make sure it is securely attached to prevent any air leaks during the process.
Step 5: Add Air
Pump air into the fork slowly and steadily. Be careful not to exceed the recommended pressure. It’s better to slightly under-inflate at this stage and then adjust as needed. You can use the pressure gauge on the pump to monitor how much air you are adding.
Step 6: Test the Fork
Once you have reached the recommended air pressure, remove the pump from the valve and replace the valve cap. Rebound the fork a few times to ensure the air pressure is distributed evenly. The fork should feel firmer and more responsive when riding, with minimal sag.
Step 7: Fine-tune the Air Pressure
If you find that the fork feels too soft or too firm during a ride, you can fine-tune the air pressure. Use the shock pump to make small adjustments, either by adding or releasing air, until you find the perfect balance for your riding style and preferences.
Following these steps will help you properly add air to your MTB forks and maintain their optimal performance. Remember to regularly check the air pressure and adjust it as needed to ensure a smooth and enjoyable ride.
Troubleshooting Air Leaks
If you’re experiencing air leaks in your MTB forks, there are a few things you can do to troubleshoot and resolve the issue.
1. Check the valve: Start by inspecting the valve on your fork. Make sure it is tightly closed and not damaged. If you notice any cracks or signs of wear, it may need to be replaced.
2. Clean the valve: Dirt or debris can cause air leaks. Use a clean cloth or cotton swab to wipe off any dirt from the valve area. Ensure that no foreign particles are obstructing the valve’s closure.
3. Tighten the valve cap: Sometimes, air leaks can occur due to a loose valve cap. Use a valve cap wrench or your fingers to tighten the cap securely, making sure not to overtighten.
4. Inspect the seals: Leaky seals can be a common cause of air leaks in MTB forks. Check the seals for any signs of damage or wear. If necessary, replace the seals with new ones that are compatible with your forks.
5. Lubricate the seals: Applying a small amount of silicone-based lubricant to the seals can help create a better seal and prevent air leaks. Be sure to clean the seals before applying any lubricant.
6. Seek professional help: If you have tried the above steps and are still experiencing air leaks, it may be best to consult a professional bike mechanic or the manufacturer for further assistance. They will have the expertise to diagnose and resolve the issue effectively.
By following these troubleshooting steps, you can resolve most air leaks in your MTB forks and enjoy a smoother, more efficient ride.


