
If you’re a woodworker or a carpenter, you know how important it is to have sharp tools. A dull draw knife can make your work frustrating and time-consuming, as it won’t cut through wood efficiently. Fortunately, sharpening a draw knife is a skill that can be easily mastered with a few simple steps.
Before you begin the sharpening process, it’s essential to gather the necessary tools: a fine-grit sharpening stone, honing oil, and a leather strop. These tools will help you achieve a razor-sharp edge on your draw knife.
The first step in sharpening a draw knife is to clean the blade thoroughly. Use a wire brush or sandpaper to remove any rust or debris from the surface. Cleaning the blade will ensure that you have a smooth and even surface to work with.
Once the blade is clean, it’s time to start sharpening. Begin by holding the draw knife securely in a vise, ensuring that the cutting edge is facing up. Using the sharpening stone, start at the base of the blade and move towards the tip in a sweeping motion. Apply light pressure and maintain a consistent angle as you sharpen.
To achieve a finely honed edge, it’s important to use honing oil on the sharpening stone. This will lubricate the stone and prevent the blade from becoming too hot or damaged. Add a few drops of oil to the stone and continue sharpening, repeating the sweeping motion from the base to the tip.
Once you’re satisfied with the sharpness of the blade, it’s time to use a leather strop to refine and polish the edge. Apply a small amount of honing oil to the strop and move the blade back and forth across the leather surface. This final step will remove any burrs and give the blade a smooth finish.
After sharpening your draw knife, remember to test it on a piece of scrap wood before using it on your project. This will ensure that the blade is sharp and ready for use. With regular maintenance and proper sharpening, your draw knife will continue to be a reliable tool in your woodworking arsenal.
Why is it important to sharpen a draw knife?
A draw knife is a versatile woodworking tool that is used for shaping and smoothing wood. Whether you are a professional woodworker or a hobbyist, keeping your draw knife sharp is essential for several reasons:
1. Efficiency
Sharpening your draw knife ensures that it cuts through wood effortlessly, making your work more efficient. A dull draw knife will require more force and effort to remove wood, resulting in slower progress and increased fatigue.
2. Precision
A sharp draw knife allows you to make precise and controlled cuts, enabling you to achieve the desired shape and surface finish. Dull blades can cause rough and uneven cuts, compromising the quality of your woodworking projects.
Additionally, a sharp draw knife allows you to remove thin shavings of wood, allowing for finer detail work and smoother surfaces.
3. Safety
A dull draw knife is not only inefficient but also increases the risk of accidents. When a blade is dull, it is more likely to slip or get caught in the wood, potentially causing injuries. By regularly sharpening your draw knife, you can maintain its cutting edge and reduce the chance of accidents.
Remember to always take safety precautions when sharpening your draw knife, such as wearing protective gloves and using a secure work surface.
In conclusion, sharpening your draw knife is crucial for efficient woodworking, precise cuts, and your overall safety in the workshop. Regular maintenance and sharpening will ensure that your draw knife remains in optimal condition, allowing you to create beautiful and professional woodworking projects.
The tools you will need
Sharpening a draw knife requires a few essential tools to ensure a proper and effective sharpening process. Here are the tools you will need:
1. Draw knife – This is the tool you will be sharpening. Make sure it is clean and in good condition before starting the sharpening process.
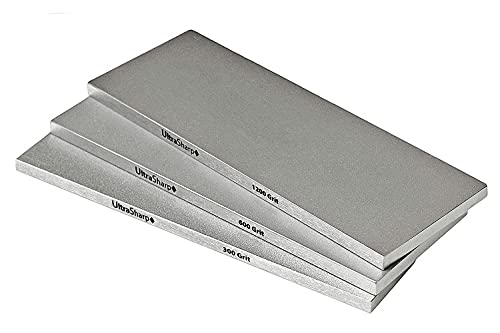
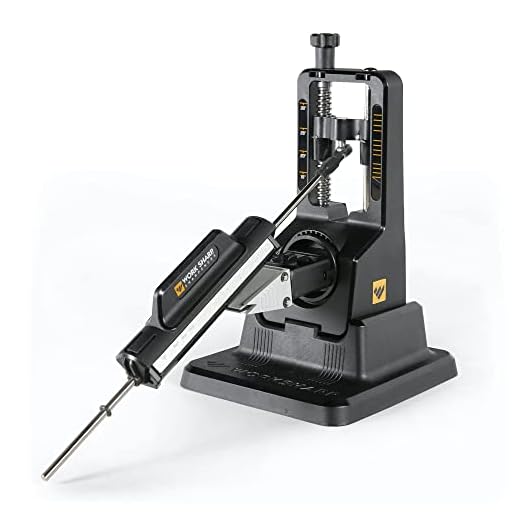
2. Sharpening stone or honing guide – Choose a sharpening stone or honing guide appropriate for the type of draw knife you have. A sharpening stone will provide a more traditional sharpening method, while a honing guide can be used with a bench grinder for a quicker sharpening process.
3. Lubricant or honing oil – Lubricants or honing oils can be used to aid in the sharpening process by reducing friction and helping to remove any metal shavings. Choose a lubricant specifically designed for sharpening tools.
4. Safety equipment – Sharpening a draw knife can be potentially dangerous, so it is important to wear the appropriate safety equipment. This may include safety goggles or glasses, gloves, and a face mask.
5. Cleaning supplies – Before sharpening the draw knife, it is important to clean it thoroughly to remove any dirt or debris. You may need soap and water, a wire brush, or a cloth for this purpose.
Having these tools ready before starting the sharpening process will help ensure a smooth and successful sharpening experience.
Step-by-step guide
Sharpening a draw knife is an essential skill for any woodworker or carpenter. A sharp draw knife ensures clean and precise cuts, making your work much easier and more efficient. Follow these step-by-step instructions to sharpen your draw knife:
1. Gather your materials
Before you begin, make sure you have the necessary materials. You will need a draw knife, a sharpening stone or honing guide, honing oil or water, a flat surface, and a safety glove to protect your hand.
2. Prepare the sharpening stone
If you are using a sharpening stone, ensure that it is clean and free from any debris. You can use a mild abrasive cleaner and warm water to remove any dirt or particles. Rinse it thoroughly and let it dry before proceeding.
3. Set up your workspace
Find a flat and stable surface to work on. Place your sharpening stone or honing guide on the surface. Make sure it is securely positioned and will not move while you are sharpening.
4. Apply honing oil or water
If you are using a sharpening stone, apply a few drops of honing oil or water to the surface. This will lubricate the stone and prevent metal shavings from clogging it during the sharpening process. Spread the oil or water evenly across the surface of the stone using your finger or a cloth.
5. Position the draw knife
Hold the draw knife securely with one hand and position the beveled edge against the sharpening stone or honing guide. Make sure the cutting edge is facing away from you and the handles are pointing in the opposite direction.
6. Sharpen the edge
Using smooth and consistent strokes, move the draw knife back and forth along the sharpening stone. Maintain a consistent angle, typically around 20-30 degrees, and evenly sharpen both sides of the blade. Repeat this process several times until you achieve the desired sharpness.
7. Test the sharpness
After sharpening, carefully touch the cutting edge with your finger to check for sharpness. Be cautious as the blade may be very sharp. If it feels dull or catches on your skin, repeat the sharpening process.
8. Clean and dry the draw knife
Once you are satisfied with the sharpness, wipe the draw knife clean with a cloth to remove any metal shavings or debris. Make sure it is completely dry to prevent rusting.
Following these step-by-step instructions, you can easily sharpen your draw knife and ensure optimal performance for your woodworking projects. Remember to always handle sharp tools with care and take necessary safety precautions.
Clean the draw knife
Before sharpening a draw knife, it is essential to clean it thoroughly. A clean draw knife not only improves its performance but also ensures a longer lifespan. Follow these steps to clean your draw knife:
|
Step 1: |
Begin by wiping off any dirt or debris from the blade using a clean cloth or brush. Pay extra attention to the areas between the handles and the blade, as they tend to accumulate dirt and grime. |
|
Step 2: |
If there are any stubborn stains or rust spots on the draw knife, use a mild abrasive cleaner or rust remover to eliminate them. Apply the cleaning solution to a cloth or sponge and gently scrub the affected areas. Rinse the blade thoroughly with water and dry it with a clean cloth. |
|
Step 3: |
Inspect the handles for any dirt or residue. Use a soft brush or cloth to clean the handles, making sure to remove any buildup that may affect your grip or comfort during use. |
|
Step 4: |
Once the draw knife is clean and dry, it is ready for sharpening. Follow the appropriate sharpening techniques to restore its cutting edge. |
By regularly cleaning your draw knife, you can maintain its performance and ensure that it remains a reliable tool for your woodworking projects.
Secure the draw knife
Before sharpening your draw knife, it is important to properly secure it to ensure your safety. There are a few methods you can use to secure your draw knife, depending on your personal preference and the tools available to you. Here are some common ways to secure a draw knife:
Using a bench vise
One popular method is to use a bench vise to hold the draw knife in place. Start by opening the bench vise wide enough to accommodate the width of the draw knife. Then, insert the draw knife into the vise and tighten the vise to firmly secure the draw knife in place. Make sure the draw knife is centered and level in the vise before proceeding.
Using clamps
Another option is to use clamps to secure the draw knife. This method can be useful if you don’t have access to a bench vise. Begin by placing the draw knife on a sturdy workbench or table. Position the clamps on either side of the draw knife and tighten them down to hold the draw knife securely in place. Ensure that the draw knife is stable and does not move during the sharpening process.
| Pros | Cons |
|---|---|
| Provides a secure grip on the draw knife | Requires a bench vise or clamps |
| Allows for precise control during sharpening | May limit the range of motion while sharpening |
| Reduces the risk of accidents or injuries | May take some time to set up |
No matter which method you choose, it is essential to ensure that the draw knife is held securely in place before attempting to sharpen it. This will not only help prevent accidents but also allow you to maintain better control over the sharpening process.