
Having a sharp knife in the kitchen is essential for efficient and safe cooking. However, over time, even the best knives can become dull and lose their cutting edge. While many people think that sharpening a knife is a difficult task that requires professional equipment, the truth is that you can easily sharpen a dull knife at home with just a few simple tools and techniques.
Firstly, it’s important to understand that there are different methods for sharpening a knife, depending on the type of blade you have. For example, you may have a straight edge knife, a serrated knife, or a Japanese-style knife with a single bevel. Each of these knives requires a slightly different approach to sharpening, so it’s important to identify the type of knife you have before starting the process.
Once you’ve identified your knife, you can begin the sharpening process. One common method is to use a sharpening stone, also known as a whetstone. To start, soak the whetstone in water for about 10 minutes to ensure it is properly lubricated. Then, hold the knife at a 20-degree angle to the stone and gently slide the blade across it in a sweeping motion. Repeat this process on the other side of the knife until you have achieved the desired sharpness. Remember to apply consistent pressure and maintain a steady angle throughout the process.
If you don’t have a whetstone, another option is to use a honing rod, also known as a sharpening steel. This method is best for maintaining the sharpness of your knife rather than fixing a dull blade. To use a honing rod, simply hold it vertically in one hand and place the knife against the rod at a 20-degree angle. Using gentle pressure, swipe the knife down the rod, starting from the base of the blade and ending at the tip. Repeat this process several times on each side of the blade to realign the edge and restore sharpness.
Step-by-Step Guide to Sharpening a Dull Knife
Having a sharp knife is essential for efficient cooking and food preparation. If you have a dull knife that needs sharpening, follow this step-by-step guide to regain its cutting edge.
|
Step 1: Gather the necessary materials. You will need a sharpening stone or honing rod, water, and a damp cloth. |
|
Step 2: Prepare the sharpening stone or honing rod by moistening it with water. |
|
Step 3: Hold the knife at a 20-degree angle against the sharpening stone or honing rod. Apply gentle and consistent pressure. |
|
Step 4: Starting from the base of the blade, slide the knife across the stone or rod towards the tip. Repeat this motion several times on each side of the knife. |
|
Step 5: Check the sharpness of the knife by carefully feeling the blade with your fingertip. If it still feels dull, repeat steps 3 and 4 until satisfied. |
|
Step 6: After sharpening, rinse the knife with water and wipe it dry with a clean cloth. |
|
Step 7: Test the sharpness of the knife by slicing through a piece of paper or a ripe tomato. If the knife glides effortlessly, it is now sharp and ready to use. |
Remember to exercise caution when sharpening your knife and always maintain a firm grip. With regular maintenance, your knife will stay sharp for longer periods, making your kitchen tasks a breeze.
Gather the necessary tools
When it comes to sharpening a dull knife at home, it’s important to have the right tools on hand. Here is a list of essential tools you’ll need:
1. Sharpening stone: This is the most important tool you’ll need to sharpen your dull knife. There are various types of sharpening stones available, such as water stones, oil stones, and diamond stones. Choose one that suits your preference and budget.
2. Honing rod: A honing rod, also known as a sharpening steel, is used to realign the edge of the knife and maintain its sharpness. It’s especially useful for regular maintenance between sharpenings.
3. Cutting board: A sturdy cutting board will provide a stable surface for sharpening your knife. Avoid using glass or ceramic cutting boards, as they can damage the blade.
4. Towel or cloth: A towel or cloth will be useful for wiping off any excess water or oil from the sharpening stone and knife during the sharpening process.
5. Angle guide: An angle guide is a helpful tool for maintaining a consistent angle while sharpening your knife. It ensures that you sharpen the blade evenly on both sides.
6. Safety gloves: While not essential, safety gloves can provide added protection for your hands during the sharpening process. They can prevent accidental cuts or injuries.
By gathering these necessary tools, you’ll be well-prepared to sharpen your dull knife at home and achieve a razor-sharp edge.
Prepare the work surface
Before sharpening your dull knife, it is important to prepare a suitable work surface. This will help create a safe and stable environment for the sharpening process.
Here are some tips on how to prepare your work surface:
Clear the area
Start by clearing the area of any clutter or objects that may get in the way during the sharpening process. This will help ensure that you have enough space to work efficiently without any obstructions.
Protect the surface
Place a protective covering on your work surface to prevent any damage or scratches. You can use a thick towel, cutting board, or a specialized sharpening mat. This will not only protect your work surface but also provide a cushioned support for your knife.
| Tip | Additional Information |
|---|---|
| Use a cutting board | Opt for a wooden or plastic cutting board that will absorb some of the impact from the sharpening process. |
| Consider a sharpening mat | If you plan on sharpening knives regularly, investing in a sharpening mat can provide a dedicated and non-slip surface for the task. |
By preparing your work surface properly, you will create a safe and stable area for sharpening your dull knife. This will help you achieve better results and reduce the risk of accidents during the process.
Begin the sharpening process
Once you have gathered all the necessary materials, you can begin the sharpening process.
Make sure you have a stable working area with good lighting to perform the task safely and effectively.
Step 1: Assess the condition of the knife
Before starting, you need to assess the condition of the knife to determine the best approach for sharpening. Examine the blade for any nicks, chips, or damages that may require professional repair. If there are minor issues or the blade is simply dull, you can proceed with the sharpening process at home.
Step 2: Choose the right sharpening method
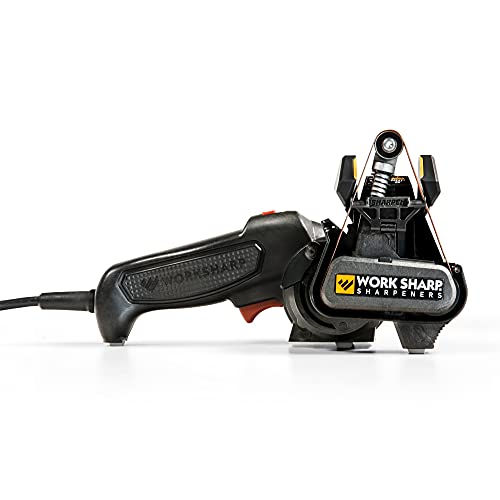
There are different methods you can choose from to sharpen a knife, depending on your preference and the tools you have available. The most common methods include using a whetstone, honing rod, or an electric knife sharpener. Research and choose the method that suits your needs and skill level.
Pro tip: If you are new to sharpening knives, it may be beneficial to start with a whetstone as it provides more control over the sharpening process.
Step 3: Prepare the sharpening tools
Before you begin, gather the sharpening tools you need. This may include a whetstone, honing rod, lubricating oil, or an electric knife sharpener. Additionally, have a damp cloth or sponge nearby to clean the blade during the sharpening process.
Pro tip: Follow the manufacturer’s instructions for any specific tool you are using to ensure safety and optimal results.
Test the sharpness of the knife
To ensure that your knife is properly sharpened, it is important to test its sharpness before using it. There are several simple and effective methods to check the sharpness of your knife.
| Method | Description |
|---|---|
| 1. Paper Test | Take a piece of paper and gently try to slice it with your knife. A properly sharpened knife should effortlessly cut through the paper with a clean edge. If the knife struggles or tears the paper, it needs further sharpening. |
| 2. Tomato Test | Using a ripe tomato, place the blade of your knife at the top of the tomato and gently draw it downward. A sharp knife will slice through the skin and flesh of the tomato with ease and precision. If the knife squashes or crushes the tomato, it is not sharp enough. |
| 3. Vegetable Test | Select a firm vegetable, such as a carrot or potato, and attempt to cut it using your knife. A sharp knife will effortlessly glide through the vegetable, creating clean and smooth cuts. If the knife struggles or requires excessive force, it needs to be sharpened. |
It is important to note that these tests should be done with caution to avoid any accidental injuries. Always handle the knife carefully and use a cutting board or suitable surface for testing.


