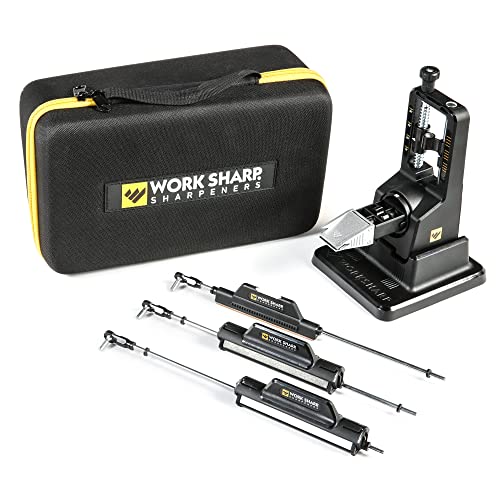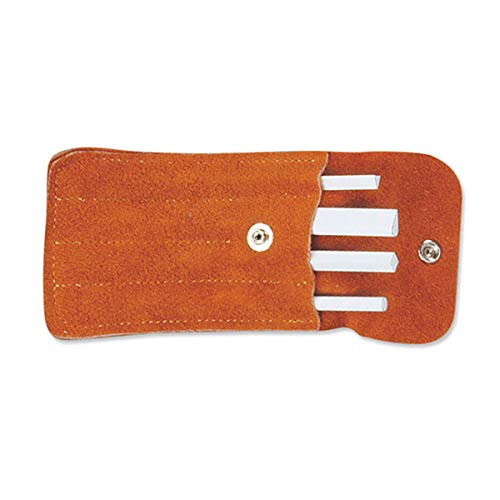
A dull knife can be frustrating to work with and can also be dangerous. To ensure your knife is sharp and ready for use, you don’t always need to take it to a professional. With the right technique and a few simple tools, you can sharpen your knife at home using a file.
A file is a versatile tool that has been used for centuries to shape and sharpen various objects. When it comes to knife sharpening, a flat file with a single-cut or double-cut pattern is the best option. This type of file will provide the necessary abrasiveness to remove the dullness and restore the sharpness of your knife.
Before you begin sharpening your knife, it’s important to ensure your safety. Wear protective gloves to protect your hands from any accidental slips or cuts. Additionally, make sure to secure the knife and the file in a vice or clamp to prevent them from moving during the sharpening process.
Start by positioning the file at a 20-degree angle to the knife blade. Firmly but gently run the file along the blade, moving in a single direction, from the base of the blade to the tip. Apply even pressure and repeat this motion several times, always moving the file away from the cutting edge. This consistent, controlled motion will remove any burrs and restore the sharpness of the blade.
Why sharpening your knife is important
Keeping your knife sharp is crucial for several reasons. Here are some of the main reasons why sharpening your knife is important:
1. Safety:
A dull knife is actually more dangerous than a sharp one. When a knife is dull, you need to exert more force to cut through an object, which increases the risk of accidents. A sharp knife, on the other hand, requires less force and provides better control, reducing the chances of slipping and injuring yourself.
2. Efficiency:
A sharp knife allows you to work more efficiently in the kitchen or any other task that requires cutting. With a dull knife, you may struggle to slice through food or other materials, leading to uneven cuts and wasting time. Sharpening your knife ensures that it will glide through the material smoothly, making your tasks quicker and easier.
3. Performance:
A well-sharpened knife performs better, delivering clean cuts and allowing you to achieve the desired results in your cooking or other activities. Whether you’re slicing vegetables, filleting fish, or preparing meat, a sharp knife will help you achieve precise cuts, enhance the presentation of your food, and improve your overall performance.
4. Longevity:
Regularly sharpening your knife helps maintain its longevity. When a knife is dull, the blade can get damaged more easily as you apply excessive force or use improper cutting techniques. By keeping the blade sharp, you reduce the risk of chipping or breaking it, extending the lifespan of your knife. Additionally, a sharp knife is less likely to rust or corrode, as it glides through the material without leaving any exposed areas.
5. Versatility:
A sharp knife is more versatile, allowing you to tackle different tasks with ease. Whether you need to chop, slice, dice, or mince ingredients, a well-sharpened knife will adapt to your needs. With a dull knife, you may struggle to perform specific cutting techniques, limiting your culinary repertoire.
In conclusion, regularly sharpening your knife is not only vital for safety but also improves efficiency, performance, longevity, and versatility. By investing a little time in sharpening your knife, you’ll enjoy the benefits of a sharp, reliable tool that enhances your culinary skills and makes your everyday tasks more enjoyable.
Step 1: Gather the necessary tools
Before you begin sharpening your knife with a file, gather the following tools:
1. File: Choose a file that is appropriate for sharpening knives, such as a mill file or a diamond file. Make sure the file is clean and in good condition.
2. Knife: Select the knife or knives that need sharpening. It’s important to work with one knife at a time to ensure a proper sharpening job.
3. Safety gear: Protect yourself by wearing a pair of work gloves to avoid any accidents or injuries. Safety glasses are also recommended to shield your eyes from any metal particles that may be produced during the sharpening process.
4. Work surface: Find a stable and flat work surface that you can use for sharpening your knife. It’s important to have a solid base to ensure safety and accuracy.
5. Lubricant: Depending on the type of file you are using, you may need to apply a lubricant to the knife blade. This will help reduce friction and make the sharpening process smoother and more efficient.
By gathering these tools beforehand, you’ll have everything you need to proceed with the knife sharpening process smoothly and safely. Remember to always exercise caution when working with sharp objects.
What you will need
To sharpen a knife using a file, you will need the following:
- A file: Choose a file with a fine grit, such as a double-cut or single-cut file. It should be suitable for metal and not too coarse.
- A knife: Select the knife or knives that you want to sharpen. Make sure they are clean and free from any debris.
- Clamps or a vise: These will help to secure the knife while you sharpen it, providing stability and safety.
- Safety equipment: It is important to protect yourself while sharpening a knife. Wear safety goggles to protect your eyes from sparks and debris, and gloves to protect your hands from slipping and cuts.
- Oil or water: Depending on the type of file you use, you may need to lubricate it with oil or water to prevent overheating and improve the sharpening process.
- Cleaning tools: After sharpening, you will need a cloth or brush to clean the knife and remove any metal filings.
Make sure you have all of these supplies before you begin the knife sharpening process.
Step 2: Prepare your workspace
Before you begin sharpening your knife, it’s important to create a suitable workspace. Follow these steps to ensure you have a clean and organized area:
- Gather your materials: Collect all the necessary items, including the knife you want to sharpen, a file, a cleaning cloth or rag, and any additional tools or safety equipment you may need.
- Choose a well-lit area: Find a location with good lighting, either natural or artificial, to help you see the blade and ensure you’re working safely.
- Cover your work surface: Protect your work area by covering it with a clean cloth or towel. This will prevent any accidental scratches or damage to the surface.
- Ensure stability: Make sure your work surface is stable and secure. Avoid working on a surface that wobbles or presents a safety hazard.
- Organize your tools: Lay out your tools and equipment in an orderly manner, ensuring easy access and minimizing the risk of misplacing anything during the process.
- Clean your knife: Before sharpening, clean your knife with a damp cloth to remove any dirt or debris. This will help you see the condition of the blade more clearly.
By setting up a well-organized workspace, you’ll create an environment that promotes safety and efficiency while sharpening your knife.
Cleaning the knife
After sharpening your knife using a file, it’s important to clean it thoroughly to remove any metal shavings and residue. Here are some steps to follow:
Step 1: Remove any loose debris
Use a soft cloth or brush to wipe away any loose debris from the blade and handle of the knife. This will help ensure that the cleaning process is more effective.
Step 2: Use warm soapy water
Fill a basin or sink with warm water and add a small amount of dish soap. Gently submerge the knife into the soapy water and let it soak for a few minutes. This will help to loosen any stubborn dirt or grime.
Use a sponge or soft cloth to gently scrub the blade and handle of the knife. Pay close attention to any areas where food or dirt may have accumulated.
Step 3: Rinse and dry
Once the knife is clean, rinse it under warm running water to remove any soap residue. Dry the knife thoroughly with a clean towel to prevent water spots and rusting.
It’s important to note that some knives may require additional care or specific cleaning instructions. Always refer to the manufacturer’s recommendations if available.
By regularly cleaning your knife after sharpening, you can maintain its performance and prolong its lifespan.
Step 3: Start sharpening
Once you have checked the angle and secured the knife, it’s time to start sharpening using the file. Here’s how to proceed:
-
Hold the file correctly
Hold the handle of the file firmly with one hand and position it at an angle of about 20 degrees to the blade of the knife. Make sure the file is aligned parallel to the edge of the blade.
-
Apply steady pressure
Using light to medium pressure, begin to slide the file along the blade in a controlled and consistent motion. Start from the base of the knife and move towards the tip. Be sure to maintain the same angle throughout the process.
-
Repeat the motion
Continue to make several passes with the file along the entire length of the blade. It’s important to maintain a steady and even pressure to ensure an even sharpening result.
-
Check your progress
After a few passes with the file, stop and examine the edge of the knife. Look for any shiny spots or imperfections that may indicate uneven sharpening. Adjust your technique if necessary.
Remember to take breaks and avoid overheating the blade. Sharpening a knife may take some time and practice, but with patience, you’ll achieve a sharp and efficient tool for your culinary needs.
Using the file on the edge
When sharpening a knife with a file, it’s important to position the file correctly on the edge. The angle at which you hold the file will determine the sharpness and durability of the blade.
1. Start by determining the angle at which the original edge was sharpened. This can usually be determined by examining the existing bevel on the blade. It’s important to maintain this angle when using the file to ensure consistency in the sharpening process.
2. Hold the file firmly with both hands, ensuring a secure grip. Position the file at the desired angle on the edge of the blade. It’s recommended to start with a 20-degree angle for most knives, but this can vary depending on the type and purpose of the knife.
3. Apply consistent pressure and move the file along the edge in one direction. Avoid using a back-and-forth motion, as this can cause uneven sharpening and damage the blade.
Tip: To ensure even sharpening, it’s helpful to use a marker to make a thin line along the blade’s edge. As you sharpen, the marker will be removed, indicating that the entire edge has been properly filed.
Special Considerations
Hardened Steel Blades: If you’re sharpening a knife with a hardened steel blade, you may need to use a specialized file with diamond or tungsten carbide grit. These files are designed to handle the tough material and provide effective sharpening.
Curved Blades: When sharpening a knife with a curved blade, such as a gut hook or a curved kitchen knife, it’s important to follow the curve of the blade with the file. This will ensure that the entire edge is sharpened and maintain the blade’s intended shape.


