
If you have a Santoku knife and want to keep it in top condition, knowing how to sharpen it on a whetstone is essential. A sharp knife not only makes your cutting tasks easier, but it also ensures the safety and precision of your cuts. Sharpening a Santoku knife on a whetstone is a traditional and effective method that allows you to control the angle and pressure applied, resulting in a razor-sharp edge.
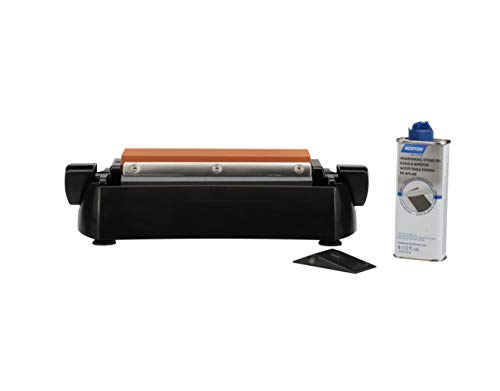
Before you begin sharpening your knife, you will need a few tools and materials. First and foremost, you will need a whetstone. Whetstones come in various grit levels, and for sharpening a Santoku knife, it is recommended to start with a medium grit stone, around 1000-2000 grit. Additionally, you will need water to lubricate the stone and a towel or non-slip mat to secure the stone in place.
To start the sharpening process, soak your whetstone in water for about 10-15 minutes. This will ensure that the stone is fully saturated and ready for use. Once the stone is ready, place it on a towel or non-slip mat to prevent it from moving during sharpening. Hold the knife by the handle with your dominant hand and position the blade at a 15-20 degree angle against the stone.
Gently slide the knife back and forth across the stone, maintaining a consistent angle and applying light pressure. Start from the base of the blade and work your way towards the tip, making sure to cover the entire length of the blade. Repeat this motion for about 10-15 times on each side of the blade or until you achieve the desired sharpness.
After sharpening, rinse the knife with water to remove any metal particles or debris. Dry the blade thoroughly and inspect the edge for any burrs or rough spots. If you notice any, you can gently use a honing rod to realign the edge. Finally, wipe the blade clean and test its sharpness by gently slicing through a piece of paper or a tomato.
Regularly sharpening your Santoku knife on a whetstone will help maintain its sharpness and prolong its lifespan. Remember to always take your time and pay attention to the angle and pressure applied during sharpening. With practice and patience, you will be able to sharpen your Santoku knife like a professional chef!
Choose the right whetstone
When it comes to sharpening your santoku knife on a whetstone, choosing the right whetstone is crucial. There are different types of whetstones available, each with its own advantages and disadvantages. Here are some factors to consider when selecting a whetstone:
| Type of Whetstone | Advantages | Disadvantages |
|---|---|---|
| Oil Stones | Provide a good cutting edge | Require oil for lubrication |
| Water Stones | Quickly remove material, great for sharpening | Require frequent flattening |
| Diamond Stones | Durable and long-lasting | Expensive |
| Ceramic Stones | Produce a fine edge | Brittle and delicate |
Consider your preferences and needs when choosing a whetstone. If you are a beginner, starting with a combination stone that offers multiple grits may be a good option. Ensure that the stones you choose are compatible with the kind of knife you have and are suitable for the type of sharpening you want to achieve. Remember, investing in a quality whetstone will result in better sharpening results and longer-lasting sharpness for your santoku knife.
Prepare the whetstone
Before sharpening your santoku knife, you need to prepare the whetstone. Follow these steps to ensure the best results:
1. Soak the whetstone
Fill a container or sink with water and submerge the whetstone in it. Allow the stone to soak for at least 10 to 15 minutes. This will help to prevent the stone from drying out during the sharpening process.
2. Place the whetstone on a stable surface
Find a stable and secure surface, such as a countertop or table, where you can comfortably work. Make sure the surface is clean and dry to prevent any unnecessary movement while sharpening.
Note: Some whetstones come with a non-slip base that helps to keep the stone in place during sharpening. If your stone has a base, make sure to use it for added stability.
3. Position the whetstone correctly
Place the whetstone in front of you with the coarse side facing up. The coarse side is typically labeled or marked for easy identification. This is the side you will use for initial sharpening and removal of any nicks or dullness.
Sharpen the blade
To sharpen a santoku knife on a whetstone, the first step is to prepare the stone. Soak the whetstone in water for about 10 to 15 minutes, or according to the manufacturer’s instructions. This will ensure that the stone is properly lubricated and ready for use.
Once the whetstone is ready, place it on a stable surface, such as a countertop or table. Make sure it is secured and won’t move during the sharpening process.
1. Obtain the correct angle
Hold the santoku knife at the correct angle. The angle will vary depending on the sharpness you desire and the type of knife you have. Generally, a 15 to 20-degree angle is recommended for santoku knives.
2. Start sharpening
Hold the handle of the knife firmly, and position the edge at the base of the whetstone. Using light pressure, slide the blade across the stone in a sweeping motion. Ensure that the entire length of the blade comes into contact with the stone.
It’s important to maintain a consistent angle and pressure throughout the sharpening process. This will help ensure an even and effective sharpening of the blade.
Repeat this motion several times on one side of the blade, then switch to the other side and repeat. Alternate between both sides until you achieve your desired level of sharpness.
3. Test the sharpness
To test the sharpness, carefully run your finger along the blade’s edge. Be extremely cautious and use a gentle touch. If the blade feels sharp and can easily cut through paper or food without resistance, then you have successfully sharpened your santoku knife.
Remember to clean the knife after sharpening and store it in a safe place. Regular maintenance and sharpening will extend the lifespan of your santoku knife and ensure it remains sharp and efficient for years to come.
Finish and maintain the edge
After sharpening your santoku knife on the whetstone, it’s important to finish and maintain the edge to keep it in optimal condition for longer. Here are some steps to follow:
| Step 1: | Remove any burrs |
| Step 2: | Use a honing rod |
| Step 3: | Strop the blade |
| Step 4: | Store the knife properly |
First, check if there are any burrs or rough spots left on the edge of the blade. Use a fine-grit whetstone or a leather strop to remove them. Gently rub the stone or strop along the edge, moving from the base to the tip of the blade.
Next, use a honing rod to maintain the edge of the knife. Hold the rod upright in one hand and the knife in the other hand. Place the rod at a 20-degree angle to the blade and swipe it along the edge, starting from the base to the tip. Repeat this process on both sides of the blade a few times.
Lastly, strop the blade to further refine and polish the edge. A leather strop with polishing compound works best for this step. Place the strop on a flat surface and hold it taut. Drag the blade along the strop, moving from the base to the tip. Repeat this motion on both sides of the blade several times.
Once you have finished the sharpening process, it’s important to store your santoku knife properly. Avoid storing it in a drawer where it can bump against other utensils, as this can dull the edge. Instead, consider using a knife block or magnetic strip to keep your knife safely stored and easily accessible.
By following these steps to finish and maintain the edge of your santoku knife, you can ensure that it stays sharp and ready for any cooking task. Remember to periodically repeat the sharpening process to keep your knife in optimal condition.


