
Sharpening a curved knife can be a challenging task, but with the right technique and tools, it is definitely achievable. A sharp curved knife makes slicing and dicing effortless and precise, ensuring that your culinary creations turn out perfectly every time.
One of the most effective methods to sharpen a curved knife is by using a sharpening stone. A sharpening stone, also known as a whetstone, provides the necessary abrasive surface to remove dullness and restore the sharpness of the blade. It is important to choose the right type of stone for your knife, ensuring that it is suitable for sharpening curved blades.
Before you begin sharpening, it is essential to take certain precautions. Firstly, make sure you have a firm grip on the knife to avoid any accidents. Secondly, use a cutting board or a sturdy surface to stabilize the stone during the sharpening process. Lastly, always remember to follow the correct sharpening angle to maintain the curve of the blade.
To start the sharpening process, wet the sharpening stone with water or honing oil. Place the stone on a stable surface and hold the knife with a firm grip. With the blade facing away from you, position it at the correct angle against the stone. Begin the sharpening process by moving the knife back and forth across the stone in a sweeping motion. Apply light pressure and repeat this motion several times on each side of the blade.
Once you have completed the sharpening process, it is crucial to test the sharpness of the knife. Carefully run your finger along the blade to check for any rough or unsharpened areas. If needed, repeat the sharpening process until the blade is uniformly sharp. Remember to clean the knife after sharpening and store it properly to maintain its sharpness.
In conclusion, sharpening a curved knife with a stone requires patience and practice. By following the right technique and taking the necessary precautions, you can restore the sharpness of your knife and enhance your culinary skills. A sharp curved knife is an indispensable tool in the kitchen, enabling precise and effortless cutting for a variety of culinary tasks.
The Importance of Sharpening Curved Knives
When it comes to working with curved knives, keeping them sharp is of utmost importance. A sharp curved knife is essential for achieving precision and efficiency in tasks such as carving, slicing, and boning. Here are some reasons why sharpening curved knives is important:
1. Safety:
A sharp curved knife is much safer to use compared to a dull one. When a knife is dull, it requires more force to cut through materials, increasing the risk of accidents. On the other hand, a sharp knife effortlessly glides through the surface, reducing the chances of slipping and causing injuries.
2. Better Performance:
A sharp curved knife enhances your overall performance in the kitchen or workshop. It allows you to make precise cuts, which is particularly important when working with intricate designs or delicate ingredients. With a sharp knife, you can achieve smoother and more appealing results with less effort.
3. Prolonged Lifespan:
Regularly sharpening your curved knives helps extend their lifespan. When a knife is dull, you may be tempted to use excessive force or twist it to compensate for the lack of sharpness. This can cause the knife to bend or even break over time. By sharpening your curved knives, you ensure that they maintain their proper shape and structural integrity.
Overall, sharpening curved knives is crucial for maintaining safety, achieving optimal performance, and prolonging their lifespan. Invest in a good quality sharpening stone and take the time to master the sharpening technique to keep your curved knives in top shape.
Why It is Necessary to Sharpen Curved Blades Regularly
Curved blades, such as those found on many kitchen and utility knives, require regular sharpening to maintain their effectiveness and safety. A sharp blade not only enhances the knife’s cutting performance but also reduces the risk of accidents while using it. Here are several reasons why it is important to sharpen curved blades regularly:
1. Cutting Efficiency
A sharp curved blade effortlessly glides through materials, making cutting tasks quicker and easier. When a blade becomes dull, it requires more force to cut, leading to uneven cuts and potentially damaging the material being worked on. By regularly sharpening the curved blade, it will always be in its optimal condition, providing maximum cutting efficiency.
2. Safety
Dull curved blades can be dangerous to use as they are more prone to slipping or sliding off the target during cutting. This increases the risk of accidental injuries. A sharp blade ensures better control while cutting and reduces the chances of accidents. Regular sharpening keeps the blade sharp and ready to perform its task effectively and safely.
It is important to note that different types of curved blades require different sharpening methods. Always refer to the manufacturer’s instructions or consult a professional for guidance on the specific sharpening technique suitable for your curved blade.
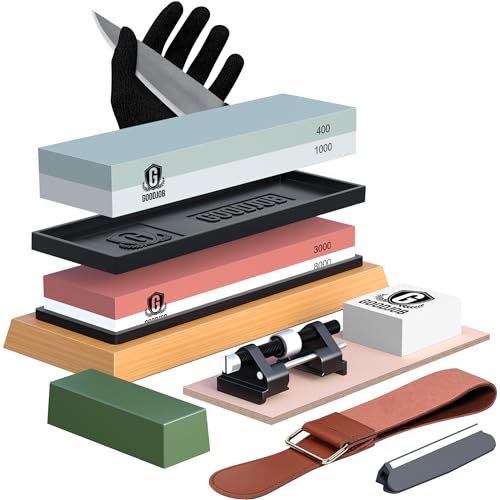
Tools and Materials Needed for Sharpening
- A curved knife
- A sharpening stone
- Water or honing oil
- A towel or rag
- A flat surface
- A container for water or oil
When sharpening a curved knife, it is important to have the right tools and materials on hand. Here is a list of what you will need:
A curved knife: This is the knife you will be sharpening. Make sure it is clean and free from any dirt or debris before you begin.
A sharpening stone: Choose a stone with a fine grit, such as 1000-2000, for sharpening a curved knife. This will help you achieve a sharp edge without removing too much material.
Water or honing oil: Depending on the type of sharpening stone you are using, you will need either water or honing oil. Check the instructions that came with your stone to determine which one is recommended.
A towel or rag: This will be used to wipe down the knife and stone during the sharpening process.
A flat surface: Find a stable and flat surface to work on. This will provide a solid base for sharpening and ensure that the knife stays in place.
A container for water or oil: If you are using a water stone, you will need a container to hold the water. If you are using a honing oil stone, you will need a container to hold the oil. This will prevent any mess and make it easier to keep the stone lubricated during sharpening.
Having all of these tools and materials ready will make the sharpening process much smoother and more efficient. Once you have everything set up, you can proceed with the steps to sharpen your curved knife.
Choosing the Right Stone for Curved Knife Sharpening
When it comes to sharpening a curved knife, choosing the right stone is crucial to achieving optimal results. Curved knives require specialized sharpening techniques, and using the wrong stone can potentially damage the blade. Here are some factors to consider when selecting a stone for sharpening your curved knife:
| Stone Type | Advantages | Disadvantages |
|---|---|---|
| Water Stones |
|
|
| Diamond Stones |
|
|
| Ceramic Stones |
|
|
It is important to carefully assess your sharpening needs and preferences when selecting a stone for your curved knife. Consider the blade material, the level of sharpening required, and your experience with sharpening tools. Experimenting with different stone types and grits can help you find the best combination for achieving a razor-sharp edge on your curved knife.
Step-by-Step Guide to Sharpening a Curved Knife with a Stone
Step 1: Gather the necessary tools
Before you begin sharpening your curved knife, make sure you have the right tools on hand. You will need a sharpening stone, preferably one with different grits, to refine and hone the edge of the blade. Additionally, you may want to have a towel or cloth and some water nearby for cleaning and lubricating the stone during the sharpening process.
Step 2: Prepare the stone
Before using the sharpening stone, it is important to make sure it is clean and flat. If the stone is dirty, wash it thoroughly and allow it to dry before continuing. If the stone is uneven or has any imperfections, you can use a stone leveler or sandpaper to flatten it.
Step 3: Understanding the angle
Next, it is important to understand the angle at which to hold the knife against the stone. In general, for most curved knives, a 20-degree angle will work well. You can use a sharpening guide or simply estimate the angle by eye.
Step 4: Start sharpening
With the stone and knife ready, begin the sharpening process. Hold the knife firmly with one hand and place the edge of the blade against the stone at the desired angle. Using light pressure, move the knife back and forth along the stone, starting from the base of the blade and working towards the tip. Repeat this motion several times, applying consistent pressure.
Step 5: Flip and repeat
After sharpening one side of the blade, flip the knife and repeat the process on the other side. This will ensure both sides of the knife are evenly sharpened. Remember to maintain the same angle as before.
Step 6: Check for sharpness
Once you have finished sharpening both sides of the curved knife, it is time to check for sharpness. Carefully run your finger along the blade’s edge, feeling for any burrs or imperfections. If necessary, continue sharpening until the blade is consistently sharp along its entire length.
Step 7: Clean the knife and stone
After sharpening, it is important to clean both the knife and the stone. Use a damp cloth or towel to wipe away any metal shavings or debris from the blade. Clean the stone with water and a brush, removing any remaining particles or residue.
Step 8: Maintain the edge
To keep your curved knife sharp, it is important to regularly maintain the edge. This can be done by periodically honing the blade with a fine grit stone or a honing rod. Additionally, avoid using the knife on hard surfaces or cutting through bones, as this can quickly dull the blade.
By following these steps and taking the time to properly sharpen your curved knife with a stone, you can ensure it remains sharp and effective for all your cooking and slicing needs.
Preparing the Stone and Knife for Sharpening
Before you can begin sharpening your curved knife with a stone, it is important to prepare both the stone and the knife to ensure the best possible result. Follow these steps to properly prepare for sharpening:
Cleaning the Stone
Start by cleaning the sharpening stone thoroughly. Use a mild dish soap and warm water to remove any dirt, debris, or oils that may be present on the surface. Gently scrub the stone with a soft brush or sponge, paying attention to any stubborn stains or residue. Rinse the stone thoroughly and allow it to dry completely before proceeding.
Inspecting the Knife
Next, carefully inspect your curved knife before sharpening. Check for any visible damage, such as chips or nicks, which may affect the sharpening process. If there are any significant issues, it is recommended to have a professional knife sharpener address them before proceeding with sharpening on your own.
Once you have ensured that your knife is in good condition, you can proceed to the next step of preparing the knife for sharpening.
Protecting Your Hands
While sharpening a curved knife, it is essential to protect your hands from any potential injuries. To do so, you can wear a cut-resistant glove on your non-dominant hand to provide an extra layer of safety. This glove will help protect your hand from accidental slips or abrasions during the sharpening process.
Setting Up a Stable Surface
Place the sharpening stone on a stable and secure surface, such as a countertop or wooden board. Ensure that the stone does not slide or move while you are sharpening the knife. It is recommended to place a damp towel or non-slip mat underneath the stone to provide stability.
By properly preparing both the stone and the knife, you are setting yourself up for a successful sharpening session. The cleaning and inspection steps ensure that the surfaces are ready for sharpening, while protecting your hands and setting up a stable surface ensures your safety and a consistent sharpening experience.
| Steps | Summary |
|---|---|
| Clean the stone | Use dish soap and warm water to remove dirt and debris. Rinse and dry thoroughly. |
| Inspect the knife | Check for any damage or significant issues that may affect sharpening. |
| Protect your hands | Wear a cut-resistant glove on your non-dominant hand for added safety. |
| Set up a stable surface | Place the stone on a secure and non-slip surface to ensure stability during sharpening. |


