Sharpening a knife is an essential skill for any chef or home cook. While there are many methods available, using an oil stone is a traditional and effective way to create a sharp edge. An oil stone, also known as a whetstone, is a natural or synthetic stone that is lubricated with oil to remove metal and create a sharp edge.
Before you begin sharpening your knife, it’s important to understand the different types of oil stones. There are two main types: natural and synthetic. Natural oil stones, such as Arkansas stones, are made from natural materials and are known for their superior quality. Synthetic oil stones, on the other hand, are made from man-made materials and are more affordable.
To start sharpening your knife with an oil stone, first, choose the appropriate grit size. The grit size refers to the coarseness or fineness of the stone. A lower grit size, such as 200 or 400, is used for major reshaping or repairing damaged edges, while a higher grit size, such as 1000 or 3000, is used for fine polishing and refining the edge.
Next, soak the oil stone in a container of mineral oil for about 5-10 minutes. This helps to keep the stone lubricated and prevent metal particles from clogging the surface. Once the stone is fully soaked, place it on a stable surface, such as a cutting board or a stone holder, with the coarse side facing up.
Hold the knife at a 20-degree angle to the stone, making sure to maintain a consistent angle throughout the sharpening process. Start at the base of the blade and drag the knife along the stone towards the tip, applying gentle pressure. Repeat this motion several times on both sides of the blade, alternating between sides to ensure even sharpening.
After sharpening, it’s important to remove any oil residue from the blade. You can use a clean cloth or paper towel to wipe off the excess oil. Additionally, it’s a good idea to rinse the stone with warm water and a mild detergent to remove any metal shavings.
With regular practice and proper technique, using an oil stone to sharpen a knife can help you maintain a sharp and efficient cutting edge. Remember to always prioritize safety and follow the manufacturer’s guidelines for your specific oil stone. Happy sharpening!
Choosing the right oil stone
When it comes to sharpening a knife using an oil stone, it is important to choose the right stone for the job. There are various types of oil stones available, each with its own unique characteristics and benefits. Here are some factors to consider when selecting an oil stone:
Type of Stone
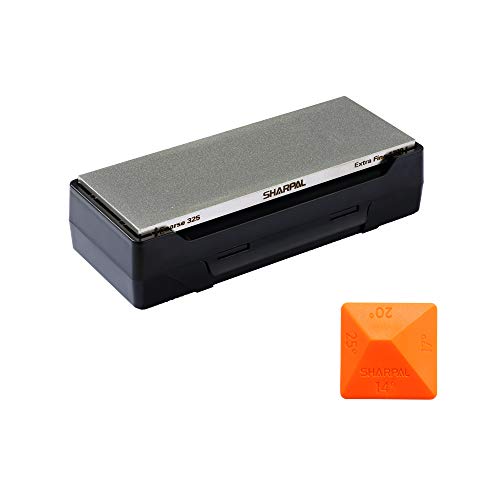
There are three main types of oil stones: Arkansas stones, synthetic stones, and diamond stones. Arkansas stones are natural stones that come in different grades, from soft to hard. Synthetic stones, on the other hand, are man-made and offer consistent grit levels. Finally, diamond stones are extremely durable and can remove material quickly.
Grit Size
The grit size of an oil stone refers to the coarseness or fineness of its abrasive particles. A lower grit size, such as 200 or 400, is suitable for repairing or reshaping the blade’s edge. Higher grit sizes, such as 1000 or 2000, are ideal for honing and refining the edge.
Stone Size
The size of the oil stone is also an important consideration. It’s recommended to choose a stone that is at least as long as the length of your knife blade. This will ensure that you can properly sharpen the entire length of the blade without any restrictions.
| Type | Grit Range | Advantages |
|---|---|---|
| Arkansas Stones | Soft to hard | Natural, versatile, produce fine edges |
| Synthetic Stones | Various grit levels | Consistent, durable, ideal for beginners |
| Diamond Stones | Coarse to fine | Durable, fast sharpening, long-lasting |
By considering these factors and choosing the right oil stone, you can ensure that you achieve the desired level of sharpness and maintain the longevity of your knives.
Preparing the knife
Before sharpening your knife on an oil stone, it is important to properly prepare the knife to ensure the best results. Follow these steps to prepare your knife:
-
Clean the knife
Start by cleaning the knife to remove any dirt, debris, or residue that may be on the blade. Wipe the blade with a damp cloth or rinse it under running water and pat it dry with a clean towel.
-
Inspect the knife
Check the knife for any damages or irregularities that may affect the sharpening process. Look for any chips, dents, or nicks on the cutting edge. If you notice any significant damage, it may be necessary to repair or restore the knife before proceeding.
-
Secure the knife
Find a stable surface to place your oil stone on, such as a workbench or countertop. Make sure the stone is secure and will not move or slide while sharpening. Place a damp cloth or a non-slip mat underneath the stone to provide additional stability.
By properly preparing your knife, you will ensure that it is clean, free of any damage, and securely positioned for the sharpening process. This will help you achieve the best possible results when using an oil stone to sharpen your knife.
Applying oil to the stone
Before you start sharpening your knife on the oil stone, it’s important to apply oil to the surface of the stone. The oil helps to lubricate the stone and prevents the blade from sticking or scratching.
There are different types of oil that you can use, such as mineral oil or honing oil. You can find these oils at most hardware or kitchen supply stores. When choosing an oil, make sure it’s specifically designed for sharpening stones.
To apply the oil, simply pour a small amount onto the surface of the stone. Use your finger or a cloth to spread the oil evenly across the stone. You don’t need to saturate the stone with oil; a thin layer is sufficient.
Once the oil is applied, let it sit for a few minutes to allow it to penetrate the pores of the stone. This will help keep the stone properly lubricated while you sharpen your knife.
Remember to reapply the oil as needed during the sharpening process. If you notice the stone becoming dry or the oil being absorbed quickly, add a few drops of oil to keep the stone lubricated.
By properly applying oil to the stone, you’ll ensure a smoother sharpening experience and extend the life of your oil stone.
Positioning the knife on the stone
Before you begin sharpening your knife with an oil stone, it’s important to know how to position the knife properly on the stone. Follow these steps to ensure the best sharpening results:
- Place a damp cloth or rubber mat underneath the oil stone to prevent it from slipping during sharpening.
- Hold the oil stone firmly with one hand to provide stability.
- Hold the knife handle with your other hand, ensuring a secure grip.
- Position the knife blade at a 20-degree angle against the stone. You can use an angle guide to help maintain consistency.
- Make sure the entire cutting edge of the knife comes into contact with the stone.
- Apply gentle pressure on the knife and begin moving it across the stone using long, sweeping motions.
- Maintain a consistent angle and apply even pressure while moving the knife back and forth across the stone.
- Repeat the sharpening process on both sides of the blade, alternating sides after a few strokes, until the desired sharpness is achieved.
Properly positioning the knife on the oil stone is crucial for achieving a sharp edge. Following these steps will help you sharpen your knife effectively and safely.
Sharpening the knife
Once you have prepared your oil stone by lubricating it with honing oil, you are ready to begin sharpening your knife. Follow these steps:
1. Establish the angle
Hold the knife at a consistent angle against the stone. The exact angle will depend on the type of knife and your personal preference, but a good starting point is a 20-degree angle. You can use a sharpening guide if you are unsure.
2. Start with the coarse side of the stone
Begin by using the coarse side of the stone to remove any nicks or damage to the blade. Apply light pressure and glide the blade across the stone in a sweeping motion, maintaining a consistent angle. Repeat this process several times on each side of the blade until the desired sharpness is achieved.
3. Switch to the fine side of the stone
Once you are satisfied with the sharpness achieved using the coarse side of the stone, flip it over to the fine side. Repeat the same sweeping motion, working on each side of the blade. This side of the stone will help refine the edge and give it a polished finish.
Tip: To check if your knife is sharp, hold it up to the light and look for a reflective edge. If it looks dull or reflects light unevenly, continue sharpening until a consistent, sharp edge is achieved.
Note: It is important to maintain a consistent angle and apply light pressure throughout the sharpening process. Sharp knives are not only safer to use but also more efficient in the kitchen.
Testing the knife’s sharpness
After sharpening your knife using the oil stone, it’s important to test its sharpness to ensure it’s ready for use. Here are a few methods you can use to assess the sharpness of your knife:
- Visual Test: Examine the edge of the knife under a bright light. If the edge reflects light evenly and appears smooth and shiny, it’s an indication that the knife is sharpened properly.
- Paper Test: Hold a sheet of paper vertically, using your non-dominant hand to grip the top and your dominant hand to hold the knife. Place the blade against the edge of the paper and slice downward. A sharp knife will cut through the paper with ease, leaving a clean, straight edge.
- Vegetable Test: Choose a vegetable, like a tomato or onion, and try slicing through it. A sharp knife will slice effortlessly through the skin and flesh, while a dull knife will require more force and may crush or tear the vegetable.
By performing these tests, you can ensure that your knife is properly sharpened and ready to use for all of your culinary needs.


