A taping knife is an essential tool for every professional or DIY enthusiast involved in drywall finishing. Over time, the blade of a taping knife can become dull, making it difficult to achieve smooth and precise results. Sharpening your taping knife can greatly improve its performance and extend its lifespan.
Step 1: Gather the necessary tools
Before you begin sharpening your taping knife, make sure you have all the necessary tools ready. You will need a medium-grit sharpening stone or sandpaper, water or honing oil, a damp cloth, and a flat surface.
Step 2: Prepare the sharpening surface
Choose a flat surface, such as a workbench or a table, and place the sharpening stone or sandpaper on it. Make sure the stone or sandpaper is securely fixed to the surface to prevent it from moving during the sharpening process. If using a sharpening stone, dampen it with water or honing oil according to the manufacturer’s instructions.

Step 3: Sharpen the taping knife
Hold the taping knife firmly with one hand and position the blade against the sharpening stone or sandpaper at a 20-degree angle. Using moderate pressure, move the taping knife back and forth along the sharpening surface, maintaining the 20-degree angle. Repeat this motion several times, alternating sides of the blade, until the blade feels sharp to the touch.
Remember to periodically wet the sharpening stone or sandpaper to prevent the blade from overheating and causing damage. Additionally, regularly wipe away any metal shavings from the blade with a damp cloth to maintain the sharpening efficiency.
By following these simple steps, you can effectively sharpen your taping knife and ensure optimal performance for your drywall finishing projects. A sharp taping knife will make your work easier and result in professional-quality finishes.
The importance of a sharp taping knife
A sharp taping knife is essential for achieving smooth and professional-looking results when applying joint compound on drywall. Here are some reasons why having a sharp taping knife is important:

- Efficiency: A sharp taping knife allows you to work more efficiently by smoothly gliding through the joint compound, reducing the amount of effort required to achieve a smooth finish. This can save you time and energy.
- Precision: When a taping knife is sharp, it enables you to have better control over the application of joint compound. This precision allows you to create clean, crisp lines and edges, resulting in a more polished look.
- Smooth finish: A dull taping knife can cause streaks, lines, and other imperfections in the joint compound. With a sharp knife, you can achieve a smoother finish, eliminating these unwanted marks and ensuring a professional result.
- Reduced fatigue: Working with a sharp taping knife reduces the amount of physical effort needed to apply the joint compound. This can help prevent fatigue, allowing you to work comfortably for longer periods without compromising the quality of your work.
- Longevity: Keeping your taping knife sharp not only enhances its performance but also prolongs its lifespan. Regular sharpening and maintenance can prevent unnecessary wear and tear, ensuring that your taping knife lasts longer and remains in excellent condition.
In conclusion, maintaining a sharp taping knife is crucial for achieving professional results and making your drywall taping job more efficient. Regularly sharpening and properly maintaining your taping knife will prove to be a valuable investment in the long run.
Tools needed for sharpening a taping knife
When it comes to sharpening a taping knife, having the right tools is essential. To ensure a sharp and precise edge, make sure you have the following tools on hand:
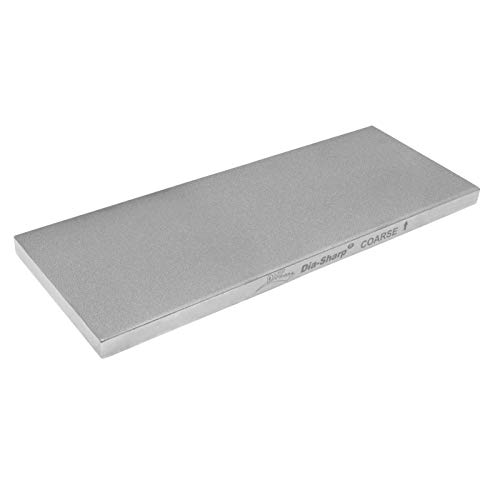
1. Whetstone: A whetstone is one of the most important tools for sharpening a taping knife. It is a rectangular stone made from natural or artificial abrasive material, which is used to grind and sharpen the blade.
2. Lubricant: Using a lubricant, such as honing oil or water, helps to reduce friction and prevent the blade from overheating while sharpening. This ensures a smooth and consistent sharpening process.
3. Fine-grit sandpaper: Fine-grit sandpaper is another tool that can be used to sharpen a taping knife. It is particularly useful for removing small burrs and imperfections on the blade.
4. Honing guide: A honing guide is an optional tool that can be used to hold the taping knife at the correct angle while sharpening. This helps to ensure a consistent and precise edge throughout the sharpening process.
5. Safety gloves and goggles: Safety should always be a top priority while sharpening a taping knife. Wearing safety gloves and goggles helps to protect your hands and eyes from any potential injuries.
6. Cleaning cloth: After sharpening your taping knife, it’s important to clean the blade thoroughly to remove any debris or metal particles. A clean cloth can be used for wiping down the knife and ensuring it is ready for use.
Having these essential tools in your toolkit will make the process of sharpening a taping knife much easier and more effective. Remember to always follow safety precautions and take your time to achieve a sharp and reliable edge on your taping knife.
Step-by-step guide on how to sharpen a taping knife
Having a sharp taping knife is essential for achieving clean, smooth finishes when working on drywall. Here is a step-by-step guide on how to sharpen a taping knife:

Step 1: Gather the necessary tools
Before sharpening your taping knife, make sure you have the following tools:
- A flat file
- An oilstone or honing stone
- A lubricant, such as mineral oil or water
- A clean cloth or rag
Step 2: Prepare the knife
Start by cleaning any dirt or debris from the taping knife using a damp cloth. Make sure the knife is completely dry before moving on to the next step.
Step 3: File the blade
Using the flat file, hold the taping knife securely with one hand and position the file at a 20-degree angle against the blade. Gently run the file along the edge of the blade, starting from the handle and moving towards the tip. Repeat this motion several times, applying even pressure, until the blade is sharpened. Be careful not to press too hard, as this can damage the knife.
Step 4: Hone the blade
Next, use the oilstone or honing stone to further sharpen the taping knife. Apply a few drops of lubricant to the stone and hold the knife at a 20-degree angle against the stone. Move the knife back and forth in a sweeping motion, maintaining a consistent angle. Continue this motion for several minutes, periodically checking the blade’s sharpness. Once the blade is sharp, wipe off any excess lubricant.
Step 5: Test the knife
To ensure the taping knife is properly sharpened, test it on a scrap piece of drywall or a similar surface. The knife should smoothly glide across the surface without snagging or tearing the material. If the knife does not perform as desired, repeat steps 3 and 4 until the desired sharpness is achieved.
Remember, a sharp taping knife not only improves the quality of your work but also makes the taping process quicker and more efficient. Regularly sharpening your taping knife will help maintain its performance and prolong its lifespan.
Tips and tricks for maintaining a sharp taping knife
Regular cleaning: Keeping your taping knife clean is essential for maintaining its sharpness. After each use, make sure to remove any excess compound or residue from the blade. You can use a putty knife or a cloth to wipe it down. Avoid using harsh chemicals that can damage the blade.
Proper storage: Storing your taping knife properly is crucial for preventing dullness. Make sure to keep it in a dry place to avoid rusting. You can also invest in a protective case or sheath to prevent the blade from getting damaged or dull when not in use.
Regular sharpening: Sharpening your taping knife regularly is key to maintaining its sharpness. There are various methods you can use, such as using a sharpening stone, honing guide, or sandpaper. Follow the manufacturer’s instructions or seek professional help if you’re unsure about the sharpening process.
Proper technique: Using the right technique when taping can also help keep your knife sharp. Avoid applying excessive pressure or using the knife for tasks it’s not intended for, as this can lead to bluntness and damage the blade. Practice using controlled, even strokes for a clean finish.
Periodic inspection: Regularly inspect your taping knife for any signs of damage or wear. Look for chips, nicks, or dullness in the blade. If you notice any issues, address them promptly to prevent further damage and maintain the knife’s sharpness.
Consider professional sharpening: If you’re not confident in sharpening your taping knife yourself, consider taking it to a professional. They have the expertise and specialized tools to sharpen the blade effectively. Professional sharpening can help extend the lifespan of your taping knife and ensure optimal performance.
Conclusion
By following these tips and tricks for maintaining a sharp taping knife, you can ensure that your tool remains in top condition for effective and efficient taping. Remember to clean your knife regularly, store it properly, sharpen it periodically, use proper technique, inspect for damage, and seek professional help if needed. With proper care and maintenance, your taping knife will consistently provide clean and smooth finishes on your drywall projects.