Having a sharp fillet knife is essential for any angler or chef who wants to achieve clean and precise cuts when working with fish. One of the best ways to sharpen a fillet knife is by using a whetstone. Whetstones have been used for centuries to sharpen all types of blades, including knives, swords, and axes. With a little practice and the right technique, you can easily sharpen your fillet knife to its optimal performance.
Step 1: Soak the Whetstone
Before you begin sharpening your fillet knife, it’s important to soak the whetstone in water for about 10 to 15 minutes. This will help to lubricate the surface of the stone and prevent the knife from getting stuck or damaged during the sharpening process.
Step 2: Find the Correct Angle
Next, you need to find the correct angle to hold the knife against the whetstone. A fillet knife typically has a thin and flexible blade, so a 15 to 20-degree angle is recommended. You can use your hand or a guide to help maintain a consistent angle throughout the sharpening process.
Step 3: Begin Sharpening
Hold the fillet knife firmly with one hand and place the edge of the blade against the whetstone at the chosen angle. Use light pressure and move the knife in a back-and-forth motion along the entire length of the stone. It’s important to maintain a consistent angle and pressure while sharpening to ensure an even edge.
Step 4: Test for Sharpness
After several passes on each side of the blade, you can test for sharpness by carefully running your finger along the edge. Be extra cautious to avoid any accidents. If the blade feels sharp and cuts through paper or fabric with ease, your fillet knife is ready to use. If not, continue sharpening until the desired sharpness is achieved.
Remember, sharpening a fillet knife with a whetstone requires patience and practice. It’s important to take your time and be mindful of the correct angle and pressure. With regular maintenance and sharpening, your fillet knife will remain sharp and efficient, making your fish preparation tasks a breeze.
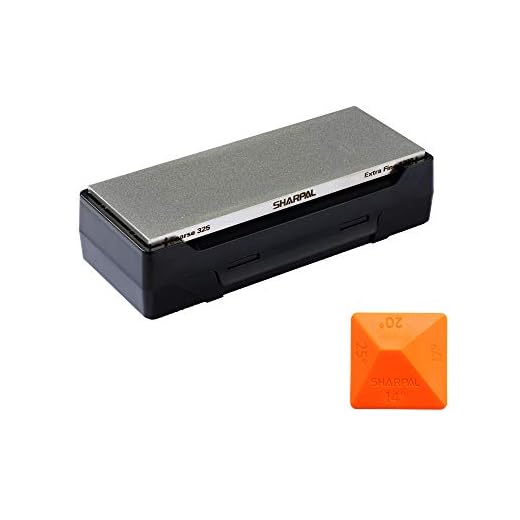
Choosing the Right Whetstone
When it comes to sharpening a fillet knife with a whetstone, choosing the right whetstone is crucial. There are several factors to consider when selecting a whetstone for sharpening your knife:
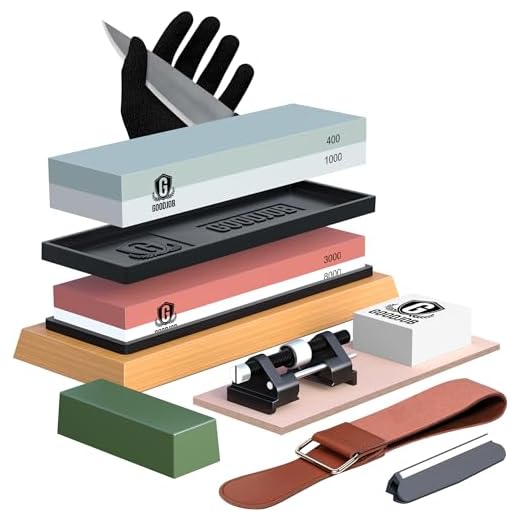
- Grit: The grit of a whetstone determines the coarseness or fineness of the sharpening surface. For fillet knives, a combination whetstone with a range of grits is recommended. Start with a medium grit (around 1000) to remove any nicks or dullness, then progress to a finer grit (3000-6000) for a polished, razor-sharp edge.
- Size: The size of the whetstone is also important. It should be large enough to comfortably accommodate your fillet knife while allowing you to maintain a consistent sharpening angle. Typically, a whetstone that is around 8 to 10 inches long and 2 to 3 inches wide is suitable for most fillet knives.
- Type: Whetstones come in different types, such as natural stones (like water stones) and synthetic stones (like ceramic or diamond stones). Natural stones are known for their ability to provide an extremely sharp edge, while synthetic stones are more durable and require less maintenance. Consider your personal preferences and needs when choosing between natural and synthetic whetstones.
Ultimately, the right whetstone for you will depend on your specific requirements and preferences. It’s a good idea to experiment with different types and grits of whetstones to find the one that works best for sharpening your fillet knife. Remember to follow the manufacturer’s instructions for proper use and maintenance of the whetstone to ensure optimal sharpening results.
Preparing the Whetstone for Sharpening
Before you can start sharpening your fillet knife, it’s important to properly prepare the whetstone. Follow these steps to ensure your whetstone is ready for use:
1. Soak the Whetstone
Begin by placing the whetstone in a bowl or container filled with water. Allow the stone to soak for about 10-15 minutes. This soaking process ensures that the stone absorbs enough water to provide the right lubrication during the sharpening process.
2. Position the Whetstone
Once the whetstone has finished soaking, carefully remove it from the water and place it on a stable, non-slip surface. You can use a damp towel or rubber mat to prevent the stone from moving around while sharpening your knife.

By properly preparing the whetstone, you’ll be creating the ideal conditions for sharpening your fillet knife effectively and safely.
Setting the Angle for Sharpening
One of the most important factors in sharpening a fillet knife is setting the correct angle. The angle at which you hold the knife against the whetstone will determine the sharpness and durability of the blade. For fillet knives, a common angle to aim for is around 20 degrees.
To set the angle, you can use a sharpening guide or rely on your own judgment. If you’re using a sharpening guide, follow the manufacturer’s instructions to attach it securely to the knife. This guide will help you maintain a consistent angle throughout the sharpening process.
If you’re relying on your own judgment, start by holding the knife at a 90-degree angle to the whetstone. Then, gradually tilt the blade until you reach the desired angle, approximately 20 degrees. You can estimate the angle by envisioning a line bisecting the angle between the knife’s edge and the whetstone’s surface. This line should be at a 20-degree angle.
Tips for Setting the Angle
Here are some additional tips to help you set the angle accurately:

- Keep your wrist and arm steady to maintain consistency.
- Use your non-dominant hand to guide and stabilize the knife while sharpening.
- Check the angle frequently during the sharpening process to ensure that you’re maintaining it.
- If you’re struggling to hold a consistent angle, consider using a sharpening guide.
Using a Table for Support
When sharpening a fillet knife with a whetstone, it’s important to have a stable surface for support. Placing the whetstone on a table or countertop provides a secure and level platform for sharpening. This helps to maintain a steady angle and reduces the risk of injuring yourself or damaging the knife.
| Advantages | Disadvantages | |
|---|---|---|
| Table | – Provides stability | – Requires a flat surface |
| Countertop | – Easy access | – May be less stable |
Choose a location that works best for you, ensuring that the surface is clean and free from any obstructions. Make sure the table or countertop is at a comfortable height for you to sharpen the knife without straining your back or arms. Adjust the position of the whetstone as needed to find the optimal angle for sharpening.
Sharpening the Blade in a Controlled Motion
When it comes to sharpening your fillet knife with a whetstone, it’s important to maintain a consistent and controlled motion to achieve the best results. Follow these steps to sharpen your blade effectively:
- Start by wetting the whetstone. Place it in a container of water and let it soak for approximately 10 minutes.
- Position the whetstone on a stable surface, such as a countertop or table, making sure it won’t move or slip during the sharpening process.
- Hold the fillet knife firmly with one hand, making sure to keep a secure grip on the handle.
- With your other hand, hold the blade at a 20-degree angle against the whetstone. Start from the base of the blade and move towards the tip in controlled strokes.
- Apply a moderate amount of pressure while moving the blade back and forth across the whetstone. Be sure to maintain the same angle throughout the sharpening process.
- Continue sharpening the blade for about 10 strokes on each side, making sure to maintain a consistent and controlled motion.
- Periodically check the sharpness of the blade by carefully running your finger along the edge. Be extremely cautious to avoid any accidents.
- If the blade is still not sharp enough, repeat the sharpening process until the desired sharpness is achieved.
- Once you’re satisfied with the sharpness of the blade, rinse it with water to remove any metal shavings or debris.
- Dry the blade with a clean towel or cloth, making sure it’s completely dry before storing it to prevent any rusting.
By following these steps and sharpening your fillet knife with a whetstone in a controlled motion, you’ll be able to maintain a razor-sharp edge for all your fillet cutting needs.
Testing and Finishing the Sharpening Process
Once you have finished sharpening your fillet knife with a whetstone, it is important to test the blade to ensure it has been properly sharpened. This helps to ensure the knife’s effectiveness and your safety when using it for filleting fish or other delicate tasks. Here are a few steps to follow:
Cutting Paper or Cardboard
One simple way to test the sharpness of your fillet knife is to attempt to cut through a piece of paper or cardboard. Hold the paper or cardboard in one hand and gently guide the knife through it. If the knife glides smoothly and effortlessly through the material, it indicates that the blade has been sharpened correctly.
Inspecting the Blade’s Edge
To further examine the sharpness of the blade, you can carefully inspect the edge. Hold the knife up to a light source and look for any reflections or light bouncing off the edge. A properly sharpened blade should have a clean and consistent edge without any gaps or irregularities.
Additionally, you can run your finger gently along the blade’s edge, being extremely cautious not to cut yourself. The edge should feel smooth and uniform, without any rough spots or nicks.
If you find that the blade is not as sharp as desired, you can repeat the sharpening process using the whetstone. Remember to follow the correct technique and angle to ensure consistent results.
Once you are satisfied with the sharpness of the blade, it is important to clean and dry it thoroughly to remove any metal dust or residue that may have accumulated during sharpening.
Lastly, it is a good practice to store your newly sharpened fillet knife in a protective sheath or knife block to prevent accidental injuries and maintain its sharpness for longer periods.
By following these testing and finishing steps, you can ensure that your fillet knife is sharpened effectively and ready for use in your culinary adventures.