Dovetail joints are a popular and attractive way to join pieces of wood together, known for their strength and durability. Traditionally, dovetail joints were made by skilled craftspeople using hand tools, but with the help of a jigsaw, you can create these beautiful joints with ease.
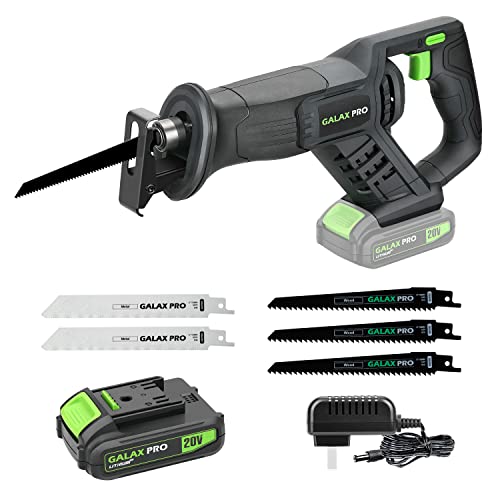
A jigsaw is a versatile power tool that allows you to make curved cuts and intricate shapes in wood. While it may not be the first tool that comes to mind when you think of dovetail joints, it can be a practical and efficient option, especially for those new to woodworking.
To make dovetail joints with a jigsaw, you will need a dovetail jig, which acts as a guide to help you create the perfect joint. The jig provides the template and the angles needed to cut the dovetail shape. With the right technique and attention to detail, you can achieve professional-looking dovetail joints that will impress even the most seasoned woodworker.
Before you begin, it’s important to familiarize yourself with the jigsaw and the dovetail jig. Read the manufacturer’s instructions and practice making cuts on scrap wood to get a feel for the tool and the jig. Once you are comfortable, you can begin making dovetail joints for your woodworking projects.
What is a dovetail joint?
A dovetail joint is a strong and traditional woodworking joint that is commonly used to join two pieces of wood together at a right angle. It is known for its strength, durability, and aesthetic appeal. The joint gets its name from the shape of the interlocking tails and pins that resemble a dove’s tail.
Dovetail joints are most commonly used in furniture making, especially for drawers. They are also used in cabinets, boxes, and other woodworking projects where a strong joint is needed. The joint creates a mechanical interlock between the two pieces of wood, making it resistant to pulling apart, twisting, and warping.
Types of dovetail joints
There are several different types of dovetail joints, each with its own unique attributes and uses. The most common types include:
- Through Dovetail Joint: This is the most recognizable type of dovetail joint, characterized by its exposed pins and tails on both sides of the joint. It is often used in visible areas of a project where appearance is important.
- Half-blind Dovetail Joint: In this type of joint, the tails are not visible from the front of the joint, providing a more seamless and clean appearance. It is commonly used in drawer construction.
- Sliding Dovetail Joint: This joint is used to join two pieces of wood at an angle other than 90 degrees. It allows for a sliding fit and is commonly used in shelves, partitions, and other similar applications.
Dovetail joints can be made by hand using chisels and a saw, but they can also be made with the help of a jig and a jigsaw, which provides more accuracy and speeds up the process. Using a jig and a jigsaw is especially useful for beginners or those who need to make a large number of dovetail joints consistently.
Overview of dovetail joints and their uses
Dovetail joints are a traditional woodworking technique that involve interlocking wedge-shaped cuts to join two pieces of wood. They are known for their strength and durability, making them popular for furniture, cabinets, and other woodworking projects.
Types of dovetail joints:
- Through Dovetail: This joint is visible from both sides of the wood and is often used for decorative purposes. It is commonly found in drawer construction.
- Half-blind Dovetail: In this joint, one side of the joint is hidden, resulting in a more seamless appearance. It is often used in cabinetry and high-end furniture.
- Sliding Dovetail: This joint involves a sliding fit, allowing movement between the two pieces of wood. It is commonly used in shelf supports and drawer dividers.
Advantages of dovetail joints:
- Durability: Dovetail joints are known for their strength and resistance to pulling apart.
- Aesthetics: The interlocking cuts of dovetail joints create an attractive and decorative look.
- Alignment: Dovetail joints help to ensure proper alignment of the wood pieces, resulting in a more accurate and precise fit.
- Reinforcement: The interlocking design of dovetail joints provides additional reinforcement to the joint, making it less likely to fail under pressure.
Overall, dovetail joints are a versatile and reliable technique for joining wood pieces. Whether you are a seasoned woodworker or just starting out, learning how to make dovetail joints can greatly enhance your woodworking skills and create strong and beautiful furniture pieces.
Tools required for making dovetail joints
When it comes to making dovetail joints with a jigsaw, there are several tools that you will need to ensure a successful and accurate result. Here are the essential tools required for making dovetail joints:
1. Jigsaw
The jigsaw is the primary tool you will need to cut the dovetail joints. Choose a jigsaw with a fine-toothed blade that is suitable for cutting through wood. A jigsaw with variable speed capability is also helpful for achieving precise and controlled cuts.
2. Dovetail Jig
A dovetail jig is a specialized tool that helps guide the jigsaw along the desired path for creating dovetail joints. It holds the workpiece securely and provides a template or guide for cutting the dovetail profiles. Ensure that the dovetail jig you choose matches the type and size of dovetails you want to create.
3. Clamps
Clamps are essential for holding the workpiece securely in place when making dovetail joints. Use clamps to attach the workpiece to the dovetail jig or a workbench, ensuring stability and accuracy during the cutting process.
4. Safety Equipment
It is crucial to prioritize safety when working with power tools. Be sure to wear safety goggles to protect your eyes from flying wood chips and dust. Additionally, wearing ear protection and a dust mask is highly recommended to minimize the risk of hearing damage and respiratory issues.
5. Measuring Tools
Accurate measurements are key to successful dovetail joints. Use a measuring tape or ruler to mark the dimensions of the dovetails on the workpiece, ensuring precise positioning and alignment.
With these tools, you will have everything you need to make dovetail joints with a jigsaw. Remember to always follow safety guidelines and take your time to achieve the best results.
Step-by-step guide to making dovetail joints
Making dovetail joints with a jig saw is a great way to create strong and durable connections between pieces of wood. In this step-by-step guide, we will go through the process of making dovetail joints using a jig saw.
Step 1: Mark the wood: Start by marking the wood where you want the dovetail joint to be. Use a square and a pencil to make precise markings.
Step 2: Set up the jig saw: Attach a fine-toothed dovetail blade to the jig saw. Make sure the blade is securely in place and tight. Adjust the cutting depth according to the thickness of the wood.
Step 3: Make the angled cuts: Position the jig saw at a 45-degree angle to the marked lines on the wood. Slowly and steadily guide the jig saw along the marked lines, making the angled cuts for the dovetail joint.
Step 4: Remove the waste: Use a chisel or a coping saw to remove the waste material between the angled cuts. Take your time and be careful not to damage the remaining wood.
| Step 5: Test the fit: | Step 6: Apply glue and assemble: |
|---|---|
| Test the fit of the dovetail joint by dry fitting the pieces together. Use a mallet to gently tap the pieces into place. If the joint is too tight, carefully trim the wood until you achieve a snug fit. | Apply a small amount of wood glue to the dovetail joint and carefully assemble the pieces. Make sure the joint is aligned correctly and use clamps to hold the pieces together while the glue dries. |
Step 7: Sand and finish: Once the glue has dried, use sandpaper to smooth out any rough edges and achieve a polished finish. Apply a wood finish of your choice to protect and enhance the appearance of the dovetail joint.
By following these steps, you can create precise and strong dovetail joints using a jig saw. Practice and patience are key to mastering this woodworking technique, so don’t be discouraged if your first attempts are not perfect. With time and experience, you will be able to create beautiful dovetail joints that will add both strength and aesthetics to your woodworking projects.
Tips and tricks for creating perfect dovetail joints
Creating dovetail joints with a jig saw can be a challenging task, but with the right techniques and attention to detail, you can achieve perfect results. Here are some tips and tricks to help you create flawless dovetail joints:
1. Use a high-quality jig saw: Investing in a good quality jig saw with a sharp blade will ensure clean and accurate cuts, making it easier to create precise dovetail joints.
2. Mark your measurements carefully: Accurate measurements are crucial for creating well-fitting dovetail joints. Use a marking gauge or a ruler to mark the measurements on both the pin and tail boards.
3. Start with shallow cuts: To avoid creating deep, uneven cuts, start with shallow cuts and gradually deepen them as needed. This will allow you to maintain control over the cutting depth and prevent any mistakes.
4. Use a guide block: A guide block can help you achieve consistent spacing and alignment for your dovetail cuts. Attach the guide block to your jig saw, and use it as a reference point to guide your cuts.
5. Test your joints: Before finalizing your cuts, it’s important to test the fit of your dovetail joints. Dry fit the pieces together to ensure they align correctly and make any necessary adjustments before permanently joining them.
6. Sand and finish: After joining your dovetail joints, use sandpaper or a file to smooth any rough edges. Apply a finish to protect the wood and enhance the appearance of the joints.
7. Practice: Like any skill, creating perfect dovetail joints takes practice. Start with simple projects and gradually move on to more complex ones as your skills improve. Don’t be discouraged by initial mistakes – keep practicing, and you’ll soon master the art of dovetail joinery.
By following these tips and tricks, you’ll be able to create beautiful and seamless dovetail joints with a jig saw. Remember to take your time, be patient, and pay attention to the details – the end result will be well worth the effort!
Common mistakes to avoid when making dovetail joints
Creating dovetail joints with a jig saw can be a rewarding woodworking project, but it’s important to avoid certain common mistakes that can undermine the quality and durability of your joints. Here are some key pitfalls to watch out for:
1. Incorrect marking and measuring
One of the most crucial steps in making dovetail joints is accurately marking and measuring the wood. It’s essential to use precise measurements and ensure that the angles are marked correctly. Careful attention to detail in this step will make the rest of the process much easier.
2. Improper sawing technique
Using a jig saw requires proper technique to ensure clean and accurate cuts. One mistake to avoid is applying too much pressure, which can cause the blade to wander and create uneven cuts. It’s important to let the saw do the work and guide it steadily through the wood.
Another mistake is not following the marked lines. It’s important to stay on the lines to achieve tight-fitting joints. Deviating from the lines can result in gaps or misaligned joints.
3. Neglecting to practice on scrap wood
Dovetail joints can be challenging, especially for beginners. Before tackling your project, it’s highly recommended to practice on scrap wood to familiarize yourself with the process and improve your technique. This will help you avoid mistakes and ensure a higher quality end result.
Conclusion
Avoiding these common mistakes will significantly increase the likelihood of creating strong and aesthetically pleasing dovetail joints. Taking the time to carefully mark and measure the wood, using proper sawing techniques, and practicing beforehand are all essential steps in achieving successful dovetail joints with a jig saw.