A dado cut is a type of joint used in woodworking that allows you to create a groove or channel in a piece of wood. This is commonly done with a table saw, a powerful and versatile tool that is commonly found in woodworking shops. By following a few simple steps, you can learn how to make a dado cut with a table saw and expand your woodworking skills.
Before making a dado cut, it is important to understand the purpose and benefits of this type of joint. Dado cuts are often used to join two pieces of wood together or create a slot for a shelf to fit into. They provide a strong and secure connection, and they can be used to create a wide range of woodworking projects, such as bookshelves or cabinets.
To make a dado cut with a table saw, you will need to adjust the blade height and the fence position. The blade should be set at the desired depth, usually between 1/4 and 1/2 inch, depending on the thickness of the wood. The fence should be set to the desired width of the dado cut, which is usually determined by the width of the material you are working with.
Once the blade height and fence position are set, you can begin making the dado cut. Start by positioning the wood against the fence and aligning the blade with the mark you made for the start of the cut. Turn on the table saw and slowly push the wood through the blade, making sure to maintain a steady and even pressure. Use a push stick or a push block to keep your hands safe and away from the blade.
What is a dado cut and why is it useful?
A dado cut is a woodworking technique that involves making a wide slot or groove in a piece of wood. This slot is typically cut across the grain of the wood and is used to join pieces together, create shelves, or insert panels. Dado cuts are commonly used in cabinetry, bookcases, and other furniture making applications.
One of the main reasons why a dado cut is useful is because it provides a strong and secure joint. By creating a groove that perfectly fits another piece of wood, you can ensure a tight, precise fit. This helps to prevent the joint from wobbling or becoming loose over time. Additionally, dado cuts increase the gluing surface area, resulting in a stronger bond between the pieces.
Benefits of using dado cuts:
1. Improved structural integrity: Dado cuts help to create strong joints, ensuring the overall stability of the project.
2. Efficient use of materials: By using dado cuts, you can economically utilize wood as panels or shelves can be easily inserted into the grooves.
Overall, dado cuts are a valuable technique in woodworking as they provide a sturdy joint and allow for efficient use of materials. Whether you are building furniture or constructing cabinets, utilizing dado cuts can enhance the strength and durability of your projects.
Understanding the basics of dado cuts
When it comes to woodworking, one important technique to master is making dado cuts. A dado cut is a type of groove or slot cut into a piece of wood to accommodate another piece of wood, such as a shelf. This technique is commonly used in joinery and cabinet making.
What is a dado cut?
A dado cut is a wide and shallow cut that is made across the grain of the wood. It is different from a rabbet cut or a groove cut in that it is wider and more substantial, providing more support for the piece of wood that will fit into it.
Typically, dado cuts are made using a table saw with a dado blade or a stacked dado set. A dado blade is a special type of circular saw blade that is designed to make wider cuts, while a stacked dado set consists of multiple blades stacked together to create the desired width.
Why use dado cuts?
There are several reasons why dado cuts are commonly used in woodworking projects. One of the main reasons is to create strong and secure joints between pieces of wood. Dado cuts provide a larger gluing surface area for better adhesion, resulting in a more stable and durable joint.
In addition to creating strong joints, dado cuts also allow for easy adjustments and interchangeability. For example, in a bookshelf, dado cuts can be used to hold the shelves in place, allowing for easy removal and rearrangement of the shelves as needed.
Dado cuts are also great for hiding the edges of plywood or particleboard, providing a more finished and professional look to your woodworking projects.
Overall, understanding the basics of dado cuts is essential for any woodworker, as it is a versatile and important technique used in many different types of woodworking projects.
The Benefits of Using Dado Cuts in Woodworking Projects
When it comes to woodworking projects, one of the most versatile techniques you can learn is making dado cuts with a table saw. A dado cut, also known as a housing joint, is a method of cutting a groove or channel into a piece of wood to create a snug and secure fit for joining two pieces together.
1. Strong and Stable Joints
One of the main benefits of using dado cuts in woodworking projects is that they result in strong and stable joints. Because the dado cut creates a precise groove in the wood, it allows for a greater surface area for the joint, resulting in increased strength and stability. This makes dado cuts ideal for constructing furniture, cabinets, and shelving units that require durable and long-lasting connections.
2. Efficient and Timesaving
Another advantage of utilizing dado cuts is the efficiency and time-saving aspect of this technique. Because the table saw can be set up with a dado blade, you can easily adjust the width and depth of the cut for various applications. This eliminates the need for multiple passes or using additional tools, such as a router, to achieve the desired groove. By making dado cuts, you can save valuable time and complete your woodworking projects faster.
3. Versatility and Design Flexibility
Dado cuts offer a wide range of design possibilities and flexibility in woodworking projects. By utilizing different widths and depths, you can create variations in the appearance and functionality of your joints. This makes dado cuts suitable for various applications, such as creating strong shelves or decorative moldings. Additionally, dado cuts can be used for joinery in both straight and angled joints, allowing for more design versatility in your woodworking projects.
In conclusion, using dado cuts in woodworking projects provides several benefits, including strong and stable joints, increased efficiency and time-saving, as well as versatility and design flexibility. By mastering this technique, you can enhance the strength and durability of your woodworking projects while also adding an element of visual interest to your designs.
Tools and equipment needed for making dado cuts
When it comes to making dado cuts with a table saw, having the right tools and equipment is essential for achieving accurate and clean results. Here is a list of the necessary items:
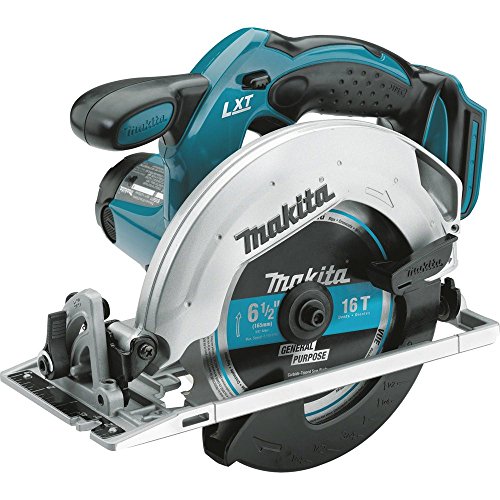
Table Saw
A table saw is the primary tool for making dado cuts. It consists of a circular saw blade mounted on an arbor and can be adjusted to different heights and angles. Ensure the table saw is in good working condition and the blades are sharp for clean and precise cuts.
Dado Blade Set
A dado blade set is crucial for making dado cuts. It typically includes two outer blades and a set of chippers that fit in between. The width of the dado cut can be adjusted by adding or removing chippers. Make sure the blades are installed correctly and securely on the arbor.
Push Stick
A push stick is necessary to safely feed the wood into the table saw and keep your hands away from the blade. It provides control and helps prevent kickback. Choose a push stick that is comfortable to hold and allows for a firm grip.
Dado Insert Plate
A dado insert plate is a special plate that replaces the standard throat plate on the table saw. It has a wider opening to accommodate the dado blades. Ensure the dado insert plate is compatible with your specific table saw model.
| Item | Description |
|---|---|
| Table Saw | The primary tool for making dado cuts consisting of a circular saw blade mounted on an arbor. |
| Dado Blade Set | A set of blades and chippers that allow for adjustable width dado cuts. |
| Push Stick | A safety tool for feeding wood into the table saw and preventing kickback. |
| Dado Insert Plate | A specialized throat plate that accommodates the wider dado blades. |
With these tools and equipment, you will be well-equipped to make precise and clean dado cuts with your table saw.
Choosing the right table saw for dado cuts
When it comes to making dado cuts, having the right table saw can make all the difference. A dado cut is a type of groove or trench that is made across the grain of the wood. It is commonly used to create strong joints for woodworking projects.
There are a few key factors to consider when selecting a table saw for dado cuts. Firstly, the saw should have the capability to handle dado blades. Not all table saws are designed to accommodate dado blades, so it’s important to check the specifications before making a purchase.
Another important consideration is the power of the table saw. Dado cuts require a greater amount of power compared to regular cuts, as the blades are wider. Look for a saw with a high-powered motor to ensure smooth and efficient cutting.
It’s also essential to choose a table saw with a wide enough rip capacity. The rip capacity refers to the distance between the saw blade and the edge of the table. Since dado cuts require more material to be removed, a wider rip capacity will allow for larger dado cuts.
Additionally, a table saw with a sturdy and stable fence is crucial. The fence helps guide the wood during the cutting process, ensuring accurate and straight dado cuts. Look for a fence that can be easily adjusted and locked securely into position.
Finally, consider the overall build quality and durability of the table saw. A well-built saw will not only provide better results but also last longer. Look for a table saw made from high-quality materials and with solid construction.
In summary, a table saw that can accommodate dado blades, has a powerful motor, wide rip capacity, stable fence, and durable build is ideal for making dado cuts. Taking the time to choose the right table saw for your specific needs will greatly enhance your woodworking projects and result in clean and precise dado cuts.
Essential accessories for making dado cuts
When it comes to making dado cuts with a table saw, having the right accessories can greatly improve your results and make the process easier and more efficient. Here are some essential accessories to consider:
Dado blade setA dado blade set is a specialized blade that allows you to make dado cuts with precision. It consists of two outer blades and a set of chippers that fit in between them. The width of the dado cut can be adjusted by adding or removing chippers. Investing in a quality dado blade set is crucial for achieving clean and accurate dado cuts. |
Dado insert plateA dado insert plate is a specially designed insert that replaces the standard throat plate on your table saw. It features a wider opening that allows the dado blade to cut through the material. Using a dado insert plate ensures that the workpiece is properly supported and prevents tear-out and other issues that can occur when making dado cuts. |
Dado sledA dado sled is a useful accessory for making dado cuts, especially for larger workpieces. It provides additional support and stability, making it easier to guide the workpiece through the dado blade. A dado sled also reduces the risk of kickback and improves overall safety. |
FeatherboardsFeatherboards are devices that hold the workpiece against the fence and table, ensuring a consistent and straight cut. When making dado cuts, featherboards help keep the workpiece in place and prevent it from drifting away from the fence or lifting off the table, resulting in more accurate dado cuts. |
By investing in these essential accessories, you will have everything you need to make clean, precise, and safe dado cuts with your table saw. Remember to always follow the manufacturer’s instructions and prioritize safety when working with power tools.
Step-by-step guide to making a dado cut with a table saw
Creating a dado cut with a table saw is a useful technique for making grooves or channels in wood, often used for joinery work. This step-by-step guide will walk you through the process of making a dado cut safely and accurately using a table saw.
Step 1: Set up the table saw
Ensure that your table saw is properly set up and adjusted for this task. Make sure the blade is at the correct height and the fence is square to the blade. It’s important to wear appropriate safety gear, such as safety glasses and ear protection, before proceeding.
Step 2: Mark the dado cut location
Using a measuring tape and a pencil, mark the starting and ending points of the dado cut on your workpiece. It’s essential to be precise with your measurements to ensure a clean and accurate cut.
Step 3: Adjust the table saw blade
Set the width of the dado by adjusting the table saw blade’s height. The blade should be set to the desired depth of the groove you want to create. Consult your table saw’s manual for specific instructions on adjusting the blade height.
Step 4: Install the dado blade set (optional)
If you have a dado blade set, you can replace the standard blade with the dado blade stack. This will allow you to make wider dado cuts in a single pass. Follow the manufacturer’s instructions to ensure the dado blade set is installed correctly.
Step 5: Set the fence
Position the fence on the table saw to control the width of the dado cut. Make sure the fence is parallel to the blade and aligned with the marked dado cut location on your workpiece.
Step 6: Make the dado cut
Turn on the table saw and carefully feed the workpiece into the blade. Use a steady and controlled motion, making sure to keep your hands clear of the blade and the path of the wood. Push the workpiece past the blade until you reach the marked ending point of the dado cut.
Step 7: Repeat if necessary
If you need to make multiple passes to achieve the desired width of the dado cut, adjust the fence accordingly and repeat Step 6 until you reach the desired depth and width.
Step 8: Clean up the dado cut
Once the dado cut is complete, use a chisel or a sharp woodworking tool to clean up any rough edges or imperfections in the groove. Sand the dado cut if necessary to achieve a smooth finish.
By following these step-by-step instructions, you can confidently and accurately make dado cuts with a table saw. Remember to prioritize safety and take your time to ensure the best results.
Preparing the table saw for dado cuts
Before making dado cuts with a table saw, it is important to properly prepare the saw for the task. Following these steps will ensure a safe and accurate cut:
1. Choose the right blade:
For dado cuts, it is necessary to use a stack dado blade set. This blade consists of two outer blades and a set of removable chippers that fit in between. Make sure the blade is suitable for the thickness of the dado cut you need.
2. Adjust the blade height:
Before starting, ensure that the table saw blade is set at the right height. For dado cuts, the blade should be raised to the desired depth of the cut. Use the height adjustment wheel on the table saw to make precise adjustments.
3. Install the dado blade set:
Follow the manufacturer’s instructions to install the stack dado blade set on the table saw arbor. Make sure to tighten the blade securely, but avoid over-tightening, as it can damage the blade or the saw.
4. Adjust the fence position:
The fence is an important component in making dado cuts. Adjust the position of the fence to align it with the outer edge of the dado cut you want to make. This ensures the workpiece stays straight and prevent any dangerous kickback.
5. Set the dado width:
Using a dado width gauge or measurements, set the width of the dado on the fence. Secure the fence in place using the locking mechanism on the table saw.
6. Test the setup:
Before making your final cut, it is always a good idea to make a test cut on a scrap piece of wood. This will allow you to make any necessary adjustments before working on your actual project.
By following these steps, you will be able to properly prepare your table saw for dado cuts. Remember to always prioritize safety and accuracy when working with power tools.