Creating custom signs, plaques, and decorative items with words is a popular craft that many woodworking enthusiasts enjoy. One tool that is commonly used for this purpose is a scroll saw. A scroll saw is a versatile and precise cutting tool that can be used to cut intricate shapes and designs, including words and letters. In this article, we will guide you through the process of using a scroll saw to cut words, from choosing the right scroll saw blade to finishing your final piece.
To begin, you will need to gather the necessary materials and tools. Apart from the scroll saw, you will need a piece of wood or other material to cut your words into, a pencil to sketch your design, and a scroll saw blade suitable for cutting intricate shapes. It’s important to choose a blade with the appropriate teeth per inch (TPI) for your project. The higher the TPI, the finer the blade and the smoother the cut.
Next, you will need to transfer your word or letter design onto the piece of wood. Using a pencil, lightly sketch out your design, ensuring that it is centered and symmetrical. If you are new to scroll sawing, it may be helpful to start with simple, block-style letters before progressing to more ornate fonts.
Once your design is sketched out, it’s time to begin cutting. Before turning on the scroll saw, ensure that your work area is clear of any obstructions and that you are wearing the appropriate safety gear, such as safety glasses and ear protection. Start by inserting the blade into the pre-drilled hole in your wood and turning on the scroll saw.
Important Tip: To achieve smooth and precise cuts, it is essential to move the wood, not the scroll saw. Simply guide the wood along the predefined lines of your design, allowing the scroll saw blade to do the cutting. Take your time and go slow to prevent any mistakes or accidents.
In conclusion, using a scroll saw to cut words can be a rewarding and creative woodworking project. With the right materials, tools, and technique, you can create beautiful and personalized items for yourself or as gifts for others. Remember to practice patience and precision, and most importantly, have fun!
What is a scroll saw?
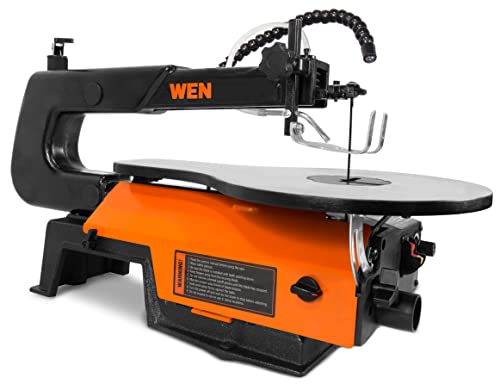
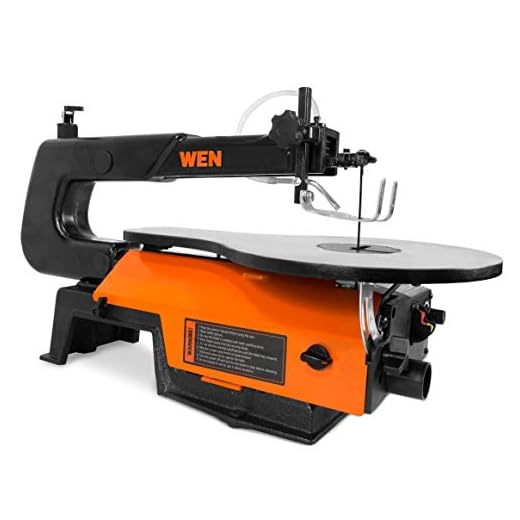
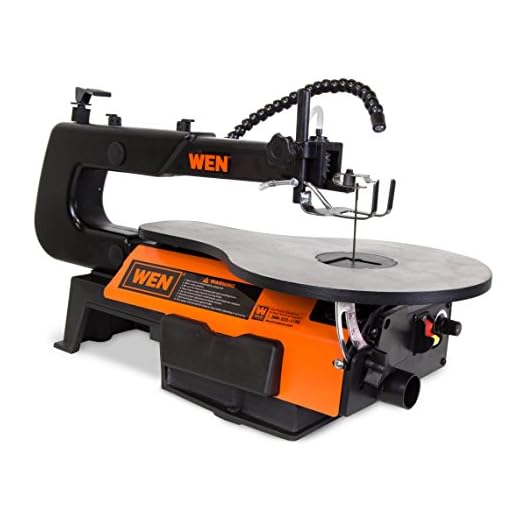
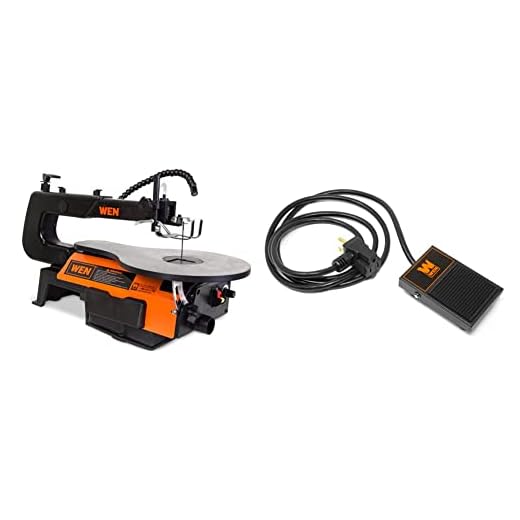
A scroll saw is a type of power tool that is used for intricate and detailed cutting. It is similar to a jigsaw, but with a smaller and finer blade that allows for more precise cuts. The scroll saw is commonly used by craftsmen and hobbyists to create intricate patterns, designs, and even words in various materials like wood, metal, or plastic.
The scroll saw consists of a motorized saw blade that moves up and down rapidly in a vertical motion, allowing for precise and controlled cuts. The blade is attached to an arm that pivots, allowing for maneuverability and flexibility in cutting curves and angles. The speed of the blade can be adjusted to suit the material and the desired cut.
Features of a scroll saw:
1. Variable speed control: This feature allows the user to adjust the speed of the blade, which is crucial for different materials and types of cuts.
2. Dust blower: A scroll saw is equipped with a dust blower to remove debris and dust from the cutting area, ensuring a clear view of the workpiece.
Uses of a scroll saw:
1. Woodworking: Scroll saws are commonly used in woodworking projects to create intricate designs, cut dovetail joints, make custom wooden letters or numbers, and more.
2. Crafts and hobbies: The scroll saw is popular among artists and hobbyists for creating detailed sculptures, patterns, and decorations in various materials.
3. Sign making: Scroll saws are often used in sign making to cut out letters or words from different materials like wood or acrylic.
Overall, a scroll saw is a versatile and powerful tool that allows for precise and intricate cutting, making it ideal for creating words or any other intricate designs.
Getting started with a scroll saw
A scroll saw is a versatile power tool that can be used to cut intricate designs and patterns in wood and other materials. If you’re new to using a scroll saw, here are some steps to help you get started.

Choosing the right scroll saw
Before you begin using a scroll saw, it’s important to choose the right one for your needs. Consider factors such as the size of the projects you plan to work on, the type of materials you’ll be cutting, and your budget. Research different models and read reviews to find one that suits you.
Setting up your workspace
Once you have your scroll saw, you’ll need to set up a workspace that is safe and comfortable. Find a well-lit area with sufficient ventilation to work in. Clear away any clutter and ensure that you have enough space to maneuver your materials.
It’s also a good idea to have a workbench or table dedicated to your scroll saw. This will provide stability and a designated area for your tools and supplies. Make sure the surface is level and sturdy.
Preparing your materials
Before you start cutting, you’ll need to prepare your materials. Choose the type of wood or other material that is suitable for your project and cut it into manageable pieces. Ensure that your materials are clean and dry to prevent any issues during the cutting process.
If you’re planning to cut words or letters, transfer your design onto the material using a pencil or stencil. This will help guide your cuts and ensure accuracy.
Using the scroll saw
When using a scroll saw, it’s important to take safety precautions. Wear safety goggles to protect your eyes from debris and use a dust mask to prevent inhalation of sawdust. Familiarize yourself with the different controls and features of your scroll saw.
Position your material on the table and adjust the blade tension according to the manufacturer’s instructions. Start the saw at a low speed and gradually increase it as you become more comfortable. Move the material slowly and steadily, following the lines of your design.
Take breaks when needed and regularly inspect the blade for any signs of wear or damage. Replace the blade as necessary to ensure clean cuts.
Once you have finished cutting, carefully remove the material from the scroll saw and clean up any sawdust or debris from your workspace.
With practice and patience, you’ll become more proficient at using a scroll saw and be able to create intricate designs and words with ease.
Step-by-step guide to cutting words
Using a scroll saw to cut words can be a fun and creative way to personalize your projects. Whether you want to add a name or a meaningful quote to a wooden sign or create custom lettering for a craft project, a scroll saw can help you achieve precise and intricate cuts. Here is a step-by-step guide to cutting words using a scroll saw:
1. Choose the right font and size
Before you start cutting, consider the font and size of the words you want to cut. You can use stencils or print out the words in the desired font and size to use as a template. This will help you visualize how the final result will look and ensure that your words fit well on your project.
2. Prepare the material
Next, prepare the material you will be cutting the words into. It can be wood, acrylic, or any other material that is compatible with your scroll saw. Make sure the material is securely fixed to the scroll saw table and that it won’t move or vibrate while you cut.
3. Transfer the template
Once you have your template ready, transfer the words onto the material. You can use carbon paper or simply trace the letters onto the material using a pencil. Ensure the letters are centered and evenly spaced according to your design.
4. Wear safety gear
Before operating the scroll saw, put on safety gear such as safety glasses and a dust mask to protect yourself from flying debris and dust particles. It’s important to prioritize safety while working with power tools.
5. Start cutting
Now you’re ready to start cutting! Turn on the scroll saw and slowly feed the material into the blade, following the lines of the letters. Take your time and make precise cuts, especially on curved or intricate parts of the letters. Remember to always keep your fingers away from the blade.
6. Clean up the cuts
After cutting all the letters, you may need to clean up the edges or remove any rough spots. Use sandpaper or a file to smooth out the cuts and ensure they are clean and neat. This will give your words a polished and professional finish.
7. Finish and display
Once you are satisfied with the cuts and the finishing, you can proceed to finish the material according to your preference. You can add a protective coat of varnish or paint the words to match your project. Finally, display your words proudly on your finished project!
By following this step-by-step guide, you can easily cut words using a scroll saw and create stunning and personalized projects. Remember to practice patience and precision for the best results. Happy cutting!