If you are a DIY enthusiast or a professional woodworker, you know the importance of having a circular saw that is both efficient and reliable. The Evolution circular saw is a popular choice among many woodworkers due to its advanced features and precision cutting. One crucial step in using a circular saw is fitting the saw blade correctly. In this article, we will guide you on how to fit a saw blade on an Evolution circular saw.
Step 1: Safety First
Before you start fitting the saw blade, it is essential to prioritize safety. Make sure the circular saw is unplugged from the power source. Wear protective gear such as safety glasses and gloves to prevent any accidents or injuries. Safety should always be your top priority when working with power tools.
Step 2: Understanding the Blade
Evolution circular saws come with different blade sizes and types, depending on the application. Before fitting a new blade, ensure you have the correct blade size and type for the specific task at hand. Check the manufacturer’s recommendations or the user manual for guidance on the suitable blade for various materials and cutting applications.

Step 3: Removing the Old Blade
To fit a new saw blade, you first need to remove the old one. Locate the blade lock button or spindle lock on your Evolution circular saw. Use a wrench or the provided tool to hold the arbor in place while loosening the blade with another wrench. Rotate the blade counterclockwise until it comes off the arbor. Once the old blade is removed, dispose of it safely.
Step 4: Fitting the New Blade
Now that the old blade is removed, you can proceed to fit the new one. Align the new saw blade’s center hole with the arbor of the Evolution circular saw. Ensure the teeth on the blade are facing in the direction of rotation, which is typically indicated on the saw. Hold the arbor in place with the provided tool or a wrench while tightening the blade clockwise with another wrench. Make sure the blade is secure and tightly fitted before proceeding.
Step 5: Double-Checking and Testing

Once the new saw blade is fitted, give it a final check to ensure it is properly aligned and tightened. Examine the blade’s positioning and make any necessary adjustments. Once you are satisfied with the blade’s fit, plug in the Evolution circular saw and conduct a test cut on a scrap piece of material. This will help you determine if the blade is properly installed and ready for use.
By following these steps, you can fit a saw blade on your Evolution circular saw correctly. Remember to always prioritize safety, use the appropriate blade, and double-check the fitting before starting any cutting operation. With the right blade and proper installation, your Evolution circular saw will continue delivering precise and efficient cutting performance.
Guide to Fitting a Saw Blade on Evolution Circular Saw
Evolution circular saws are known for their high-quality performance and versatile cutting capabilities. To ensure the best results, it’s important to properly fit a saw blade on your Evolution circular saw. Here’s a step-by-step guide on how to do so:
Step 1: Safety First
Before starting any work on your Evolution circular saw, make sure you wear protective gear such as safety goggles, gloves, and a dust mask. This will help prevent any injuries or accidents.
Step 2: Unplug the Saw
Always unplug your saw from the power source before attempting to fit or remove a saw blade. This will prevent any accidental starting of the saw during the blade-changing process.

Step 3: Remove the Old Blade
Locate the arbor lock button or lever on your Evolution circular saw. This is usually found near the blade housing. Press and hold the arbor lock to stop the blade from rotating. Use a wrench or blade changing tool provided with your saw to loosen and remove the blade bolt or nut. Carefully take out the old blade, making sure to keep track of any washers or spacers.
Step 4: Prepare the New Blade
Inspect the new saw blade for any defects or damage. Make sure it is the correct size and type for your Evolution circular saw. Clean any debris or sawdust from the mounting hole of the new blade. If necessary, install any washers or spacers that were included with the saw blade.
Step 5: Fit the New Blade
Carefully place the new saw blade onto the arbor of the Evolution circular saw, aligning the mounting hole with the arbor. Tighten the blade bolt or nut securely using a wrench or the blade changing tool. Make sure the blade is properly seated and does not wobble.
Step 6: Test and Adjust
Once the new saw blade is fitted, plug in your Evolution circular saw and perform a quick test cut on a scrap piece of wood. Ensure that the blade is cutting smoothly and does not deflect or bind. If necessary, make any adjustments to the blade alignment or tension before using it on your intended project.
| Tips: |
|---|
| Always refer to the user manual or manufacturer’s instructions for specific information on fitting a saw blade on your Evolution circular saw. |
| Regularly inspect your saw blade for any signs of wear or damage. Replace it if necessary to maintain optimal cutting performance. |
| Never force a blade onto the arbor or overtighten the blade bolt or nut. This can lead to damage to the saw blade or the saw itself. |
By following these steps and taking the necessary precautions, you can easily fit a saw blade on your Evolution circular saw and ensure safe and accurate cuts for your woodworking projects.

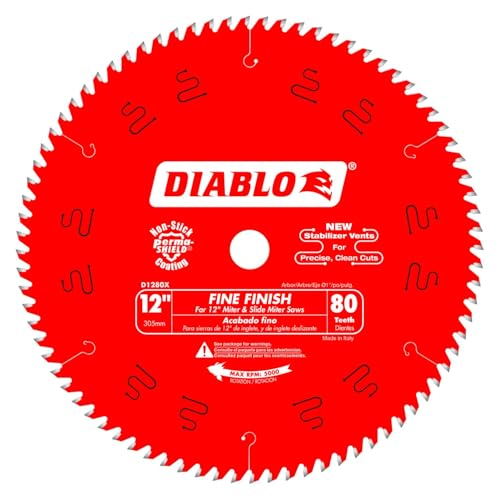
Choosing the Right Blade
When it comes to fitting a saw blade on your Evolution circular saw, it is important to choose the right blade for the job. The blade you select will depend on the type of material you are cutting and the desired end result.
Consider the Material
Before choosing a blade, consider the type of material you will be cutting. Evolution offers a range of blades specifically designed for cutting various materials, including wood, metal, plastic, and masonry.
- For cutting wood, a general-purpose blade with a high tooth count is ideal. This type of blade will make clean and accurate cuts.
- If you are working with metal, look for a blade with a lower tooth count and a specialized design for metal cutting. These blades are made from stronger materials to withstand the demands of metal cutting.
- When cutting plastic, a blade with a high tooth count and a special coating to reduce friction is recommended. This will help prevent melting and ensure smooth cuts.
- For masonry cutting, choose a blade specifically designed for this task. These blades have diamond-tipped teeth to handle the hardness of masonry materials.
Consider the Finish
In addition to the material, consider the desired finish of your cuts. For rough cuts where the finish is not a major concern, a blade with a lower tooth count will suffice. However, if you require clean and precise cuts with minimal tear-out, opt for a blade with a higher tooth count.
Evolution offers blades with various tooth counts to suit different cutting needs. For smooth finishes, choose a blade with more teeth per inch (TPI), while for faster cuts and rougher finishes, a blade with fewer TPI would be more suitable.
Remember, choosing the right blade for your Evolution circular saw is crucial for achieving the best results and prolonging the life of both the blade and the saw itself. Take into consideration the material you will be cutting and the desired finish, and select a blade that matches those requirements.
Preparing the Saw
Before fitting a saw blade on your Evolution circular saw, it is essential to ensure that the saw is properly prepared. Here are the steps to follow:
1. Safety First
Always prioritize your safety when working with power tools. Wear appropriate safety gear, such as goggles and gloves, to protect your eyes and hands from harm. Also, make sure the saw is turned off and unplugged before starting any preparation.
2. Clean the Saw
Thoroughly clean the saw, removing any dust, debris, or wood particles that may have accumulated. Use a clean cloth or brush to wipe down the surface of the saw and its components. This step ensures the saw operates optimally and prevents any unwanted interference during blade fitting.
3. Check the Saw’s Condition
Inspect the saw for any signs of damage or wear. Look for any cracks, loose parts, or worn-out components that may need replacement. It is crucial to address any issues before fitting a new blade to ensure safe and efficient operation.
By following these preparatory steps, you can ensure that your Evolution circular saw is ready for fitting a new saw blade. Taking the time to properly prepare the saw will result in better cutting performance and safer operation.
Fitting the Blade onto the Saw
Once you have chosen the right saw blade for your Evolution circular saw, it’s time to properly fit it onto the saw. Properly fitting the blade is crucial for both safety and performance.
Before you begin, make sure the saw is unplugged from the power source and the blade guard is in the raised position. This will prevent any accidental rotation of the blade during the fitting process.
Step 1: Loosen the Arbor Nut
Locate the arbor nut on the saw’s spindle. This nut holds the blade in place. Use the wrench provided with your saw to loosen the arbor nut by turning it counterclockwise. Make sure to hold the blade steady as you loosen the nut.
Step 2: Remove the Old Blade
Once the arbor nut is loose, remove the old blade from the saw. Carefully slide the blade off the spindle. Be cautious of the sharp teeth and handle the blade with care to avoid any injuries.
Step 3: Install the New Blade
Take the new saw blade and align the mounting hole with the spindle on the saw. Slide the blade onto the spindle, making sure it is properly seated. Rotate the blade slightly to ensure it is securely in place.
Note: Some saw blades may have arrows indicating the direction of rotation. Make sure to align the arrow on the blade with the direction of rotation of the saw.
Step 4: Tighten the Arbor Nut
Use the wrench to tighten the arbor nut securely. Rotate the nut clockwise until it is firmly tightened. Ensure that the blade is held securely in place and does not wobble or move when gently pushed or pulled.
Important: Do not overtighten the arbor nut, as this can damage the blade or the saw. Follow the manufacturer’s recommendations for the appropriate level of tightness.
Step 5: Lower the Blade Guard
After the blade is properly fitted and secured, lower the blade guard back into position. This will protect both the blade and the operator during use.
With the new blade securely fitted onto your Evolution circular saw, you are now ready to tackle your cutting tasks with precision and efficiency.
Testing and Adjustments
Once you have successfully installed the saw blade on your Evolution circular saw, it’s important to test and adjust it to ensure optimal performance and safety. Here are some steps to follow:
1. Blade Position
Check the position of the saw blade to make sure it is aligned properly. The blade should be parallel to the table or work surface, and the teeth should be pointing in the right direction. Use a square or an angle finder to ensure accuracy.
2. Blade Height
Adjust the blade height to the desired position, depending on the type of cut you want to make. The blade should protrude slightly over the top surface of the material you are cutting. Use the depth adjustment knob or lever on your saw to make the necessary adjustments.
It’s important to note that the blade height should never be set too high, as it can increase the risk of accidents and decrease the quality of the cut.
Always make sure to follow the manufacturer’s recommendations regarding maximum blade height for different materials and cutting depths.
3. Cutting Test
Before starting any cutting job, it’s recommended to perform a test cut on a scrap piece of material. This will allow you to check the accuracy of the blade position and height, as well as the overall cutting performance.
Adjust any settings if necessary and repeat the test cut until you are satisfied with the results. This step is crucial to ensure clean and precise cuts and to avoid any potential errors or accidents.
Remember to wear appropriate safety gear, such as goggles and gloves, during the testing and adjustment process to protect yourself from any potential hazards.