If you are a handy person who enjoys do-it-yourself projects, making your own shovel can be a rewarding and practical task. Whether you need a shovel for gardening, landscaping, or construction purposes, crafting your own can give you a sense of accomplishment and save you money.
Before you begin, it is important to gather the necessary materials. You will need a sturdy piece of flat metal for the shovel blade, a wooden or metal handle, screws or rivets, a drill, and a file or grinder for shaping and smoothing the blade. It is recommended to choose a metal that is durable and corrosion-resistant, such as stainless steel, to ensure the longevity of your shovel.
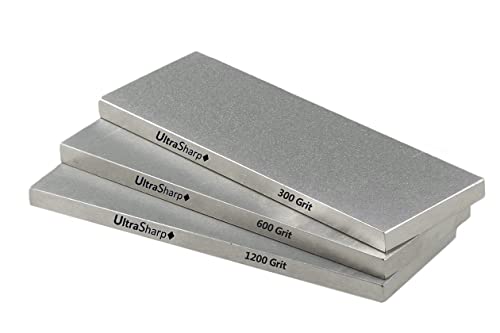
First, measure and mark the desired size and shape of your shovel blade on the metal piece. Use a ruler or measuring tape to ensure accuracy. Once you have marked the outline, use a file or grinder to carefully cut and shape the metal to form the blade. Pay attention to the edges to ensure they are smooth and not sharp. This will prevent injuries and make the shovel more functional.
Next, attach the handle to the shovel blade. If using a wooden handle, make sure it is strong and securely fastened to the blade. Drill holes into the blade and handle where they will be joined, and then use screws or rivets to secure them together. If using a metal handle, welding or soldering may be required to attach it to the blade.
Once the handle is securely attached, take some time to test the shovel and make any necessary adjustments. Ensure that the handle is comfortable to grip and that the blade is securely fixed in place. If needed, you can further smooth and shape the blade with a file or grinder to improve its performance.
Lastly, give your homemade shovel a finishing touch. Sand down any rough edges and apply a protective finish to the metal to prevent rust and corrosion. You may also choose to paint or decorate the handle for a personalized touch.
Now that you know how to make a shovel, you can confidently tackle your next outdoor project with a tool you’ve crafted with your own hands. Remember to always prioritize safety and take your time during the construction process. Happy shoveling!
What is a shovel
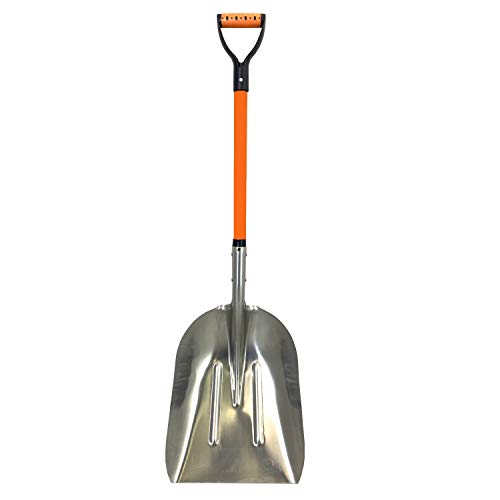
A shovel is a simple yet essential tool that is used for digging and moving soil, sand, gravel, or other loose materials. It typically consists of a long handle made of wood or metal, attached to a scoop-shaped blade. The blade, also known as the head or spade, is usually made of metal and has a curved shape that allows it to easily dig into the ground.
Shovels come in various sizes and designs depending on their intended purpose. Some shovels have a larger scoop for digging while others have a narrower blade for more precise work. They can also be specialized for specific tasks such as gardening, construction, or snow removal.
The handle of a shovel provides leverage and allows the user to exert force while digging or moving materials. It is important for the handle to be sturdy and comfortable to hold for extended periods of use. Some shovels have a grip or cushioning material on the handle to provide a better grip and reduce strain on the hands.
Overall, shovels are versatile tools that are used in a wide range of applications. They are essential for tasks such as garden maintenance, construction, landscaping, and even archaeological excavations. Whether you need to dig a hole, move dirt, or clear a path, a shovel is a reliable tool that can get the job done efficiently.
Materials
Before you start making a shovel, you will need to gather the necessary materials. Here is a list of items you will need:
- Wood: Choose a hardwood such as oak or ash for the handle of your shovel.
- Metal: You will need a metal plate for the blade of your shovel. Steel or iron are good options.
- Nails: Purchase some nails or screws to secure the handle to the blade.
- Hammer: You will need a hammer to drive in the nails or screws.
- Sandpaper: Have some sandpaper on hand to smooth out any rough edges on the wood handle.
- Saw: If your wood handle is not pre-cut, you will need a saw to shape it to the desired length.
- Measuring tape: For accurate measurements, a measuring tape will be useful.
- Pencil: Use a pencil to mark where you will make cuts or attach the handle to the blade.
- Protective gear: It is important to keep yourself safe during the construction process. Wear gloves and safety goggles as necessary.
Once you have gathered all of the necessary materials, you will be ready to proceed with making your own shovel.
Types of metal
When it comes to making a shovel, choosing the right type of metal is crucial. The type of metal used will determine the shovel’s durability, strength, and resistance to wear and tear. Here are some common types of metal used in shovel construction:
1. Carbon Steel
Carbon steel is a widely used material for shovels due to its excellent strength and durability. Shovels made from carbon steel are typically strong and resistant to bending or breaking under heavy use. However, carbon steel shovels may rust over time if not properly cared for.
2. Stainless Steel
Stainless steel is a popular choice for shovels due to its resistance to rust and corrosion. Shovels made from stainless steel are highly durable and can withstand harsh environments and exposure to moisture without deteriorating. Additionally, stainless steel shovels are easy to clean and maintain.
These are just a few examples of the different types of metal used in shovel manufacturing. Each type of metal has its own advantages and disadvantages, so it’s important to consider the specific needs and requirements of your project before choosing the right type of metal for your shovel.
Wooden Handle
A wooden handle is an essential part of a homemade shovel. It provides stability and a comfortable grip, allowing you to dig with ease. Here are the steps to make a wooden handle for your shovel:
Materials Needed:
- Wooden plank
- Saw
- Sandpaper
- Drill
- Screws
Step 1: Measure and Cut
Start by measuring the desired length of your handle. Use a saw to cut the wooden plank to the appropriate size. Make sure the handle is long enough for a comfortable grip and provides enough leverage for digging.
Step 2: Smooth the Edges
After cutting the handle, use sandpaper to smooth the rough edges and surfaces. This will help prevent splinters and provide a more comfortable grip. Be sure to sand all sides of the handle for a uniform finish.
Step 3: Drill Holes
Next, mark the area where the handle will attach to the shovel head. Use a drill to create pilot holes in the wooden handle and the shovel head. These holes will ensure a secure attachment.
Step 4: Attach the Handle
Align the holes in the handle and shovel head, and insert screws to secure them together. Use a screwdriver or drill to tighten the screws firmly. Make sure the handle is securely attached and does not wobble.
Once the wooden handle is attached to the shovel head, your homemade shovel is ready to be used. Remember to test it out and make any necessary adjustments before putting it to work in your garden or yard.
Tools needed
Before you can start making your own shovel, you’ll need to gather a few tools. Here are the essential tools you will need:
1. Metal sheet
A metal sheet will be the main material for your shovel blade. Look for a sheet that is sturdy and durable, as it will need to withstand the pressure and weight of digging. Ensure that the sheet is large enough to create the desired size of your shovel blade.
2. Saw
A saw will be necessary to cut the metal sheet into the shape of a shovel blade. Choose a saw that is suitable for cutting metal, such as a hacksaw or a reciprocating saw with a metal-cutting blade. Make sure to follow safety precautions while using the saw and wear appropriate protective gear.
3. Drill
A drill will be needed to create holes in the metal sheet for attaching the handle. Use a drill bit that is suitable for drilling through metal. Make sure to carefully mark the desired locations for the holes before drilling.
4. Rivets or screws
Rivets or screws will be used to secure the handle to the shovel blade. Choose rivets or screws that are appropriate for attaching metal parts. Make sure to select the right size and type of fasteners for a secure and reliable connection.
5. Hammer
A hammer will be necessary for riveting the shovel blade to the handle. Use a hammer with a suitable weight and size for your project. Ensure that the hammer is in good condition to prevent any accidents or damage to the shovel.
6. Protective gear
When working with tools and materials, it is important to prioritize safety. Wear protective gear such as safety goggles, gloves, and ear protection to protect yourself from potential accidents and injuries.
Once you have gathered all the necessary tools, you will be ready to start making your own shovel. Remember to work carefully and slowly, paying attention to all safety precautions. With the right tools and a little patience, you’ll have a functional and reliable shovel in no time!
Welding Machine
When it comes to making a shovel, welding is an essential process. A welding machine, also known as a welder, is a device used to join two or more pieces of metal together using heat and pressure. It is an invaluable tool in the world of metalworking and fabrication.
A welding machine works by creating an electric arc that generates high levels of heat. This heat is used to melt the metal at the joint, allowing it to fuse with the other piece of metal. The resulting bond is strong and durable, making it ideal for creating sturdy shovels.
There are various types of welding machines available, each with its own unique features and capabilities. Some common types include MIG (Metal Inert Gas) welding machines, TIG (Tungsten Inert Gas) welding machines, and stick welding machines. Each type has its own advantages and is suitable for different applications.
The choice of welding machine depends on factors such as the type of metal being welded, the thickness of the metal, and the desired strength of the weld. It is important to select the right machine for the job to ensure optimal results.
Welding machines require proper safety precautions to be taken during their operation. Welders should wear protective clothing, including gloves, goggles, and a welding helmet, to protect themselves from sparks and ultraviolet rays emitted during the welding process. Adequate ventilation is also important to prevent the inhalation of welding fumes.
In conclusion, a welding machine is an essential tool for making a shovel. It allows for the joining of metal pieces with heat and pressure, creating a strong and durable bond. It is important to choose the right welding machine for the job and to take the necessary safety precautions during its use.
Saw
A saw is an essential tool for making a shovel. It is used to cut wood or other materials to the desired shape and size. There are different types of saws available, such as hand saws, circular saws, and reciprocating saws. The choice of saw depends on the type of material being cut and the precision required.
When selecting a saw for making a shovel, it is important to consider the type and thickness of the material you will be cutting. A hand saw with a fine-toothed blade is suitable for cutting thin pieces of wood, while a circular saw with a carbide-tipped blade is more suitable for cutting thicker materials like plywood or boards.
When using a saw, it is important to always wear protective goggles and gloves to prevent injuries. It is also important to secure the material being cut with clamps or a vice to ensure stability. Begin the cut slowly and steadily, using the full length of the blade. Apply even pressure and let the saw do the work, avoiding excessive force or twisting.
After cutting the desired shape and size for your shovel, it is important to smooth the edges with sandpaper or a file to remove any roughness or splinters. This will ensure a clean and safe finish for your shovel.
Remember to always follow the manufacturer’s instructions and safety guidelines when using a saw. Proper maintenance and storage of the saw will also help ensure its longevity and optimal performance.
In conclusion, a saw is a crucial tool for making a shovel. By selecting the right type of saw and practicing proper cutting techniques, you can create a well-crafted shovel that will be useful for various outdoor tasks.