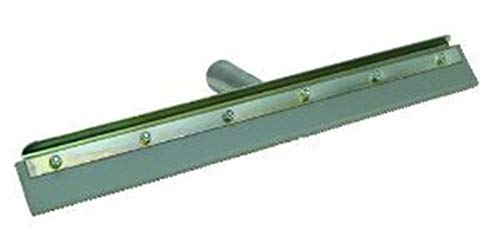
Plastering trowels are essential tools in the construction industry, used to apply and smooth plaster onto walls and ceilings. However, over time, these trowels can become rusty and lose their effectiveness. Rust not only weakens the trowel but can also leave unsightly stains on the plaster. Cleaning a rusty plastering trowel is crucial to maintain its longevity and ensure a professional finish.
When dealing with a rusty plastering trowel, it’s important to take proactive steps to remove the rust and prevent further damage. One method to clean a rusty trowel is by using a wire brush. Start by firmly holding the trowel and scrubbing the rusted areas with the wire brush. Be sure to scrub in all directions to remove as much rust as possible.
Another effective way to clean a rusty plastering trowel is by using a mixture of vinegar and salt. Fill a container with equal parts vinegar and water, then add a generous amount of salt. Let the trowel soak in this solution for several hours or overnight. The vinegar will help dissolve and loosen the rust, while the salt acts as an abrasive to remove it.
After soaking, remove the trowel from the vinegar and salt solution and rinse it thoroughly with clean water. Use a cloth or paper towel to dry the trowel completely to prevent any further rust formation. To ensure maximum protection against rust, you can also apply a thin layer of oil or rust inhibitor to the cleaned trowel.
Regular maintenance is key to preventing rust from forming on plastering trowels. After using the trowel, always clean it thoroughly with water and a wire brush to remove any debris or plaster residue. Store the trowel in a dry place and make sure it is completely dry before putting it away. Additionally, consider applying a protective coating, such as a rust-inhibiting spray, to further protect the trowel from rusting.
By following these simple steps, you can effectively clean a rusty plastering trowel and restore its functionality. Remember to take preventive measures and provide regular maintenance to keep your trowel in excellent condition for all your plastering projects.
Why clean a rusty plastering trowel?
A rusty plastering trowel can negatively impact the quality of your work and make it more difficult to achieve a smooth finish. Rust on a trowel can cause the plaster to stick to the surface, making it harder to spread and create even layers. It can also leave behind unsightly marks on the wall or ceiling.
Regular cleaning and maintenance of your plastering tools is essential to ensure they remain in good condition and perform at their best. Removing rust from a trowel not only helps to prolong its lifespan but also ensures a professional and efficient plastering job.
Rust can also weaken the metal of the trowel, making it more susceptible to breaking or bending during use. This can lead to costly repairs or the need to replace the trowel altogether. By regularly cleaning and removing rust from your plastering trowel, you can help prevent these issues and save money in the long run.
Additionally, a clean and rust-free trowel is much more enjoyable to work with. It glides smoothly across the surface, allowing you to create a flawless finish with ease. It also prevents any rust particles from contaminating your plaster, ensuring a clean and professional result.
In summary, cleaning a rusty plastering trowel is essential for maintaining its performance, prolonging its lifespan, preventing costly repairs, and achieving a professional finish. With proper cleaning and maintenance, your trowel will continue to serve you well for years to come.
Prepare the necessary tools and materials
Before you begin cleaning your rusty plastering trowel, gather the following tools and materials:
Trowel scraper
This tool will help you remove any excess plaster and rust from the trowel. Make sure it is durable and can withstand scraping.
Wire brush
A wire brush is essential for removing loose rust and dirt from the trowel. Look for a brush with stiff bristles that can effectively clean the surface.
Vinegar
Vinegar is a versatile household item that can be used for various cleaning tasks. It can help dissolve rust and make it easier to remove. Make sure to use white vinegar for the best results.
Baking soda
Baking soda is a mild abrasive that can be used to scrub away remaining rust and stains on the trowel. It is also a natural deodorizer that can help eliminate any unpleasant smells.
Cloth or sponge
You will need a cloth or sponge to apply the vinegar and baking soda to the trowel. Make sure it is clean and absorbent to effectively clean the surface.
Protective gloves
Since you will be working with vinegar and potentially harsh cleaning agents, it is important to protect your hands with gloves. Choose gloves that are chemical-resistant and provide a good grip.
Once you have gathered all the necessary tools and materials, you are ready to start cleaning your rusty plastering trowel.
Remove loose rust
Before you can effectively clean a rusty plastering trowel, it’s important to remove any loose rust from the surface. This will ensure that the cleaning process is more efficient and effective.
Materials needed:
- Wire brush
- Steel wool
- Protective gloves
Here’s how to remove loose rust from your plastering trowel:
- Put on your protective gloves to avoid any injuries.
- Using a wire brush, gently scrape the surface of the trowel to remove any loose rust. Be sure to cover the entire surface.
- If there are any stubborn rust spots, you can use steel wool to scrub them away. Apply some pressure while scrubbing to effectively remove the rust.
- Once you have removed as much loose rust as possible, inspect the trowel for any remaining rust spots.
- If there are still rust spots present, repeat the wire brushing and steel wool scrubbing process until the trowel is free from loose rust.
After you have successfully removed the loose rust from your plastering trowel, you can proceed with the next steps to thoroughly clean and restore its surface.
Apply rust remover
Before applying the rust remover, make sure the trowel is clean and free of any loose debris. Use a brush or cloth to wipe away any dirt or dust.
Next, apply a generous amount of rust remover onto the surface of the trowel. Make sure to cover the entire affected area.
Allow the rust remover to sit on the trowel for the recommended amount of time, usually stated on the product label. This will give the rust remover enough time to penetrate the rust and break it down.
Once the recommended time has passed, use a brush or sponge to scrub the surface of the trowel. This will help to remove any remaining rust and lift it from the surface.
Rinse the trowel thoroughly with water to remove any residue from the rust remover. Use a clean cloth or towel to dry the trowel completely.
After the trowel is dry, inspect the surface for any remaining rust. If necessary, repeat the rust removal process until the trowel is completely free of rust.
It is important to note that some rust removers may contain harsh chemicals, so make sure to follow the instructions and safety guidelines provided by the manufacturer.
Scrub and clean the trowel
Once you have removed any loose rust and debris from the surface of the plastering trowel, it’s time to scrub and clean it more thoroughly. This will help to remove any remaining rust and restore the tool to its original condition.
Here’s how to scrub and clean a rusty plastering trowel:
- Fill a bucket or basin with warm soapy water. Use a mild dish soap or a rust-removing product specifically designed for cleaning tools.
- Submerge the trowel in the soapy water and let it soak for a few minutes. This will help to loosen any stubborn rust.
- Use a scrub brush or a nylon bristle brush to scrub the trowel. Pay extra attention to the areas with heavy rust and corrosion.
- If the rust doesn’t come off easily, you can use a rust remover or a paste made from baking soda and water. Apply the rust remover or the baking soda paste to the affected areas and scrub with the brush.
- Rinse the trowel thoroughly with clean water to remove any soap residue or rust remover.
- Inspect the trowel to make sure all rust has been removed. If you notice any remaining rust, repeat the scrubbing process.
- Once the trowel is clean, dry it with a clean towel or let it air dry completely.
- After the trowel is dry, you can apply a thin coat of oil or a rust inhibitor to prevent future rusting. This will help to protect the trowel and keep it in good condition.
Cleaning a rusty plastering trowel may require some effort and time, but the end result will be a clean and functional tool that can be used for many projects to come.
| Items Needed: | Optional: |
|---|---|
| Bucket or basin | Rust remover |
| Warm soapy water | Baking soda |
| Mild dish soap | Oil or rust inhibitor |
| Scrub brush or nylon bristle brush |
Dry and protect the trowel
After cleaning the rust from the plastering trowel, it is important to dry it thoroughly to prevent any further rusting. Leaving the trowel wet can lead to the formation of new rust spots, undoing all the hard work you put into removing the existing rust. To dry the trowel:
- Use a clean, dry cloth to remove any excess moisture from the trowel’s surface.
- Ensure that all the nooks and crannies of the trowel are dry, including the handle and the space between the blade and the handle.
- Let the trowel air dry in a well-ventilated area for a few minutes.
Once the trowel is dry, it is important to protect it from further rusting. Here are some tips to help you keep your plastering trowel rust-free:
- Apply a thin coat of petroleum jelly or a rust inhibitor product to the entire surface of the trowel. This will create a barrier against moisture and prevent rust formation.
- Store the trowel in a dry place, away from water and humidity. Consider hanging it on a pegboard or using a tool belt for easy access while keeping it protected.
- Regularly inspect the trowel for any signs of rust and repeat the cleaning and protection process as needed.
| Tip | Caution |
|---|---|
| Avoid using the trowel on wet surfaces or leaving it in contact with water for extended periods to prevent rust. | Be careful when handling sharp-edged tools to avoid injury. |
By drying and protecting your plastering trowel, you can extend its lifespan and ensure it remains in good condition for future use. Taking these simple steps will save you time and money in the long run by preventing the need for frequent rust removal and replacement of your trowel.


