Having a sharp plastering trowel is essential for achieving smooth and professional results in your plastering projects. Over time, the edge of the trowel can become dull, making it difficult to apply plaster evenly. Thankfully, sharpening a plastering trowel is a relatively simple process that can be done with just a few tools.
Before you begin, make sure you have a flat file and a small sharpening stone. It’s also important to have a pair of gloves to protect your hands from the sharp edges of the trowel. Start by wiping any dirt or debris off the trowel blade to expose the edge.
Next, use the flat file to sharpen the edge of the trowel. Hold the file at a slight angle against the edge of the blade and move it back and forth in a smooth motion. Be sure to apply consistent pressure and keep the file at the same angle throughout the process. Continue filing until you have achieved a sharp, clean edge.
Once you have sharpened the edge with the file, use the sharpening stone to refine and polish the blade. Wet the stone with water or oil and rub the edge of the blade against it in a circular motion. This will help remove any rough edges and create a smooth, sharp edge. Repeat this process until you are satisfied with the sharpness of the trowel.
Remember to regularly maintain and sharpen your plastering trowel to ensure optimal performance. By following these simple steps, you can keep your trowel in top condition and achieve professional and flawless plastering results every time.
Why Sharpen a Plastering Trowel?
Sharpening a plastering trowel is an essential practice for any professional or DIYer in the plastering trade. A sharp trowel ensures a smoother finish and allows for better control over the application of plaster. It eliminates the risk of dragging or catching the plaster, resulting in a more even and professional-looking surface.
There are several reasons why sharpening a plastering trowel is important:
1. Improved Efficiency
A sharp trowel allows for faster and more efficient work. With a dull trowel, you’ll need to apply more pressure and make multiple passes to achieve a smooth finish. By sharpening your trowel, you can reduce the number of strokes required and save both time and effort.
2. Enhanced Control
A sharp trowel provides better control over the plastering process. It allows you to spread the plaster evenly and smoothly, helping to avoid lumps, bumps, and uneven surfaces. The sharper the trowel, the more precise your movements can be, resulting in a more professional finish.
Additionally, a sharp trowel minimizes the risk of overworking the plaster, which can lead to cracking or weakening of the surface. With a sharp tool, you can achieve the desired result with fewer strokes, reducing the likelihood of causing damage to the plaster.
3. Reduced Fatigue
A sharp trowel requires less effort to use compared to a dull one. By minimizing the amount of force needed to spread plaster, you can reduce fatigue and strain on your muscles. This can be especially beneficial when working on larger or more extensive plastering projects, allowing you to work for longer periods without experiencing excessive tiredness.
In conclusion, sharpening a plastering trowel is vital for achieving professional results. It improves efficiency, enhances control, and reduces fatigue. By taking the time to sharpen your trowel regularly, you can ensure a smoother finish and increase productivity in your plastering endeavors.
Types of Plastering Trowels
Plastering trowels come in a variety of types, each designed for specific purposes and finishes. Understanding the different types and their uses can help you choose the right plastering trowel for your project. Below are some common types of plastering trowels:
1. Finishing Trowel
The finishing trowel, also known as a float or polisher, is used to achieve a smooth and flawless finish on the plastered surface. It has a flat rectangular or square blade with a slightly rounded tip. The blade is typically made of stainless steel or carbon steel, which ensures durability and rust resistance.
2. Gauging Trowel
The gauging trowel is a smaller version of the finishing trowel. It is mainly used for mixing and applying small amounts of plaster or cement. The gauging trowel has a narrow blade with a pointed tip, which allows for precise application and control in tight spaces.
3. Corner Trowel
The corner trowel, as the name suggests, is used for plastering corners and edges. It has a triangular-shaped blade with one curved side and two straight sides, allowing for easy and smooth application of plaster on corners and edges.
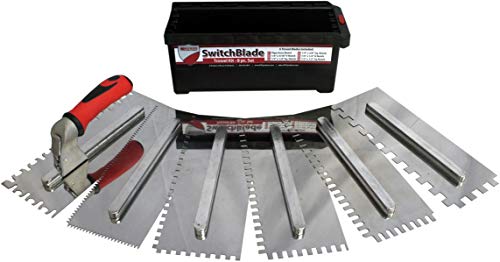
4. Notched Trowel
The notched trowel, also known as a serrated trowel, is used for applying adhesive or mortar on surfaces before tiling. It has a rectangular blade with notches or serrations on one or both sides, which help in creating an even layer of adhesive or mortar for better adhesion.
5. Plastering Hawk
The plastering hawk is not exactly a trowel but an essential tool in the plastering process. It is a flat square board with a handle underneath. The hawk is used to hold the plaster or mortar while working, making it easier to apply the material onto the wall or ceiling.
Apart from these types, there are also specialized trowels like the pool trowel, margin trowel, and bucket trowel used for specific plastering tasks.
Choosing the right plastering trowel depends on the type of surface, finish required, and personal preference. It’s always advisable to have a selection of trowels available to ensure you can achieve the desired results for any plastering job.
| Type | Blade Shape | Primary Use |
|---|---|---|
| Finishing Trowel | Rectangular or square with a slightly rounded tip | Smoothing and polishing the plastered surface |
| Gauging Trowel | Narrow and pointed | Mixing and applying small amounts of plaster or cement |
| Corner Trowel | Triangular with one curved side and two straight sides | Plastering corners and edges |
| Notched Trowel | Rectangular with notches or serrations on one or both sides | Applying adhesive or mortar before tiling |
| Plastering Hawk | Flat square board with a handle underneath | Holding and applying plaster or mortar |
When to Sharpen a Plastering Trowel?
A plastering trowel is an essential tool used in the process of applying plaster to walls and ceilings. Over time, the cutting edge of the trowel can become worn and dull, making it less effective for spreading and smoothing the plaster. Sharpening the trowel blade can help restore its performance and ensure a smoother, more precise finish.
There are several signs that indicate it may be time to sharpen a plastering trowel:
- Uneven or rough plaster finish: If you notice that the plaster is not being spread smoothly or is leaving behind lumps or ridges, it may mean that the trowel blade is no longer sharp enough to achieve a clean finish.
- Difficulty in spreading plaster: If you find it increasingly difficult to spread the plaster evenly, it could be a sign that the trowel blade is blunt. A sharp trowel blade allows for easier and more efficient application.
- Visible nicks or dents in the blade: Inspect the blade of your trowel for any noticeable damage. Nicks and dents can affect the trowel’s ability to glide smoothly over the plaster surface. Sharpening can help remove these imperfections.
- Reduced control and precision: A dull trowel blade can make it more challenging to achieve precise and controlled movements while applying plaster. Sharpening the blade can restore the trowel’s control and improve the overall quality of the plastering job.
Regularly maintaining and sharpening your plastering trowel is key to achieving excellent results and prolonging the lifespan of your tool. If you notice any of the signs mentioned above, it is time to sharpen your trowel. Remember to use caution and follow the proper techniques for sharpening to ensure safety and optimal performance.
Sharpening Tools for Your Plastering Trowel
Properly sharpening your plastering trowel is essential for achieving a smooth and precise finish on your plastering projects. A sharp trowel allows you to effortlessly apply and spread plaster, ensuring a professional result.
1. Whetstone
A whetstone is a popular tool for sharpening plastering trowels. To sharpen your trowel with a whetstone, wet the stone and then hold your trowel at a 20-degree angle. Swipe the trowel back and forth across the stone, applying even pressure. Repeat this motion several times on each side of the trowel until you achieve the desired sharpness.
2. File
A file is another effective tool for sharpening your plastering trowel. Start by securing your trowel in a vise to prevent slippage. Use the file to gently remove any burrs or nicks from the blade of the trowel. Move the file in one direction, away from your body, using smooth and consistent strokes. Be sure to file both sides of the trowel evenly until the blade is sharp.
By regularly sharpening your plastering trowel using these tools, you can ensure that your trowel remains in optimal condition, allowing you to achieve professional results with each plastering project.
Step-By-Step Guide to Sharpening Your Plastering Trowel
If you’re a professional plasterer or even a DIY enthusiast, you know the importance of having a sharp and well-maintained plastering trowel. A properly sharpened trowel can help you achieve a smooth and professional finish on your plastering projects. Here is a step-by-step guide on how to sharpen your plastering trowel:
1. Gather the necessary tools:
Before you begin, make sure you have all the necessary tools for sharpening your plastering trowel. You will need a bench grinder or a file, a wire brush, a sharpening stone, and some water.
2. Clean the trowel:
Start by cleaning your plastering trowel. Use a wire brush to remove any debris or dried plaster from the blade. Make sure the blade is free from any dirt or particles before proceeding with the sharpening process.
3. Assess the condition:
Take a close look at your trowel and assess its condition. Check for any nicks, burrs, or dull spots on the blade. Identifying these areas will help you focus your sharpening efforts on the right spots.
4. Use a bench grinder or a file:
If you have a bench grinder, it can be an efficient way to sharpen your trowel. Hold the trowel at a 20-degree angle against the grinder wheel and move it back and forth evenly. Be careful not to overheat the blade or remove too much material. If you don’t have a bench grinder, you can use a file instead. Start at the top edge of the blade and file it down gently. Use long, smooth strokes to maintain an even edge.
5. Remove burrs:
After using the bench grinder or file, you may notice burrs or rough edges on the blade. Use a sharpening stone to remove these burrs. Wet the sharpening stone with water and hold the trowel at a shallow angle against the stone. Move the trowel back and forth in a sweeping motion to smooth out the blade and remove any remaining burrs.
6. Test the sharpness:
Once you’ve finished sharpening the trowel, it’s essential to test its sharpness. Run your finger lightly along the blade’s edge to feel for any rough or jagged spots. A properly sharpened trowel should have a smooth and even edge with no noticeable imperfections.
7. Maintain the sharpness:
To ensure your plastering trowel stays sharp, it’s important to maintain it regularly. After each use, clean the trowel and remove any plaster or debris. Store it in a dry place to prevent rusting. If you notice the blade is dulling, repeat the sharpening process to keep it in top condition.
By following these steps, you can keep your plastering trowel sharp and in optimal condition. A well-sharpened trowel will make your plastering projects more efficient and help you achieve excellent results every time.