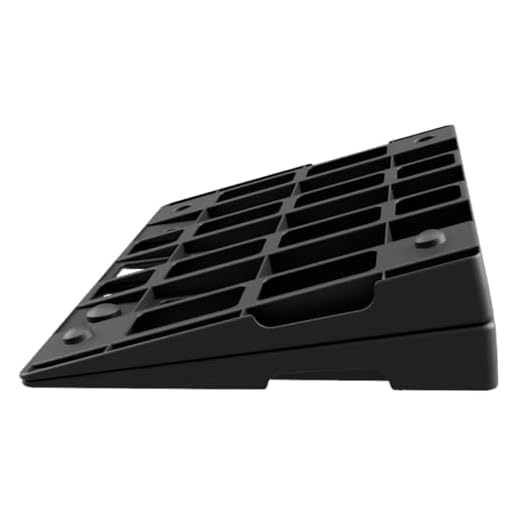
A bed wedge is a versatile and useful piece of furniture that can be used for various purposes. Whether you want to read or watch TV in bed, alleviate acid reflux or snoring, or simply improve your overall comfort, a wooden bed wedge can be the perfect solution. And the best part is that you can easily make your own bed wedge at home with just a few basic materials and tools.
To start making your wooden bed wedge, you will need the following materials: a piece of plywood or solid wood board, a saw, sandpaper, a tape measure, wood glue, screws, and a screwdriver. It’s important to choose a sturdy and durable material for your bed wedge to ensure its longevity and stability.
First, measure and mark the desired dimensions for your bed wedge on the plywood or solid wood board. The size will depend on your personal preferences and needs, but a typical bed wedge is around 20 to 30 inches long, 7 to 10 inches wide at the top, and 3 to 7 inches high. Use a saw to cut the board according to your measurements.
Next, use sandpaper to smooth the edges and surfaces of the wooden pieces. This will ensure that your bed wedge is comfortable to use and free from any rough or sharp edges. Once the surfaces are smooth, apply wood glue along the edges of one of the pieces and press them firmly together. Use screws and a screwdriver to further secure the pieces in place.
Your wooden bed wedge is now ready to be used! Place it on your bed with the higher end positioned towards the headboard, and you can adjust the angle to your preferred height. It’s advisable to cover the bed wedge with a soft and washable fabric for added comfort and easy maintenance.
In conclusion, making a wooden bed wedge is a simple and rewarding DIY project that can greatly improve your sleeping experience and overall well-being. By following these steps and using basic tools, you can create a customized bed wedge that suits your needs and preferences perfectly.
Materials Needed
To make a wooden bed wedge, you will need the following materials:
- Wood: Choose a sturdy, untreated wood that is at least 6 inches thick. Pine or plywood are good options.
- Measuring tape: You will need this to measure the dimensions of the bed wedge.
- Saw: Use a hand saw or a power saw to cut the wood to your desired dimensions.
- Sandpaper: Sand the edges and surfaces of the wood to ensure a smooth finish.
- Screws: Use screws to secure the different parts of the bed wedge together.
- Screwdriver: You will need a screwdriver to tighten the screws.
- Wood glue: Apply wood glue to reinforce the joints of the bed wedge.
- Paint or varnish: Optional, but you can choose to paint or varnish the bed wedge to enhance its appearance and protect the wood.
- Brush or roller: Use a brush or roller to apply the paint or varnish.
Additional tools (optional)
- Clamps: Clamps can be used to hold the wood together while the glue dries.
- Sanding block or electric sander: These tools can help speed up the sanding process.
Step 1: Measure and Cut the Wood
The first step in making a wooden bed wedge is to measure and cut the wood pieces. Here’s how you can do it:
- Start by measuring the length, width, and height of the bed wedge you want to make. Consider the size of your bed and personal preferences when determining the dimensions.
- Once you have the measurements, mark them on the wooden board or plywood. Use a tape measure and a pencil to ensure accuracy.
- Next, using a saw, carefully cut along the marked lines to create the main components of the bed wedge. It is recommended to use a saw with a fine-toothed blade for a clean and precise cut.
- If you want to add a cover to your bed wedge, you may also need to cut a piece of fabric to the desired size. Make sure to measure and cut the fabric accordingly.
- After cutting the wood and fabric pieces, sand down any rough edges or surfaces using sandpaper. This will help create a smooth finish and prevent any splinters.
Once you have measured and cut the wood and prepared the fabric, you are ready to move on to the next step of constructing your wooden bed wedge.
Step 2: Sand the Wood
Once you have gathered all the necessary materials and measurements, it’s time to begin constructing your wooden bed wedge. The second step in this process is sanding the wood to ensure a smooth finish and prevent any splinters.

Start by using a coarse-grit sandpaper to remove any rough surfaces or imperfections on the wood. Sand in the direction of the grain, applying moderate pressure. Remember to wear protective gloves and a dust mask to avoid inhaling any dust particles.
After you have sanded the entire surface with the coarse-grit sandpaper, switch to a finer-grit sandpaper to further smooth out the wood. This will help achieve a polished and professional-looking result.
Be thorough
Take your time and sand every surface of the wood, including the sides and edges. Pay extra attention to any corners or tight spots, as these areas are more likely to have rough edges. It’s important to sand evenly and consistently to ensure a uniform and attractive appearance.
Check for smoothness
After you have finished sanding, run your hand over the surface to check for smoothness. If you feel any rough patches or splinters, go over those areas again with the sandpaper until they are completely smooth.
Once you are satisfied with the smoothness of the wood, wipe away any dust or debris with a clean cloth. This will prepare the wood for the next step in the construction process.

Step 3: Apply Wood Glue
Once you have your wooden wedge pieces cut and sanded, it’s time to apply the wood glue. Wood glue is a strong adhesive that will bond the wood pieces together, ensuring a sturdy bed wedge.
Follow these steps to apply the wood glue:
| Step | Action |
| 1 | Prepare the work area by laying down some protective coverings, such as a drop cloth or newspaper. |
| 2 | Squeeze a thin, even layer of wood glue onto one of the long edges of one of the wedge pieces. |
| 3 | Press the matching long edge of another wedge piece against the glued edge, ensuring the edges are aligned. |
| 4 | Apply clamps or heavy objects to hold the glued pieces together, keeping them in place while the glue dries. Be careful not to apply too much pressure, as it can cause the wood to warp or crack. |
| 5 | Repeat steps 2-4 for the remaining wedge pieces, gluing and clamping them together until you have created the entire wood bed wedge. |
| 6 | Allow the wood glue to dry completely, following the manufacturer’s instructions for drying time. |
Once the wood glue has fully dried and cured, you can move on to the next step of the bed wedge construction process.
Step 4: Secure with Screws
Once you have attached the two pieces of wood together, it’s time to secure them with screws. This will ensure that your bed wedge is sturdy and durable.
Start by marking the spots where you want the screws to go. Make sure they are evenly spaced and that there are enough screws to hold the pieces of wood securely together.

Drill pilot holes at the marked spots. This will prevent the wood from splitting when you insert the screws.
Next, place the screws in the pilot holes and use a drill or a screwdriver to attach the pieces of wood together. Make sure the screws are tightened properly, but be careful not to overtighten them as this can damage the wood.
Once all the screws are in place, check to make sure the bed wedge is secure and doesn’t wobble. If necessary, tighten any loose screws.
After securing the pieces of wood, you can sand the edges and surfaces to give your bed wedge a smooth finish. Use sandpaper or a sander to remove any rough edges or splinters.
Now that your bed wedge is securely attached and has a smooth finish, it’s ready to be used. Place it under your mattress to provide support and elevation while you sleep or relax in bed.
Important Tips:
- Ensure that the screws you use are the appropriate length for the thickness of the wood, so they don’t poke through the other side.
- Make sure to use screws that are strong enough to withstand the weight and pressure placed on the bed wedge.
Remember: Safety is paramount when using tools and working with wood. Always wear protective gear, such as safety goggles and gloves, and exercise caution throughout the process.
In the next step, we will provide some optional finishing touches to make your bed wedge even more comfortable and visually appealing.
Step 5: Sand and Finish
After the bed wedge is fully assembled, it’s time to sand and finish it. Sanding will smooth out any rough edges and prepare the wood for the finish.
Here are the steps to sand and finish the bed wedge:
| 1. | Start by using a medium-grit sandpaper (around 120 grit) to sand the entire surface of the bed wedge. Be sure to sand in the direction of the wood grain to avoid creating unwanted scratches. |
| 2. | Once you have sanded the entire surface, switch to a finer-grit sandpaper (around 220 grit) and repeat the sanding process. This will help to achieve a smoother finish. |
| 3. | After sanding, use a clean, damp cloth to remove any dust or debris from the surface of the bed wedge. |
| 4. | Next, apply your chosen finish to the bed wedge. This could be a wood stain, varnish, or paint, depending on the desired look. Follow the manufacturer’s instructions for application and drying times. |
| 5. | Allow the finish to dry completely before using the bed wedge. |
Once the bed wedge is sanded and finished, it will not only be functional but also visually appealing. The finish will protect the wood and enhance its natural beauty.
Step 6: Test and Adjust
Once you have completed your wooden bed wedge, it is important to test it out to ensure that it is stable and comfortable. Place the wedge under your mattress and lie down on your bed to see if it provides the desired level of elevation and support.
If the wedge feels too high or too low, you can make adjustments by either sanding down the top surface to reduce the height or adding additional layers of wood to increase the height. Remember to measure and mark the desired height before making any adjustments to ensure consistency.
In addition, you should also pay attention to the stability of the wedge. If it feels wobbly or unstable, you can reinforce it by adding additional support beams underneath or securing it to the bed frame using screws.
| Tips: |
|