A caulking gun is an essential tool for any DIY enthusiast or professional contractor. It is used to apply caulk or sealant to various surfaces, such as windows, doors, and bathtubs, to prevent leaks and drafts. If you are new to using a caulking gun, this guide will walk you through the steps to ensure a successful and professional-looking application.
Step 1: Choose the right caulk
Before you begin, it is important to select the appropriate type of caulk for your project. There are different types of caulk available, such as silicone, latex, or acrylic, each with its own properties and uses. Read the instructions on the caulk tube or consult a professional to determine the best caulk for your specific needs.
Step 2: Prepare the surface
Before applying caulk, make sure the surface is clean and dry. Remove any old caulk or loose debris using a putty knife or scraper. Clean the area with a mild detergent and let it dry completely. This will ensure proper adhesion and a longer-lasting seal.

Step 3: Load the caulk
Next, load the caulk cartridge into the caulking gun. Cut off the tip of the caulk tube at a 45-degree angle using a utility knife. Insert the tube into the gun, with the cut end facing away from the trigger. Pull back the rod on the gun to catch the plunger of the caulk tube.
Step 4: Begin caulking
To start caulking, hold the caulking gun at a 45-degree angle to the surface. Press the trigger to release the caulk, applying a steady and even pressure. Keep a constant speed and maintain a continuous bead of caulk along the desired area. If necessary, use a caulking tool or your finger to smooth out the caulk and create a neat finish.
Step 5: Clean up

After you have finished caulking, it is important to clean up any excess caulk before it dries. Wipe off any stray caulk with a damp cloth or sponge, using a mild soap if necessary. This will prevent the caulk from smearing or creating an unsightly mess.
By following these simple steps, you can become proficient in using a caulking gun and achieve professional results. Remember to practice good technique and take your time for a clean and effective caulk application.
How to Use a Caulking Gun: Step-by-Step Guide
A caulking gun is a versatile tool used for sealing gaps and cracks in various surfaces, such as windows, doors, and walls. Using a caulking gun correctly is essential to ensure a clean and effective seal. Follow these step-by-step instructions to learn how to use a caulking gun.
Step 1: Choose the Right Caulk and Gun
Before starting, it’s important to select the appropriate caulk for the job. There are different types of caulk available, such as silicone, acrylic, and latex, each designed for specific applications. Additionally, ensure that you have a caulking gun that fits the size and type of caulk you will be using.
Step 2: Prepare the Surface
Prior to applying caulk, it’s crucial to prepare the surface properly. Clean the area you will be caulking, removing any dirt, dust, or loose particles. For best results, use a mild soap and water solution to clean the surface and let it dry completely before applying caulk.

Step 3: Load the Caulk Tube into the Gun
Insert the caulk tube into the caulking gun. Most caulking guns have a release lever or a metal rod at the back. Pull back the rod or press the lever to create space for the caulk tube. Insert the tube with the nozzle facing outward and ensure that it is secured in place.
Step 4: Cut the Nozzle
Use a utility knife or a pair of scissors to cut the tip of the caulk tube nozzle at a 45-degree angle. The size of the opening should be suitable for the width of the gap you will be filling. Start with a smaller opening and cut more if necessary, as you can always make it bigger, but not smaller.
Step 5: Test the Flow
Prior to applying the caulk, test the flow by squeezing the trigger gently. This will help you familiarize yourself with the gun’s mechanism and ensure that the caulk is dispensing smoothly. If the flow is uneven or clogged, check for any obstructions in the nozzle or the gun itself.
Step 6: Apply the Caulk
Hold the caulking gun at a 45-degree angle to the surface you will be caulking. With one hand on the trigger and the other supporting the back of the gun, apply steady pressure to the trigger to dispense the caulk. Move the gun along the gap, applying an even bead of caulk. Take your time to ensure thorough coverage.
Step 7: Smooth the Caulk
After applying the caulk, use a caulk smoothing tool or your finger to smooth the bead of caulk. This will help create a consistent and neat finish. Wet your finger slightly with water or use a soapy solution to prevent the caulk from sticking to your finger.

Step 8: Clean Up
Once you have finished caulking, clean up any excess caulk before it dries. You can use a damp cloth or sponge to remove any smudges or unwanted caulk. Dispose of any unused caulk properly and store the caulking gun and remaining caulk in a cool, dry place.
By following these step-by-step instructions, you can confidently use a caulking gun to seal gaps and cracks, improving the appearance and efficiency of your home.
| Tools/ Materials Needed: | Additional Tips: |
|---|---|
| – Caulking gun | – Choose a caulk color that matches the surface |
| – Caulk tube | – Practice on a small, inconspicuous area first |
| – Utility knife or scissors | – Work in a well-ventilated area |
| – Caulk smoothing tool or finger | – Use painter’s tape to create clean lines if necessary |
| – Damp cloth or sponge | – Keep a damp cloth or sponge nearby for easy cleanup |
Preparation
Before using a caulking gun, there are a few important steps you should take to ensure a successful caulking project:
- Gather all the necessary materials:
- A caulking gun
- Caulk
- Caulking gun cartridges
- A utility knife
- Painter’s tape (optional)
- A caulk smoothing tool (optional)
- A clean cloth
- Protective goggles and gloves (optional, but recommended)
- Choose the right caulk for your project:
- For indoor projects, such as sealing gaps around windows and doors, it is best to use acrylic latex caulk.
- For outdoor projects, such as sealing gaps in concrete or brick, it is best to use a silicone-based caulk.
- Read the label on the caulk cartridge to ensure it is suitable for your specific project.
- Prepare the surface:
- Clean the area where you will be applying caulk, making sure it is free of dust, dirt, and debris.
- If necessary, remove any old caulk using a utility knife or caulk remover tool.
- Sand any rough or uneven surfaces to create a smooth and even base for the caulk.
- If desired, use painter’s tape to mask off areas adjacent to where you will be applying caulk, creating clean and straight caulk lines.
- Load the caulk into the caulking gun:
- Remove the cap from the caulk cartridge.
- Insert the tube of caulk into the opening at the back of the caulking gun.
- Pull the rod back until it is fully extended, and then push it forward to engage the plunger in the caulk cartridge.
- Make sure the caulk comes out of the nozzle when the trigger is squeezed. If it doesn’t, double-check that the plunger is fully engaged.
By following these preparation steps, you will be ready to effectively use a caulking gun and achieve professional-looking results.
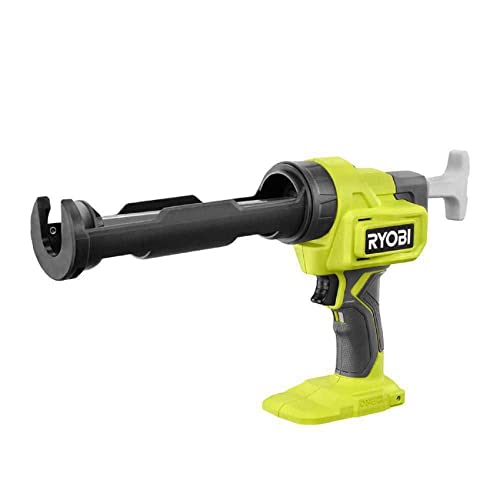
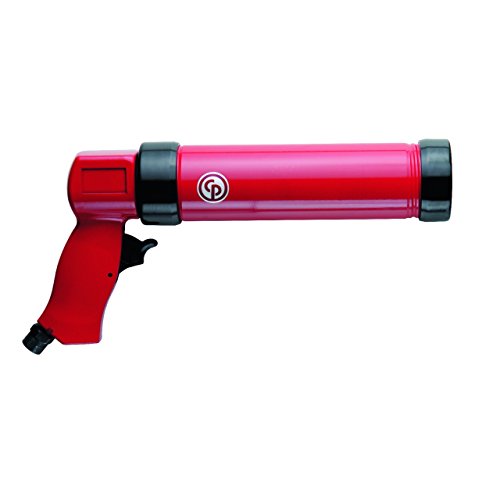
Select the Right Caulking Gun
When it comes to using a caulking gun, selecting the right one for the job is crucial for achieving the best results. There are several factors to consider before making your decision:
1. Type of Caulk
The type of caulk you plan to use will greatly influence the caulking gun you choose. Different caulking guns are designed for specific types of caulk, such as silicone, latex, or acrylic. Make sure to check the label on the caulking gun to ensure it is compatible with the type of caulk you plan to use.
2. Size of the Project
Consider the size of the project you will be working on. For smaller projects, a manual caulking gun may be sufficient. However, for larger projects, you may want to invest in a battery-powered or pneumatic caulking gun to make the job easier and more efficient.
3. Comfort and Grip
Since caulking can be a time-consuming task, it’s important to choose a caulking gun that offers comfort and a secure grip. Look for a caulking gun with an ergonomic handle that fits comfortably in your hand. This will help reduce fatigue and make the job more comfortable.
4. Quality and Durability
Investing in a high-quality caulking gun is essential for long-term use. Look for a caulking gun made from durable materials such as steel or aluminum. This will ensure that the gun can withstand repeated use without breaking or wearing down.
By considering these factors and selecting the right caulking gun for your needs, you can ensure a smooth and successful caulking project every time.
Load the Caulking Gun
Before you can start using a caulking gun, you need to load it with caulk. Follow these steps to ensure proper loading:
Step 1: Prepare the caulk tube
Remove the cap from the caulk tube and use a utility knife or a caulk puncture tool to cut open the tip. Make the cut at a 45-degree angle, ensuring that the hole is big enough to provide the desired bead size.
Step 2: Insert the caulk tube into the gun
Hold the caulking gun with one hand and pull back the rod handle until it locks in place. This will create enough space to insert the caulk tube. Place the tube into the barrel of the gun, making sure that the punctured end is facing forward.
Step 3: Secure the tube
Push the caulk tube forward until the nozzle is snug against the tip of the gun. Some guns have built-in clamps to secure the tube in place, while others require you to manually secure it. If your gun has clamps, engage them to hold the tube firmly.
Step 4: Prime the gun
Pump the trigger of the caulking gun a few times to prime it. This will help to push the caulk towards the nozzle and eliminate any air bubbles. You should see caulk oozing out of the tip of the gun. If not, continue pumping until you achieve a consistent flow of caulk.
Step 5: Begin caulking
Now that the caulking gun is loaded and primed, you can start using it to caulk. Slowly squeeze the trigger while moving the gun along the joint or gap you want to seal. Maintain a steady pressure on the trigger to control the flow of caulk, and release the pressure when you want to stop.
Remember to always follow the manufacturer’s instructions for your specific caulking gun model, as some guns may have unique loading mechanisms.
Position the Caulking Gun
Before you begin using a caulking gun, it’s important to position it correctly for optimal control and accuracy. Follow these steps to ensure you have the proper grip and angle:
Grip the Caulking Gun
Hold the caulking gun firmly with your dominant hand. Place your index finger on the trigger, and wrap your remaining fingers around the handle for stability. This grip will provide you with the control needed to apply the caulk smoothly and evenly.
Angle the Caulking Gun
Position the caulking gun at a 45-degree angle to the surface you are caulking. This angle will allow the caulk to flow evenly across the joint and prevent it from oozing out uncontrollably. Maintaining a consistent angle throughout the process will ensure professional-looking results.
Note: Be careful not to hold the gun too far away from the surface, as it may cause the caulk to be applied too thin or unevenly.
By following these guidelines, you will be able to position the caulking gun correctly and achieve clean, precise lines of caulk.
Apply the Caulking Material
Once the caulk gun is loaded, it’s time to apply the caulking material to the desired area. Here are the steps to follow:
- Hold the caulk gun at a 45-degree angle to the surface you want to caulk.
- Slowly squeeze the trigger to release the caulk material. Start at one end of the area and move steadily towards the other end.
- Apply even pressure to ensure a consistent bead of caulk. Avoid jerking or stopping abruptly, as this can result in an uneven application.
- Continue the smooth, controlled motion until you reach the end of the area to be caulked.
- Release the trigger and quickly pull the caulk gun away from the surface.
- Smooth the caulk bead using a caulking tool or your finger. This step helps ensure proper adhesion and a professional finish. Be sure to have a damp cloth or paper towel nearby to wipe away any excess caulk.
- Allow the caulk to dry fully before exposing it to water or other environmental factors. Read the caulk product instructions for specific drying times.
Tip: If you need to caulk a large area, it may be helpful to break it up into smaller sections. This can make it easier to maintain a consistent speed and avoid interruptions in the caulk bead.
With these steps, you should be able to successfully apply caulking material using a caulking gun. Remember to practice on a scrap surface first to get a feel for the gun and achieve a smooth application.
Finish and Clean Up
Once you have finished applying caulk with your caulking gun, it’s important to properly finish and clean up. Follow these steps to ensure a professional-looking result and to keep your caulking gun in good condition:
Cleaning the Tip
After you have finished caulking, wipe off any excess caulk from the tip of the gun with a paper towel or cloth. This will help prevent the caulk from drying and clogging the tip, making it difficult to use for future projects.
Smoothing the Caulk
Use a caulk smoothing tool or your finger to smooth the caulk line. This will create a neat, professional finish and help ensure a watertight seal. Wet your finger or the caulk smoothing tool with water or a mild soapy solution to prevent the caulk from sticking.
Avoid applying too much pressure or moving too slowly, as this can cause the caulk to smudge or create an uneven surface. Work in a steady, controlled manner to achieve the desired outcome.
Clean Up
Finally, clean up any excess caulk that may have gotten on surrounding surfaces. Use a damp cloth or sponge to wipe away the caulk before it dries. If the caulk has dried, you may need to carefully scrape it off with a putty knife or similar tool. Be cautious not to damage the surface beneath the caulk.
Dispose of any used caulk tubes and other materials responsibly, following your local regulations for hazardous waste. Store your caulking gun in a cool, dry place for future use.
| Materials Needed: | Cleaning Steps: |
|---|---|
| Paper towels or cloth | 1. Wipe off excess caulk from the tip of the gun. |
| Caulk smoothing tool or finger | 2. Smooth the caulk line using a caulk smoothing tool or your finger. |
| Water or mild soapy solution | 3. Wet your finger or the caulk smoothing tool to prevent sticking. |
| Cloth or sponge | 4. Clean up any excess caulk from surrounding surfaces. |
| Putty knife or similar tool | 5. Scrape off dried caulk if necessary. |