Are you tired of not knowing how to pronounce “caulking gun” the right way? Well, you’re in luck! In this article, we’ll guide you through the correct pronunciation of this commonly mispronounced tool.
First things first, let’s break it down. “Caulk” is pronounced as “kawk” with a long “o” sound. It rhymes with “talk” or “hawk.” The “ing” at the end is pronounced as “ing,” just like in “sing” or “ping.”
Now, let’s move on to “gun.” This word is pretty straightforward. It is pronounced as “guhn,” rhyming with “fun” or “sun.” Combine the two words together, and you have “caulking gun,” pronounced as “kawk-ing guhn.”
So, the next time you need to talk about a caulking gun, remember the correct pronunciation – “kawk-ing guhn.” Impress your friends and colleagues with your knowledge and make your next DIY project discussion even more professional!
What Is a Caulking Gun?
A caulking gun is a hand tool commonly used in construction and DIY projects to apply caulking or sealant to various surfaces. Caulking, also known as sealant or adhesive, is a flexible material used to fill gaps, cracks, and joints, preventing air and water leakage.

The caulking gun is designed to hold a tube or cartridge filled with caulking material. It helps to regulate the flow of the caulk and apply it precisely to the desired areas. The gun typically consists of a frame, a trigger, and a rod that pushes the caulk out of the cartridge.
Using a caulking gun is relatively easy. Once the caulk tube is loaded into the gun, you squeeze the trigger to push the rod forward, forcing the caulk out through the nozzle. By controlling the pressure on the trigger, you can control the amount of caulk being dispensed.
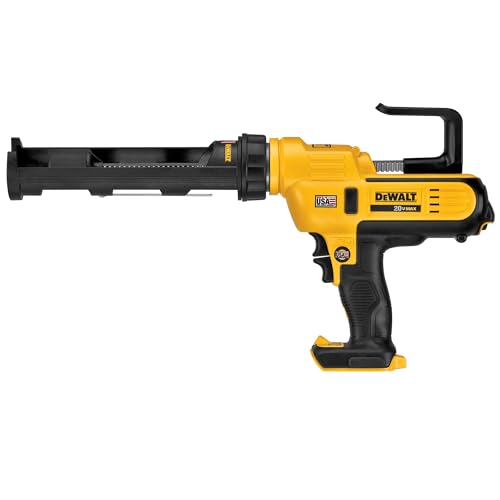
Caulking guns come in various sizes and designs, ranging from basic manual guns to battery-powered or pneumatic guns for larger projects. Some caulking guns also offer features like dripless or adjustable flow settings, making them more convenient to use.
Common applications for a caulking gun include sealing joints in windows, doors, and baseboards, filling cracks in walls or ceilings, and repairing gaps in fixtures or appliances. It is an essential tool for any DIYer or professional contractor, helping to achieve a clean and professional finish.
Understanding the Purpose and Function of Caulking Guns
A caulking gun is an essential tool used for applying caulk to seal gaps and joints in various construction projects. Whether you are working on a bathroom renovation, installing windows or doors, or doing any type of home improvement requiring sealing, having a caulking gun can make the job easier and more efficient.

The Purpose of Caulking Guns
Caulking guns are designed to:
- Dispense caulk: The primary purpose of a caulking gun is to apply caulk precisely and smoothly. Caulk is usually stored in cartridges or tubes, and the gun’s trigger mechanism easily dispenses it as you apply even pressure.
- Create a watertight seal: Caulk helps prevent water, air, and other substances from infiltrating gaps and joints. By creating a tight seal, caulking guns help ensure the integrity of the structure, whether it’s sealing gaps around windows or filling cracks in bathroom tiles.
- Improve energy efficiency: By sealing gaps, caulking guns can contribute to improved energy efficiency. They help prevent drafts and air leaks, thus reducing heating and cooling costs.
- Achieve a professional finish: The precise control provided by caulking guns allows for a neat and professional finish. The caulk can be smoothly applied, filling and sealing gaps without excess mess or wasted material.
How Caulking Guns Work
Basic steps in using a caulking gun:
- Preparation: Start by selecting the appropriate caulk for your project and preparing the surface you will be sealing. Ensure the area is clean, dry, and free of debris.
- Loading the gun: Insert the caulk cartridge or tube into the gun, ensuring it is securely placed and the plunger is properly positioned.
- Preparing the tip: Cut the tip of the caulk cartridge at a 45-degree angle using a utility knife. The size of the opening will determine the size of the bead the caulk produces.
- Applying the caulk: Squeeze the trigger to apply a consistent bead of caulk along the gap or joint that needs sealing. Move the gun steadily along the gap, maintaining even pressure on the trigger.
- Smoothing the caulk: Use a caulk smoothing tool or your finger to smooth out the applied caulk, ensuring it fills the gap completely and creates a clean, finished look.
- Clean-up: Wipe off any excess caulk before it cures using a damp cloth or sponge. If necessary, use a caulk remover to remove any stray caulk.
By understanding the purpose and function of caulking guns, you can achieve professional results in your home improvement projects. With their ability to dispense caulk precisely and create watertight seals, caulking guns are an indispensable tool for any DIY enthusiast or professional contractor.
Types of Caulking Guns
There are several types of caulking guns available for different applications:
1. Manual Caulking Guns: These are the most common type of caulking guns and are operated by hand. They have a trigger mechanism that dispenses the caulk as the trigger is pulled. Manual caulking guns are suitable for small projects and occasional use.

2. Pneumatic Caulking Guns: Pneumatic caulking guns are powered by compressed air. They provide a consistent flow of caulk and are ideal for larger projects or situations where a lot of caulk needs to be applied. Pneumatic caulking guns require an air compressor to operate.
3. Battery-Powered Caulking Guns: Battery-powered caulking guns are operated using rechargeable batteries. They are portable and convenient to use, making them a popular choice for both professionals and DIY enthusiasts. Battery-powered caulking guns are especially useful for tasks that require mobility or working in tight spaces.
4. Dripless Caulking Guns: Dripless caulking guns are designed to minimize mess and waste. They feature an anti-drip mechanism that stops caulk from oozing out when the trigger is released. Dripless caulking guns can be either manual, pneumatic, or battery-powered.
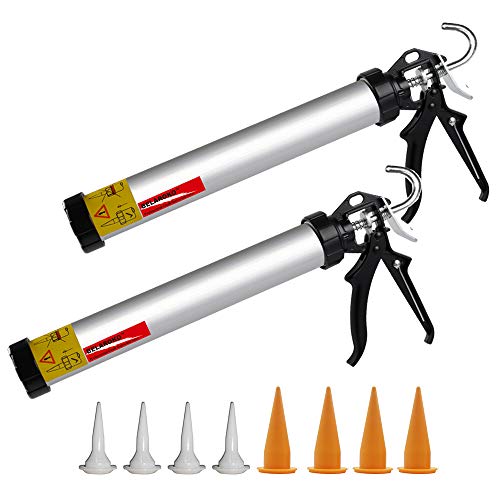
5. Sausage Caulking Guns: Sausage caulking guns are specifically designed to dispense sealants in sausage packs. These guns have a special barrel that accommodates the sausage pack, allowing for easy application of larger quantities of caulk. Sausage caulking guns are commonly used in commercial and industrial settings.
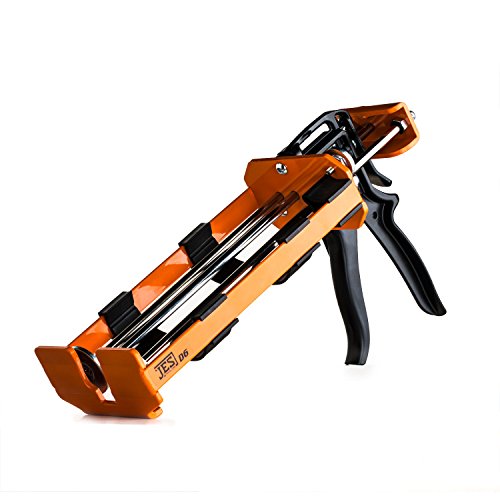
6. Dual Component Caulking Guns: Dual component caulking guns are used for dispensing two-part sealants or adhesives. These guns have separate compartments for storing and dispensing each component. They are commonly used in heavy-duty construction, automotive, and plumbing applications.

When choosing a caulking gun, consider the specific requirements of your project and select the appropriate type. The right caulking gun can make your caulking tasks easier and more efficient. Always follow the manufacturer’s instructions for proper use and maintenance.
Exploring the Different Types of Caulking Guns Available
When it comes to caulking guns, there are various types available on the market, each catering to different needs and preferences. Here, we will explore the different types of caulking guns to help you choose the right one for your project:
| Type | Description | Common Uses |
|---|---|---|
| Dripless Caulking Gun | This type of caulking gun is designed to minimize dripping and wastage of caulk. It often has a built-in pressure release feature that stops the flow of caulk when the trigger is released. | Ideal for precision caulking and projects where clean application is essential. |
| Ratchet-Drive Caulking Gun | A ratchet-drive caulking gun uses a ratchet mechanism to apply pressure on the caulk tube. This allows for better control and easier caulking, especially for long or continuous bead applications. | Recommended for large-scale caulking projects or when working with thick or difficult-to-apply caulk. |
| Squeeze Handle Caulking Gun | This type of caulking gun features a simple squeeze handle mechanism. It is lightweight and easy to use, making it a popular choice for DIYers or occasional users. | Perfect for small caulking tasks or for those who prefer a more basic caulking gun. |
| Battery-Operated Caulking Gun | As the name suggests, a battery-operated caulking gun runs on batteries and eliminates the need for manual pressure. This type of caulking gun is particularly useful for high-volume or repetitive caulking tasks. | Great for professionals or individuals who frequently engage in caulking projects. |
| Pneumatic Caulking Gun | A pneumatic caulking gun is powered by air compression. It provides consistent pressure and is often used in construction or industrial settings where a high volume of caulking is required. | Ideal for heavy-duty caulking tasks and professional use. |
Before choosing a caulking gun, consider factors such as the type of caulk you will be using, the scale of the project, and your level of experience. These factors will help you determine the most suitable caulking gun for your needs. Remember, selecting the right caulking gun can greatly impact the success and efficiency of your project.
How Does a Caulking Gun Work?
A caulking gun is a tool used to apply caulk or sealants to various surfaces. It consists of a metal or plastic frame with a trigger mechanism and a metal rod called a plunger.
Key Components of a Caulking Gun:
1. Frame: The frame of the caulking gun holds all the components together. It is usually made of metal or durable plastic.
2. Trigger Mechanism: The trigger mechanism is used to control the flow of caulk. When the trigger is squeezed, it pushes the plunger forward, forcing the caulk out of the tube.
3. Plunger: The plunger is a metal rod that fits inside the caulk tube. When the trigger is squeezed, the plunger is pushed forward, exerting pressure on the caulk and forcing it out of the tube.
4. Tube Holder: The tube holder secures the caulk tube in place. It is usually adjustable to accommodate different sizes of caulk tubes. The tube holder also helps to control the flow of caulk.
5. Cut-Off Tool: Some caulking guns have a cut-off tool attached to the frame. This tool is used to cut the tip of the caulk tube, allowing for easy application of caulk.
How a Caulking Gun Works:
1. Load the Caulk Tube: Open the caulking gun by releasing the pressure on the rod and pulling the trigger back. Insert the caulk tube into the tube holder and push it forward until it is securely in place. Close the caulking gun by squeezing the trigger and pushing the rod forward.
2. Cut the Tip: If your caulking gun has a cut-off tool, use it to cut the tip of the caulk tube at a 45-degree angle. This will allow for better control and application of caulk.
3. Apply Caulk: Hold the caulking gun at a 45-degree angle to the surface you want to caulk. Squeeze the trigger to start the flow of caulk. Move the caulking gun along the surface, applying a continuous bead of caulk. Release the trigger to stop the flow of caulk.
4. Finish and Clean: Once you have finished applying the caulk, release the pressure on the rod and pull the trigger back to release the caulk tube. Wipe off any excess caulk from the surface using a damp cloth or sponge. Replace the cap on the caulk tube to keep it sealed for future use.
A caulking gun is a simple yet essential tool for any DIY enthusiast or professional looking to seal gaps and joints effectively. By following these steps, you can easily use a caulking gun to apply caulk and achieve a clean and professional finish.
Step-by-Step Guide on Using a Caulking Gun
Step 1: Choose the right caulk
Before using a caulking gun, it’s important to choose the right caulk for your project. There are different types of caulk available, such as silicone caulk, acrylic latex caulk, and polyurethane caulk. Each type has its own properties and is suitable for specific applications.
Step 2: Prepare the surface
Prior to using a caulking gun, make sure that the surface is clean and free from dirt, dust, and debris. Use a scraper or a wire brush to remove any loose material or old caulk. Wipe the surface with a clean cloth to ensure it is dry.
Step 3: Load the caulking gun
To load the caulking gun, pull back the rod all the way until it locks in place. Then, remove the nozzle cap from the caulk tube and place the caulk tube into the gun, with the nozzle facing forward. Push the rod forward until the caulk comes out of the nozzle.
Step 4: Apply the caulk
Hold the caulking gun at a 45-degree angle and apply steady pressure on the trigger as you move it along the joint or crack that you want to seal. Make sure to keep a consistent speed and pressure to apply an even bead of caulk.
Step 5: Smooth the caulk
After applying the caulk, use a caulk smoothing tool or your finger (dipped in a mixture of water and dish soap) to smooth the caulk and remove any excess. This will help create a neat and professional finish.
Step 6: Clean the caulk gun
Once you have finished using the caulking gun, wipe off any excess caulk from the nozzle. If the caulk has dried, you can use a utility knife to carefully remove it. Clean the gun with warm, soapy water or a caulk remover, following the manufacturer’s instructions.
Following these steps will help you effectively use a caulking gun and achieve a clean and professional-looking result for your caulking projects.
Tips for Pronouncing Caulking Gun Correctly
Pronouncing the word “caulking gun” correctly can be a challenge for some non-native English speakers. Here are some tips to help you pronounce this term correctly:
| 1. Break it down: | Divide the word into syllables: “caulk-ing” and “gun”. Focus on pronouncing each syllable clearly. |
| 2. Emphasize the stress: | In the word “caulking gun”, the stress is on the first syllable “caulk”. Make sure to emphasize this syllable when pronouncing the word. |
| 3. Practice the sounds: | Pay attention to the sounds involved in the word “caulking gun”. The “k” and the “g” sounds can be challenging, especially for non-native speakers. Practice pronouncing these sounds separately and then put them together. |
| 4. Listen and imitate: | Listen to native English speakers pronouncing “caulking gun” and try to imitate their pronunciation. You can find audio samples online or ask a native English speaker to help you. |
| 5. Slow down: | Take your time when pronouncing “caulking gun”. Slow down and focus on each sound and syllable. This will help you pronounce the word more accurately. |
Remember, practice makes perfect. Keep practicing the pronunciation of “caulking gun” until you feel confident and comfortable saying it correctly.