Sharpening a chisel is an essential skill for woodworkers and carpenters. A sharp chisel is crucial for achieving clean, precise cuts and ensuring the longevity of your tool. One effective method of sharpening a chisel is using a sharpening block.
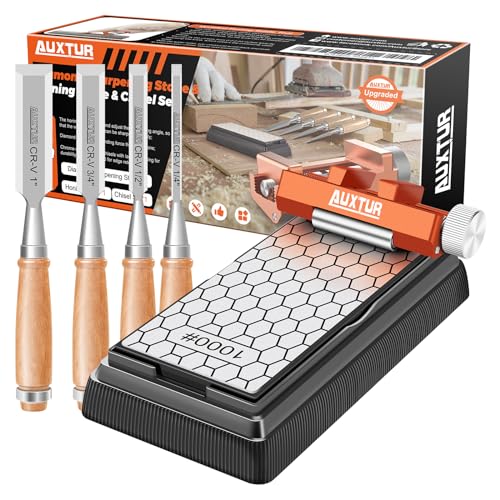
A sharpening block, also known as a sharpening stone or whetstone, is a versatile tool that can be used to sharpen a variety of cutting edges. When used correctly, it can restore a dull chisel blade to its optimal cutting performance. The block is made of abrasive material that removes metal from the chisel’s edge, creating a sharper and more effective cutting surface.
To begin the sharpening process, place the sharpening block on a stable work surface. Secure the block with a non-slip mat or clamp to prevent any movement during the sharpening process. Hold the chisel firmly in one hand, with the beveled edge facing up. Rest the bevel against the block at a slight angle, typically between 20 and 25 degrees.
Using moderate pressure, move the chisel back and forth across the block in a controlled motion. Maintain a consistent angle throughout the sharpening process to ensure an even edge. It is essential to evenly distribute the pressure across the entire chisel blade to avoid uneven sharpening. Continue this motion until you have achieved a sharp edge on the chisel.
After sharpening, it is important to remove any metal particles and debris from the chisel. Use a brush or rag to clean the blade thoroughly. Once clean, you can test the sharpness of the chisel by making a test cut on a piece of scrap wood. If the chisel effortlessly slices through the wood fibers, it is properly sharpened.

Sharpening your chisel on a block is a skill that requires practice and patience. With regular maintenance and proper sharpening techniques, you can keep your chisels sharp and ready for any woodworking project.
What is a chisel?
A chisel is a woodworking tool that is used to shape, cut, and carve wood. It has a sharp metal blade with a beveled edge on one side that is attached to a handle. The blade is usually made of high carbon steel, which allows it to maintain a sharp edge for a long time.
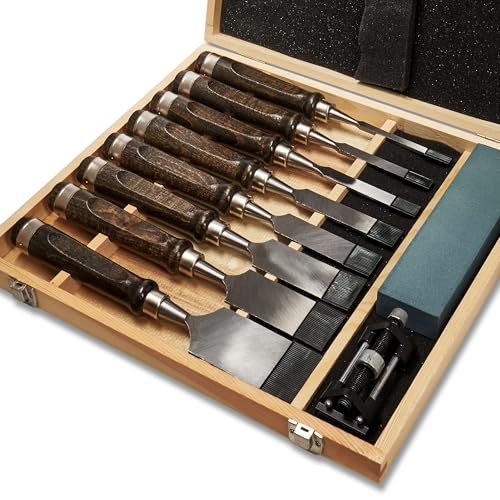
Chisels come in various sizes and shapes, each designed for a specific task. Some common types of chisels include bench chisels, mortise chisels, carving chisels, and paring chisels. Bench chisels are the most versatile and are used for general woodworking tasks like shaping and trimming. Mortise chisels are used to create square holes, while carving chisels are used for intricate carving work. Paring chisels have a long, thin blade and are used for delicate work and finishing touches.
To use a chisel, the blade is held against the wood and struck with a mallet or hammer. The force of the strike drives the blade into the wood, allowing it to make precise cuts and shapes. Chisels require frequent sharpening to maintain their sharpness and effectiveness. Proper sharpening techniques involve using a sharpening stone or honing guide to regrind the beveled edge and remove any nicks or dullness.
Whether you are a professional woodworker or a DIY enthusiast, having a sharp chisel is essential for achieving clean, accurate cuts and shapes in your woodworking projects.

Why is it important to sharpen a chisel?
Sharpening a chisel is an essential skill for any woodworker or carpenter. A sharp chisel not only improves the quality of your work but also makes it safer and more efficient. Here are a few reasons why sharpening a chisel is important:
1. Improved Cutting Performance
When a chisel is sharp, it cuts through wood with less effort, providing cleaner and more precise results. A dull chisel, on the other hand, tends to tear the wood fibers, leading to rough and uneven cuts. By regularly sharpening your chisel, you can ensure that it remains in optimal cutting condition, allowing you to achieve the desired outcome in your woodworking projects.
2. Safety
A dull chisel requires more force to use, increasing the risk of accidents. With a sharp chisel, you have better control and are less likely to slip or lose control of the tool. This reduces the chances of accidents and injuries, making sharpening a chisel an important safety measure.
3. Extended Chisel Lifespan
Regularly sharpening your chisel can help extend its lifespan. When a chisel is dull, it not only performs poorly but also puts extra stress on the tool. This can lead to chipping or breaking of the cutting edge, ultimately reducing the chisel’s overall lifespan. By maintaining a sharp edge, you can minimize the wear and tear on your chisel, making it last longer and saving you money in the long run.
To ensure that your chisel remains sharp, it is crucial to have the right sharpening tools and techniques. Using a proper sharpening stone and following the correct angles and honing methods will help you achieve the best results. Additionally, inspecting the chisel regularly for any signs of damage or wear is important for maintaining its performance.

In conclusion, sharpening a chisel is not only important for achieving better results in your woodworking projects but also for your safety and the longevity of your tools. By making it a regular part of your woodworking routine, you can ensure that your chisel remains sharp and ready for use whenever you need it.
Preparation
Before you begin sharpening your chisel on a block, there are a few important steps you need to take to ensure a successful result.
Step 1: Safety First
Always prioritize your safety when working with sharp tools. Make sure you wear protective gear such as safety glasses and gloves to avoid any potential accidents.
Step 2: Gather Your Materials
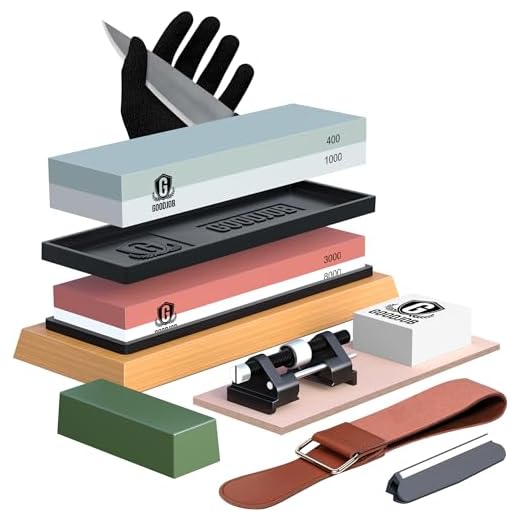
Collect all the necessary materials for sharpening your chisel. This includes a sharpening stone or sandpaper, honing guide, water or honing oil, and a flat wooden block.
Step 3: Clean the Chisel
Before you can start sharpening, it’s important to clean the chisel thoroughly. Use a solvent or cleaning solution to remove any dirt, grime, or rust from the blade. Dry it completely before moving on to the next step.
Step 4: Set Up Your Workspace
Find a sturdy work surface or bench where you can securely place your wooden block. Make sure it’s at a comfortable height for you to work on and that there’s enough light to see clearly.
Step 5: Prepare the Block
Place the flat wooden block on your work surface. It should be large enough to accommodate your chisel and allow for easy movement during sharpening.
Step 6: Soak the Sharpening Stone
If you’re using a sharpening stone, soak it in water for the amount of time specified by the manufacturer. This will ensure that the stone is properly lubricated and will result in a smoother sharpening process.
By following these preparation steps, you’ll be ready to sharpen your chisel on a block effectively and safely.
Gather the necessary tools
Before you start sharpening your chisel on a block, it’s important to gather all the necessary tools. Here’s a list of what you’ll need:
- A chisel
- A sharpening stone or sandpaper
- A block of wood
- A honing guide (optional, but recommended)
- A spray bottle with water
- A piece of cloth or towel
Make sure your chisel is of good quality and in proper condition. A dull or damaged chisel will require more effort and time to sharpen. Choose a sharpening stone with a grit suitable for your chisel’s edge. If you don’t have a sharpening stone, you can alternatively use sandpaper of different grits to achieve a sharp edge.
The block of wood will serve as a stable surface to work on and protect your workbench or table from scratches. It should be long and wide enough to comfortably hold the chisel while sharpening.
The honing guide is not essential but highly recommended, especially for beginners. It helps maintain a consistent angle while sharpening, resulting in an even edge. If you’re confident in your ability to hold a consistent angle freehand, you can skip the honing guide.
The spray bottle filled with water is used to keep the sharpening stone or sandpaper lubricated during the sharpening process. Lubrication prevents the material from clogging and allows for a smoother sharpening experience.
Lastly, have a piece of cloth or towel nearby to wipe off any excess water or debris from the chisel and sharpening tools. Keeping everything clean and dry will help you achieve better results.
Secure the chisel in a block
Before you start sharpening your chisel, it’s important to secure it in a block to prevent any accidents or injuries. The block will provide stability and support, allowing you to focus on sharpening without worrying about the chisel moving.
To secure the chisel, follow these steps:
- Select a wooden block that is large enough to accommodate the width of your chisel.
- Place the block on a sturdy work surface, ensuring it doesn’t wobble or move.
- Position the chisel in the block, aligning the cutting edge with the top surface of the block.
- Apply gentle pressure to push the chisel into the block until it is securely held in place.
Once the chisel is secured in the block, you can proceed with sharpening. Remember to keep your fingers away from the cutting edge and wear appropriate safety gear, such as protective eyewear and gloves, throughout the sharpening process.
Sharpening Process
To ensure a chisel is sharp and ready for use, it is important to follow a proper sharpening process. Here are the steps to sharpen a chisel on a block:
1. Prepare the Block
Start by securing the block in a vise or clamp, making sure it is stable and won’t move during the sharpening process. This will provide a solid surface for sharpening the chisel.
2. Check the Chisel
Inspect the chisel for any nicks, chips, or damage. If there are any imperfections, use a bench grinder or file to remove them. It is important to work slowly and carefully to avoid removing too much material.
3. Honing Guide
Attach a honing guide to the chisel blade. The honing guide will help maintain the correct angle while sharpening. Adjust the guide according to the manufacturer’s instructions, ensuring the correct angle is set.
4. Coarse Grit
Start with a coarse grit sharpening stone to remove any larger nicks or dullness. Hold the chisel securely in the honing guide and slowly move it back and forth along the stone, maintaining a consistent angle. Repeat this process several times until the desired sharpness is achieved.
5. Fine Grit
Switch to a finer grit sharpening stone to refine the edge and remove any scratches left by the coarse grit stone. Use the same technique as before, moving the chisel back and forth along the stone, maintaining the correct angle.
6. Finishing Touches
After sharpening on the fine grit stone, remove the chisel from the honing guide and hold it by hand. Use a strop or piece of leather with honing compound to make a few final passes on both sides of the blade. This will polish the edge and make it razor-sharp.
Remember to periodically clean the sharpening stones to remove any metal particles that may clog the grit. Proper maintenance and regular sharpening will ensure that your chisels are always ready for use and perform at their best.
Start with the rough grit stone
When sharpening a chisel on a block, it is important to start with a rough grit stone. The rough grit stone is typically the first step in the sharpening process as it helps to remove any nicks or imperfections in the blade.
Before starting, make sure the stone is clean and free from any debris. You can do this by washing it with water and a mild detergent. Once clean, place the stone on a stable surface, such as a workbench or table.
Next, wet the stone with water. The water will act as a lubricant and help to prevent the chisel from overheating during the sharpening process. It is recommended to use a spray bottle or damp cloth to wet the stone evenly.
Hold the chisel firmly with one hand, making sure to keep your fingers away from the cutting edge. With your other hand, place the beveled edge of the chisel against the stone at a 20-degree angle. The beveled edge is the angled side of the chisel that forms the cutting edge.
Using moderate pressure, move the chisel back and forth along the length of the stone. Make sure to maintain the 20-degree angle and evenly distribute the pressure across the blade. Repeat this motion several times, applying water as needed to keep the stone wet.
As you sharpen the chisel, you may notice a burr forming on the back side of the blade. This is a normal part of the sharpening process and can be removed later. Keep sharpening until the beveled edge is smooth and free from any imperfections.
Once you are satisfied with the sharpness of the chisel, you can move on to the next step in the sharpening process, using a finer grit stone. The finer grit stone will help to refine the edge and provide a polished finish. But for now, you have successfully sharpened your chisel using the rough grit stone!
Move on to the fine grit stone
Start by wetting the fine grit stone with water or honing oil, depending on the type of stone you are using. This will ensure smooth and consistent sharpening. Place the chisel on the stone at the same angle as before, but this time, apply lighter pressure.
Using consistent and fluid motions, slide the chisel back and forth on the stone. Make sure to cover the entire beveled edge of the chisel. This will help remove any remaining burrs or imperfections from the coarse grit sharpening.
Continue sharpening on the fine grit stone until you feel that the edge of the chisel is razor-sharp. You can test for sharpness by running your finger gently along the edge – be careful not to cut yourself! If the edge feels smooth, you’ve achieved a sharp edge.
Once you are satisfied with the sharpness, rinse off the chisel and the stone to remove any residue. Dry the chisel thoroughly before storing it or using it for your woodworking project. Remember, a sharp chisel not only makes woodworking tasks easier, but also produces cleaner and more precise cuts.
With regular maintenance and sharpening, your chisel will remain in optimal condition and serve you well for years to come.