


Writing on wood with a chisel can be a unique and creative way to add a personal touch to your woodworking projects. Whether you want to leave a message on a handmade piece of furniture or create a decorative design on a wooden sign, using a chisel can give your work a beautiful and rustic look.
Before you begin, it’s important to gather the necessary materials. You will need a chisel with a sharp blade, a wooden surface to write on, and a pencil or marker to create a guide for your writing. It’s also helpful to have sandpaper or a sanding block to smooth out any rough edges on the wood.
To start, determine the placement and size of your writing on the wood. Use a pencil or marker to lightly draw your desired design or text. This will serve as a guideline for your chisel work. If you’re creating a text, consider using stencils or templates to achieve more precise and uniform lettering.
Once your design is in place, position the chisel at a slight angle and start gently tapping it with a hammer. Take care to apply even pressure and make controlled cuts along the lines of your design. Remember to always chisel away from your body and keep your fingers clear of the blade.

As you work, periodically check the depth and thickness of your cuts to ensure a consistent and even appearance. If desired, you can create different depths and textures using various chisels. Experiment with different angles and techniques to achieve the desired effect.
Once your writing is complete, take a step back and admire your work. If necessary, use sandpaper or a sanding block to smooth any rough areas and give your writing a polished and finished look. Consider applying a protective finish or sealant to protect your writing and enhance the natural beauty of the wood.
Writing on wood with a chisel requires practice and patience, but the end result can be a stunning piece of art. So, grab your chisel and get creative with your woodworking projects!
Choosing the Right Chisel
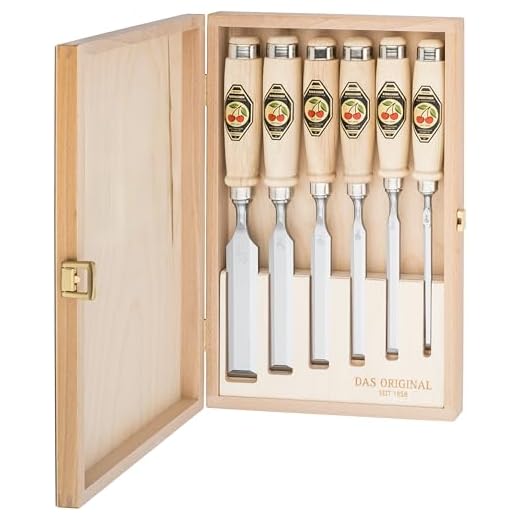
When it comes to writing on wood with a chisel, choosing the right tool for the job is crucial. There are various types of chisels available, each with its own unique characteristics and uses. Here are some factors to consider when selecting a chisel:
- Type of wood: Different types of wood have different densities and hardness levels. For softer woods, a chisel with a lower hardness rating may be suitable, while harder woods may require a chisel with a higher hardness rating.
- Chisel size: The size of the chisel is an important factor to consider as it determines the width of the marks you will make on the wood. For fine lines and intricate details, a narrower chisel is recommended, while a wider chisel is more suitable for larger, bolder markings.
- Handle material: The material used for the chisel handle affects its comfort and durability. Traditional wooden handles offer a classic feel and are comfortable to hold, while synthetic handles may provide better grip and durability.
- Bevel angle: The bevel angle of the chisel determines the angle at which it makes contact with the wood. A lower bevel angle creates sharper and more precise cuts, while a higher bevel angle is better for rougher and more aggressive cuts.
- Quality: Investing in a high-quality chisel is essential for achieving clean and accurate writing on wood. Look for chisels made from strong and durable materials that can withstand repeated use without losing their sharpness.
By taking these factors into consideration, you can choose the right chisel that suits your specific needs and preferences. Remember to always practice proper safety measures when working with chisels to prevent accidents or injuries.
Consider the Wood Type
Before you start writing on wood with a chisel, it’s important to consider the type of wood you’re working with. Different types of wood have different characteristics, and this can affect how well the wood holds the chisel marks and how easily it can be written on.
Hardwood vs Softwood
One of the main things to consider is whether the wood is hardwood or softwood. Hardwoods, such as oak or mahogany, are generally denser and harder, making them more resistant to chisel marks. Softwoods, such as pine or cedar, are less dense and easier to mark with a chisel.
While both hardwood and softwood can be written on, it might be easier to achieve clear and distinct letters on softwood due to its softer nature. However, the choice of wood should ultimately depend on the desired aesthetic and the project you’re working on.
Wood Grain
Another factor to consider is the wood grain. The grain refers to the pattern of fibers in the wood, and it can vary between different types of wood. Some wood grains are straight and uniform, while others have a more irregular or wavy pattern.
When writing on wood with a chisel, it’s important to take the wood grain into account. It can affect the way the chisel cuts into the wood and the overall appearance of the writing. For example, a straight-grained wood might result in cleaner and more precise letters, while a wood with a more pronounced grain might add texture and character to the writing.
| Type of Wood | Characteristics |
|---|---|
| Oak | Dense, hard, prominent grain |
| Pine | Less dense, soft, straight grain |
| Mahogany | Dense, hard, fine grain |
| Cedar | Less dense, soft, aromatic |
There are many types of wood available, each with its own unique characteristics and appearance. Take the time to choose a wood that suits your project and consider its hardness and grain to achieve the desired results when writing on it with a chisel.
Select the Chisel Size
When it comes to writing on wood with a chisel, the size of the chisel is an important consideration. You want to choose a chisel that is appropriate for the size of the letters you plan to carve. A chisel that is too small will make it difficult to create bold and legible letters, while a chisel that is too large may result in clumsy and imprecise carving.
There are various chisel sizes available, ranging from 1/8 inch to 1 inch or even larger. The size you choose will depend on factors such as the font style, the size of the lettering, and the level of detail you want to achieve.
For small lettering or intricate designs, a smaller chisel, such as a 1/8 or 1/4 inch, is recommended. These chisels allow for greater control and precision when carving delicate lines and curves. They are also ideal for creating fine details such as serifs or decorative flourishes.
On the other hand, if you plan to write large letters or want to cover a larger area, a larger chisel, such as a 3/4 or 1 inch, may be more suitable. These chisels have a wider blade that can remove more material with each stroke, allowing you to carve broader lines and fill in larger spaces more quickly.
Remember that the size of the chisel not only affects the appearance of your carving but also the amount of force required to make the cuts. A smaller chisel requires less force but may take longer to remove material, while a larger chisel requires more force but can remove material more quickly.
Consider the Wood Type
Another factor to consider when selecting a chisel size is the type of wood you are working with. Hardwoods, such as oak or maple, require more effort to carve and may benefit from a larger chisel that can remove material more efficiently. Softwoods, such as pine or cedar, are easier to carve and may work well with a smaller chisel.
It is worth experimenting with different chisel sizes to find the one that works best for your project. You may also find that having a selection of chisels in different sizes is advantageous, as it allows you to adapt to different lettering styles and project requirements.
Remember to always keep your chisels sharp and well-maintained for optimal carving performance. A dull or damaged chisel can make carving more difficult and may result in unsatisfactory results. Regularly sharpen and hone your chisels to keep them in top condition.
Preparing the Surface
Before you begin writing on wood with a chisel, it is important to properly prepare the surface to ensure the best results. This involves a few key steps:
Clean the Wood
Start by cleaning the wood surface thoroughly. Remove any dust, dirt, or grime that may be present. You can use a soft cloth or brush to gently wipe away any debris.
Sand the Wood
Next, you’ll want to sand the wood to create a smooth and even surface. This will help the chisel glide more easily and prevent any rough spots or imperfections from interfering with your writing. Start with a coarse sandpaper and gradually work your way up to a finer grit. Be sure to sand in the direction of the wood grain to avoid leaving any scratches.
Pro Tip: Consider using a sanding block or sponge to help maintain an even pressure and prevent over-sanding in certain areas.
Apply a Sealant or Primer
Once the wood is sanded, you can choose to apply a sealant or primer to further protect the surface and enhance the longevity of your writing. This step is optional but recommended, especially if you plan to display or use the wood piece for an extended period. Follow the manufacturer’s instructions when applying the sealant or primer, and allow sufficient drying time before proceeding.
Note: Some sealants or primers may alter the appearance of the wood, so it’s important to test a small, inconspicuous area first to ensure you’re satisfied with the result.
By properly preparing the surface of the wood, you will set yourself up for success when it comes time to write with a chisel. Taking the time to clean, sand, and seal the wood will help you achieve the best possible outcome, resulting in clear and precise writing that will stand the test of time.
Sanding the Wood
Once you have finished chiseling your design onto the wood, the next step is to sand the wood. Sanding helps to smooth out any rough edges or uneven surfaces, giving your wood a polished finish.
Here are the steps to sanding the wood:
1. Gather your materials
Before you start sanding, gather the necessary materials. You will need sandpaper in various grits, ranging from coarse to fine, a sanding block, and a dust mask to protect yourself from inhaling wood dust.
2. Start with coarse sandpaper
Begin by using a coarse grit sandpaper, such as 60 or 80, to remove any large imperfections or rough areas on the wood. Use the sanding block to maintain an even pressure and make sure to sand along the grain of the wood.
3. Move to a medium grit sandpaper
After you have smoothed out the wood with the coarse sandpaper, switch to a medium grit sandpaper, such as 120 or 150. This will help to further refine the surface and remove any remaining roughness left by the coarse sandpaper.

4. Finish with a fine grit sandpaper
Lastly, use a fine grit sandpaper, such as 220 or 320, to achieve a smooth and polished finish on the wood. Make sure to sand gently and in a circular motion for an even result.
Remember to take breaks and check the wood periodically to ensure you are achieving the desired smoothness. You can also use sanding sealer or varnish to protect the wood and enhance its appearance.
By following these steps, you will be able to achieve a beautifully sanded wood surface that is ready for any additional finishes or treatments.
Applying a Wood Finish
Once you have completed your wood carving or engraving project, it is important to apply a wood finish to protect and enhance the beauty of the wood. A wood finish serves to seal the surface of the wood, preventing moisture damage and adding a polished look.
Choosing the Right Finish
There are various types of wood finishes available, such as varnish, lacquer, shellac, and oil finishes. Each type has its own characteristics, so it’s important to choose the right one based on the desired appearance and level of protection.
Varnish: Varnish is a popular choice for protecting wood as it provides a durable and long-lasting finish. It is available in different sheen levels, from matte to glossy.
Lacquer: Lacquer is another commonly used wood finish that dries quickly and creates a hard, durable surface. It is available in different sheen levels and can be sprayed or brushed on.
Shellac: Shellac is a traditional wood finish that is often used for antique restoration projects. It provides a warm, rich appearance and can be easily repaired or refreshed.
Oil Finishes: Oil finishes, such as tung oil or linseed oil, penetrate the wood and enhance its natural beauty. They provide a more natural-looking finish but may require more maintenance.
Applying the Finish
Before applying the finish, ensure that the wood surface is clean and free of dust or debris. It’s recommended to sand the wood to a smooth surface beforehand.
When applying the finish, use a brush or a soft cloth and follow the manufacturer’s instructions. Apply the finish in thin, even coats, allowing each coat to dry completely before applying the next. This will ensure a smooth and professional-looking finish.
After applying the final coat, allow the finish to cure according to the manufacturer’s instructions. This will ensure that the finish fully hardens and provides optimal protection.
Remember to work in a well-ventilated area and wear appropriate safety gear, such as gloves and a mask, when applying the finish.
By properly applying a wood finish, you can enhance the natural beauty of your wood carving or engraving project while protecting it for years to come.
Working with a Chisel
Working with a chisel requires a steady hand and precise movements. Here are some tips to help you achieve the best results:
1. Choose the Right Chisel
Before starting, make sure you have the right chisel for the job. Chisels come in different sizes and shapes, so pick one that suits your needs. A beveled edge chisel is great for general woodwork, while a mortise chisel is perfect for creating joints.
2. Safety First
Always wear safety goggles and gloves when working with a chisel. This will protect your eyes from flying wood chips and your hands from accidental cuts. Work in a well-ventilated area to avoid inhaling dust particles.
3. Start with Marking the Wood
Before you start chiseling, mark the area you want to work on with a pencil. This will give you a guide and prevent any mistakes. Take your time to ensure the markings are accurate.
4. Position the Chisel Correctly
Hold the chisel firmly but not too tightly. Position it at a slight angle against the wood, with the cutting edge facing the direction you want to remove the wood. Start with light taps to create a groove, then gradually increase the force as needed.
5. Use a Mallet
For more power, use a mallet to strike the chisel. This will help you remove larger chunks of wood quickly. Make sure to hit the chisel straight and avoid hitting your fingers.
6. Work in Small Sections
It’s best to work in small sections at a time, especially if you’re a beginner. This will give you more control and reduce the risk of making big mistakes. Take breaks to check your progress and make adjustments if needed.
7. Keep the Chisel Sharp
A sharp chisel is essential for achieving clean and precise cuts. Regularly sharpen your chisel using a sharpening stone or honing guide. This will make your work easier and prevent the chisel from slipping and causing accidents.
Remember, practice makes perfect. With time and experience, you’ll become more proficient in using a chisel and create beautiful woodwork.

Marking the Wood
Before you start chiseling wood, it is important to mark out the areas where you want to make cuts or carve. This will help you stay focused and ensure accuracy in your work. Here are some methods you can use to mark the wood:
- Pencil: A simple pencil can be used to mark the wood. The lead leaves a visible line that can easily be seen and followed.
- Chalk: Chalk is a great option for marking dark or rough wood surfaces. It can be easily wiped off with a damp cloth.
- Knife: A utility knife can be used to make small incisions or marks on the wood. These marks can serve as guidelines for your chiseling.
- Masking Tape: Applying masking tape on the wood surface allows you to mark directly on the tape. This prevents any damage to the wood and provides a clear guide for your chisel.
When marking the wood, it is important to be precise and double-check your measurements. Take your time and ensure that the marks are in the correct positions before you start chiseling. This will help you achieve the desired results and avoid any mistakes.
Remember, practice makes perfect. It is always a good idea to practice your chiseling technique on a scrap piece of wood before working on your actual project. This will allow you to gain confidence and improve your skills before tackling more challenging tasks.