Cleaning a Bond It foam gun is an essential task to ensure the longevity and proper functioning of the tool. Whether you are a professional in the construction industry or a DIY enthusiast, keeping your foam gun clean is crucial for achieving optimal results in your projects.
With time and use, foam residue can build up inside the gun, affecting its performance and quality of foam application. But worry not! Cleaning your Bond It foam gun is a simple process that can be done with a few easy steps.
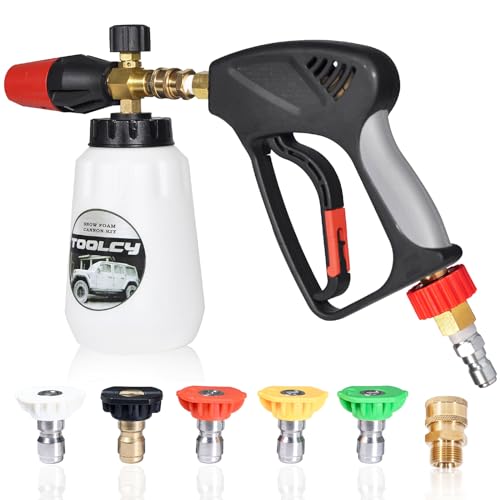
Step 1: Disassemble the foam gun to access its internal components. Start by removing the canister by twisting it counterclockwise. Next, detach the nozzle by unscrewing it from the gun body. Be sure to wear protective gloves during this process.
Step 2: Clean the canister and the nozzle. Use a cloth or sponge dampened with acetone or a recommended solvent to wipe away any foam residue or debris from these parts. Make sure to reach all the nooks and crannies to ensure a thorough cleaning.
Step 3: Clean the gun body. Dip a clean cloth or brush into the solvent and scrub the inside of the gun body to remove any remaining foam. Pay close attention to the trigger mechanism and other moving parts to ensure they are free from any debris.

Step 4: Rinse and dry. Once all the components are clean, rinse them thoroughly with water to remove any traces of the solvent. Allow the parts to air dry completely before reassembling the foam gun.
Remember, regular cleaning and maintenance of your Bond It foam gun will not only extend its lifespan but also guarantee smooth and efficient foam application in your future projects. By following these simple steps, you can keep your foam gun in top condition and achieve professional results every time.
How to Properly Disassemble Bond It Foam Gun
Properly disassembling your Bond It Foam Gun is an important step in maintaining its effectiveness and ensuring its longevity. Follow these steps to safely and efficiently disassemble your foam gun:
Step 1: Release Pressure
Before disassembling your Bond It Foam Gun, it is essential to release any pressure that may be built up inside. To do this, simply release the trigger and press the pressure release valve.
Step 2: Remove the Canister
Once the pressure has been released, you can remove the canister from the foam gun. Twist the canister counterclockwise to detach it from the gun. Set the canister aside for cleaning.

Step 3: Remove the Needle
Next, you will need to remove the needle from the foam gun. Unscrew the retaining nut on the back of the gun to release the needle. Be careful not to damage the needle during this process.
Step 4: Clean the Components
With all the parts of the foam gun disassembled, it is now time to clean each component. Use a suitable solvent or cleaner to remove any foam residue or debris. Pay close attention to the needle and nozzle area, as these are the most critical parts for proper foam dispensing.
Step 5: Inspect for Damage
While cleaning, inspect each component for any signs of damage or wear. Check the needle for any bends or warping, and ensure the nozzle is free from clogs or obstructions. Replace any damaged or worn parts to maintain optimal performance.
Step 6: Reassemble the Foam Gun
Once all the components are clean and in good condition, it is time to reassemble the foam gun. Follow the reverse order of the disassembly steps, ensuring each part is securely attached and tightened.
Step 7: Test the Foam Gun
After reassembly, it is a good idea to test the foam gun to ensure everything is working correctly. Attach a canister of foam to the gun and dispense a small amount to check for proper flow and consistency.

By following these steps to properly disassemble your Bond It Foam Gun, you can ensure it remains in excellent working condition for future use.
| Step | Description |
|---|---|
| Step 1 | Release Pressure |
| Step 2 | Remove the Canister |
| Step 3 | Remove the Needle |
| Step 4 | Clean the Components |
| Step 5 | Inspect for Damage |
| Step 6 | Reassemble the Foam Gun |
| Step 7 | Test the Foam Gun |
Essential Tools for Cleaning Bond It Foam Gun
When it comes to cleaning your Bond It Foam Gun, there are several essential tools that you will need to ensure a thorough and effective cleaning process. These tools will help remove excess foam and prevent clogs, ensuring that your foam gun is ready for future use. Here are the must-have tools for cleaning your Bond It Foam Gun:
- Acetone or solvent cleaner: This is an essential cleaning agent that will help dissolve and remove the foam residue from your foam gun. Acetone is a commonly used cleaner for this purpose, but make sure to check the manufacturer’s instructions for any specific recommendations.
- Wire brush: A wire brush is ideal for removing any stubborn foam residue that may be stuck on the nozzle or other parts of the foam gun. Gently scrub the affected areas to loosen and remove the residue.
- Long-tip cleaning nozzle: This specialized cleaning nozzle is designed to fit into the foam gun and allows you to reach deep into the gun’s internal components for thorough cleaning. It helps remove any foam build-up that may be causing blockages.
- Lint-free cloth: A lint-free cloth is useful for wiping down the foam gun and removing any remaining foam residue. Make sure the cloth is clean and free from lint to avoid leaving behind any particles.
- Pipe cleaners or small brushes: These tools are handy for cleaning hard-to-reach areas such as small crevices or narrow gaps in the foam gun. They help ensure a comprehensive cleaning of the gun’s components.
Using these essential tools, you can effectively clean your Bond It Foam Gun, prolonging its lifespan and maintaining its performance. Always follow the manufacturer’s instructions and safety guidelines when cleaning your foam gun to ensure safe and proper usage.
Step-by-Step Guide: How to Clean Bond It Foam Gun
Keeping your Bond It foam gun clean is essential for its proper functioning and longevity. Regular cleaning helps prevent clogs and ensures a smooth and consistent application of foam. Follow this step-by-step guide to clean your Bond It foam gun effectively:
Step 1: Prepare the Cleaning Solution
Mix a cleaning solution by diluting a suitable foam gun cleaner with water according to the manufacturer’s instructions. This solution will effectively dissolve and remove the foam residues.

Step 2: Remove the Foam Canister
Unscrew the foam canister from the gun body. This will allow you better access to the internal parts and nozzles.
Step 3: Disassemble the Foam Gun
Take the foam gun apart by unscrewing and separating the different sections. This will expose the nozzle, trigger assembly, and other internal parts that need cleaning.
Step 4: Soak the Parts
Place the disassembled parts in a container filled with the cleaning solution. Let them soak for the recommended time, usually around 30 minutes, to dissolve the foam residue.
Step 5: Clean the Parts
Take each part out of the cleaning solution and scrub them gently with a brush or sponge. Pay extra attention to the nozzle and other narrow passages to ensure all foam residue is removed. Rinse the parts with water to remove any remaining cleaning solution.
Step 6: Reassemble the Foam Gun
Once all the parts are clean and dry, reassemble the foam gun by screwing and fitting them back together. Ensure the nozzles and other components are tightly secured to prevent any leakage during use.
Step 7: Test the Foam Gun
Before storing the foam gun, perform a test by attaching a foam canister and dispensing a small amount of foam to ensure everything is working properly. If any issues are detected, repeat the cleaning process or consult a professional.
Following this step-by-step guide will help you maintain a clean and efficient Bond It foam gun. Regular cleaning will extend its lifespan and ensure consistent foam application for all your projects.
Tips for Maintaining Bond It Foam Gun
Proper maintenance of your Bond It foam gun is crucial to ensure its longevity and optimal performance. Here are some tips to help you maintain your foam gun:
- After each use, clean the foam residue from the gun by using an appropriate cleaning solution. This will prevent blockages and keep the gun in good working condition.
- Use a small brush or toothpick to remove any hardened foam particles from the gun’s nozzle or other areas. This will prevent clogs and ensure smooth and even foam application.
- Regularly inspect the gun for any signs of damage or wear. Pay attention to the seals, trigger mechanism, and nozzle. Replace any damaged parts to prevent leaks and maintain consistent foam flow.
- Store the foam gun in a dry and clean location to prevent moisture buildup and damage. Keep it away from direct sunlight or extreme temperatures as these can affect its performance.
- Before using the foam gun again, always test its functionality by dispensing a small amount of foam. This will help you identify any issues and ensure that the gun is ready for use.
- If you won’t be using the foam gun for an extended period, thoroughly clean it and remove any leftover foam residue. Apply a light coating of lubricant to all moving parts to prevent them from sticking or rusting.
By following these maintenance tips, you can prolong the lifespan of your Bond It foam gun and ensure consistent, hassle-free foam application for all your projects.
Common Mistakes to Avoid when Cleaning Bond It Foam Gun
Not wearing gloves: One common mistake people make when cleaning their Bond It foam gun is not wearing protective gloves. The foam gun cleaner can be harsh on the skin and can cause irritation. It is important to wear gloves to protect your hands while cleaning the foam gun.
Skipping the disassembly step: Another mistake to avoid is skipping the disassembly step. It is important to disassemble the foam gun before cleaning it to ensure that all parts are thoroughly cleaned. Skipping this step can result in leftover residue and can compromise the performance of the foam gun.
Using the wrong cleaning solution: Using the wrong cleaning solution is another common mistake. It is important to use a cleaning solution that is specifically designed for foam gun cleaning. Using the wrong solution can damage the foam gun and can affect its functionality.
Not cleaning regularly: Neglecting to clean the foam gun regularly is a mistake to avoid. Regular cleaning is important to maintain the performance and prolong the lifespan of the foam gun. Not cleaning it regularly can result in clogged nozzles and compromised foam output.
Rinsing with water only: Rinsing the foam gun with water only is another mistake. While water can help remove some debris, it is not enough to thoroughly clean the foam gun. It is important to use a foam gun cleaner and follow the manufacturer’s instructions for proper cleaning.
Improper storage: Storing the foam gun improperly is a mistake that can affect its performance. It is important to store the foam gun in a clean and dry place, away from direct sunlight and extreme temperatures. Improper storage can lead to damage and can affect the foam gun’s functionality.
Not lubricating the foam gun: Neglecting to lubricate the foam gun after cleaning is a common mistake. Lubrication is important to ensure smooth operation and prevent any sticking or binding of the moving parts. It is recommended to use a silicone-based lubricant for the foam gun.
Not following manufacturer’s instructions: Lastly, not following the manufacturer’s instructions for cleaning the foam gun is a mistake to avoid. Each foam gun may have specific cleaning requirements and using the wrong method can damage the foam gun. Always refer to the manufacturer’s instructions for proper cleaning and maintenance.
Avoiding these common mistakes can help you effectively clean and maintain your Bond It foam gun, ensuring its optimal performance and durability.