
Oo Gauge model railways are a popular choice among enthusiasts due to their realistic look and intricate detailing. One of the essential tasks in building an Oo Gauge layout is cutting the rails to the desired length. While there are various tools available for this purpose, hand cutters are often the tool of choice for many modellers.
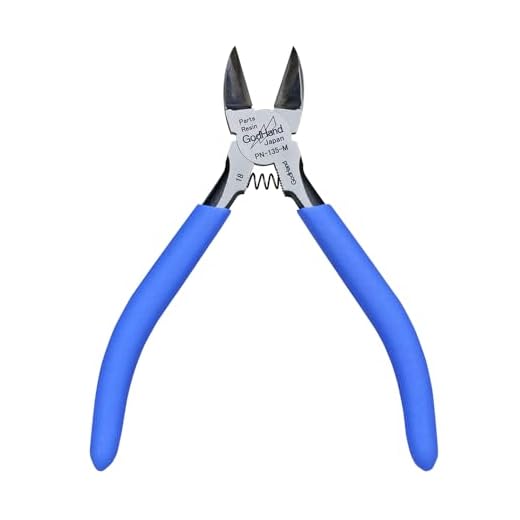
Hand cutters offer a precise and controlled way of cutting the Oo Gauge rails. These specially designed tools allow you to create clean and crisp cuts, ensuring a professional-looking finish. Whether you are a beginner or an experienced modeller, knowing how to cut Oo Gauge rails with hand cutters is a valuable skill to have.
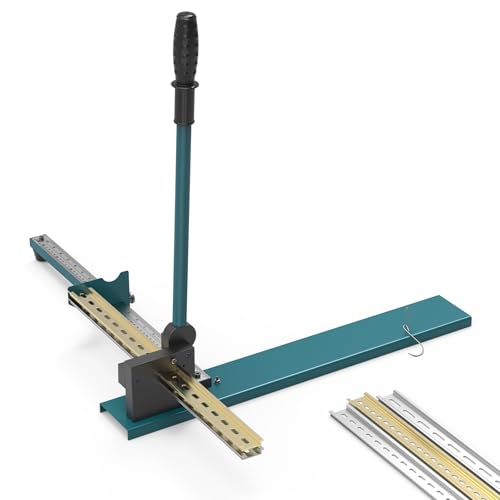
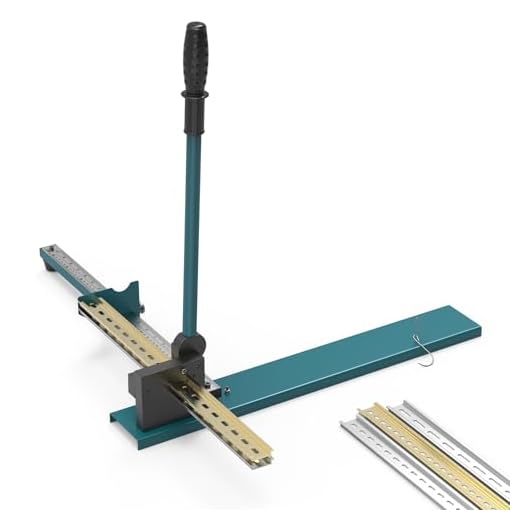
Before you start cutting the rails, it is essential to gather the necessary equipment. You will need a good quality pair of hand cutters specifically designed for rail cutting. It is worth investing in a reliable brand, as cheap or substandard tools may not provide the desired results. Once you have the right tool, you can proceed with the following steps to cut Oo Gauge rails with hand cutters.
Why Cut OO Gauge Rails?
OO gauge model railways are a popular choice among enthusiasts for their realistic scale and level of detail. However, there may come a time when you need to cut the OO gauge rails to fit your specific layout or create custom trackwork. Here are a few reasons why you might need to cut OO gauge rails:
1. Custom Layout Design
Every model railway layout is unique, and sometimes off-the-shelf rails just don’t fit the desired design. Cutting the OO gauge rails allows you to create curved or straight sections that perfectly match your layout’s track plan. By customizing the rails, you can make your model railway more personalized and tailored to your vision.
2. Track Adjustments
During the construction of your model railway, you may find that certain sections of track need to be adjusted. Perhaps there is an uneven spot, or you want to add a turnout or crossover. Cutting the OO gauge rails allows you to modify the track to fit your specific needs and ensure smooth operation of your trains.
When cutting OO gauge rails, it’s important to use the right tools and techniques to achieve clean, precise cuts. Hand cutters specifically designed for model railway use can help you achieve accurate cuts without causing damage to the rails.
Step-by-Step Guide
Step 1: Gather all the necessary tools and materials. You will need a pair of hand cutters, a ruler or measuring tape, and your O gauge rails.
Step 2: Measure and mark the desired length of the rails using your ruler or measuring tape. Make sure to double-check your measurements to ensure accuracy.
Step 3: Hold the rail securely with one hand, making sure to keep your fingers clear of the cutting area.
Step 4: Position the hand cutters around the rail, aligning the blades with your marked measurement.
Step 5: Apply firm pressure to the hand cutters, squeezing them together to make the cut. Make sure to use a smooth, controlled motion to prevent any burrs or rough edges on the rail.
Step 6: Once the rails have been cut, use a file or sandpaper to smooth out any rough edges or burrs.
Step 7: Repeat steps 3-6 for any additional rails that need to be cut.
Step 8: Clean up the cutting area, removing any excess debris or rail pieces.
Step 9: Your O gauge rails are now ready to be used for your model railway project!
Note: Always exercise caution when working with hand cutters and other sharp tools. Be sure to wear appropriate safety gear, such as safety goggles or gloves, to protect yourself from any potential accidents.
Measure and Mark
Before cutting OO gauge rails with hand cutters, it is important to measure and mark the sections accurately. This ensures that the cuts are made at the intended locations and that the rails fit together properly.
Materials Needed
Here are the materials you will need for this step:
| Materials | Description |
| Ruler or Tape Measure | A ruler or tape measure is required to measure the length of the rail sections accurately. |
| Marker or Pencil | A marker or pencil can be used to mark the measured sections on the rails for cutting. |
Steps to Measure and Mark
Follow these steps to accurately measure and mark the OO gauge rails:
- Start by measuring the desired length of the rail section using a ruler or tape measure. It is important to measure from one end to the exact point where the cut will be made.
- Once you have determined the length, use a marker or pencil to make a small mark on the rail at the measured point. This mark will serve as a guide during the cutting process.
- Repeat the above steps for any additional sections that need to be cut.
- Double-check all the measurements and marks to ensure accuracy before proceeding to the cutting step.
By taking the time to measure and mark the OO gauge rails accurately, you can ensure that the cuts are precise and the rails fit together seamlessly. This will result in a more professional-looking and functional layout for your model railway.
Secure the Rail
To ensure a clean and precise cut, it is important to securely hold the rail in place before making any cuts using hand cutters. Here are some steps to follow to properly secure the rail:
- Use clamps or a vice: Clamping the rail to a sturdy surface, such as a workbench, will provide stability and prevent any movement while cutting.
- Position the rail correctly: Make sure the rail is positioned with the area to be cut hanging slightly over the edge of the work surface. This will allow for a clean and accurate cut without damaging the surface below.
- Apply pressure evenly: Once the rail is securely clamped or positioned, apply even pressure to ensure it remains stable during the cutting process. This will help prevent any vibrations or unwanted movement that could result in an uneven or jagged cut.
- Wear protective gloves: It is essential to protect your hands while handling the rail and using hand cutters. Wear gloves to prevent any potential injuries that may occur during the cutting process.
By taking these steps to secure the rail, you can confidently proceed with cutting OO gauge rails using hand cutters, knowing that the rail is stable and positioned correctly for a precise and clean cut.
Position the Hand Cutter
When it comes to cutting OO gauge rails with hand cutters, the positioning of the tool is crucial. To ensure a clean and accurate cut, follow these steps:
Step 1: Secure the Rail
Before you begin cutting, make sure the rail is securely held in place. This can be done by clamping it to a workbench or using a vice grip. The rail needs to be stable and immovable to prevent any accidental movements during the cutting process.
Step 2: Determine the Cutting Point
Next, decide on the exact point where you want to make the cut on the rail. Measure and mark this point using a ruler or a measuring tape. Ensure that the mark is clear and visible to avoid any mistakes during the cutting process.
Step 3: Position the Hand Cutter
Hold the hand cutter firmly in your dominant hand, with your fingers gripping the handles and your thumb supporting the tool. Position the cutting blades of the hand cutter right on top of the marked cutting point.
Tip: Make sure the blades are aligned perpendicular to the rail, ensuring a straight and precise cut.
Note: If you’re using a hand cutter with an adjustable cutting gap, make sure the gap is set according to the thickness of the rail. This will ensure a clean cut without any bending or distortion of the rail.
By following these steps and properly positioning your hand cutter, you’ll be ready to make accurate and clean cuts on your OO gauge rails.
Apply Pressure
When cutting OO gauge rails with hand cutters, it is important to apply the right amount of pressure to ensure a clean and accurate cut. Too much pressure can result in a uneven cut or cause the rail to become deformed, while too little pressure may not cut through the rail effectively.
Before beginning the cutting process, it is important to position the rail securely on a flat surface and hold it in place using clamps or a vise. This will help to stabilize the rail and prevent any movement during the cutting process.
Step 1: Position the cutters
Hold the hand cutters perpendicular to the rail, with the cutting blades positioned exactly on the area where you want to make the cut. Ensure that the blades are fully engaged with the rail to achieve a clean cut.
Step 2: Apply pressure
Using a firm and steady grip, apply pressure to the hand cutters to start the cutting process. It is important not to squeeze the cutters too tightly, as this may cause the blades to slip or bend. Apply a consistent amount of pressure throughout the cutting motion to ensure a clean and even cut.
| Tips: | |
|---|---|
| 1. | Avoid cutting too quickly, as this may result in an uneven or jagged cut. Take your time and use a steady hand. |
| 2. | If you encounter resistance while cutting, do not force the cutters. Instead, stop and reposition the blades to ensure a clean cut. |
| 3. | After each cut, inspect the rail for any rough or uneven edges. Use a fine-grit sandpaper or a file to smooth out any imperfections. |
By applying the right amount of pressure and following these steps, you can cut OO gauge rails with hand cutters accurately and effectively.
Check the Cut
After you have made the cut with your hand cutters, it is important to carefully check the quality of the cut.
Inspect the cut: Look closely at the rail ends to ensure they are clean and smooth. Any jagged or rough edges should be smoothed out using a file or sandpaper.
Measure the result: Use a measuring tool, such as a ruler or caliper, to confirm that the cut rail matches the desired length. It is crucial to have accurately cut rails to ensure proper alignment and smooth running of your Oo gauge model trains.
Test the fit: Once you have confirmed the quality and accuracy of the cut, test the fit of the rail by connecting it to the existing tracks. It should slide into place easily and align properly with the adjacent rails.
Consider any adjustments: If the cut rail does not fit properly or align correctly, you may need to make further adjustments. This could involve removing any excess material or smoothing out any rough edges until the rail fits and aligns correctly.
Note: If you are unsure or inexperienced with cutting Oo gauge rails, it is always a good idea to practice on spare pieces first to gain confidence and improve your technique.