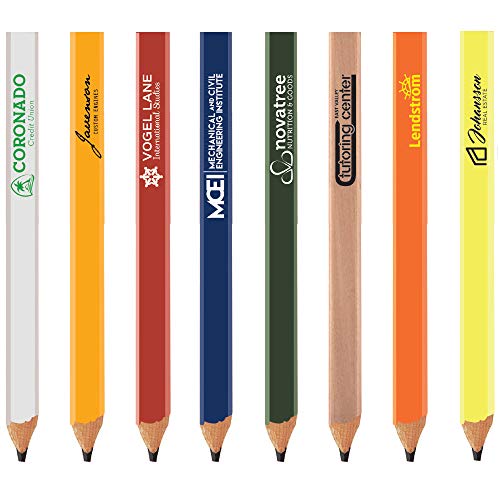


When it comes to sketching, artists often have their own preferences in terms of materials. Some artists swear by the traditional graphite pencil, while others prefer to experiment with different tools and mediums. One such tool that has gained popularity among artists is the carpenter’s pencil.
A carpenter’s pencil, also known as a carpentry pencil or lumber crayon, is a durable and versatile tool primarily used for marking surfaces in woodworking. However, many artists have discovered that it can also be used for sketching and drawing. The unique shape and design of the carpenter’s pencil make it an interesting alternative to traditional artist pencils.
The main feature that sets the carpenter’s pencil apart from other pencils is its flat, rectangular shape. This design allows for a more comfortable grip and better control over the pencil while sketching. Additionally, the lead in a carpenter’s pencil is thicker than that of a regular pencil, making it ideal for bold and expressive lines.
Despite its unconventional nature, the carpenter’s pencil can produce stunning results in the hands of a skilled artist. Its versatility allows for a wide range of techniques, from quick and loose sketches to detailed and intricate portraits. So, if you’re looking to try something different in your art practice, why not give the carpenter’s pencil a try? You may just discover a new tool that enhances your artistic expression.
Portrait Sketching Techniques Using a Carpenter’s Pencil
Creating a portrait sketch can be a challenging yet fulfilling artistic endeavor. While there are various tools available for sketching, one underrated but highly effective option is the carpenter’s pencil. With its unique characteristics, a carpenter’s pencil can bring a distinctive quality to your portrait sketches. Here are some techniques to get you started:
1. Utilize the Broad Lead
One of the main advantages of a carpenter’s pencil is its broad lead. This feature allows you to create broad strokes, capturing the general shape and contours of the subject’s face. Use the side of the pencil to shade larger areas, such as shadows or the background, for added depth.
2. Embrace the Texture
The rough texture of a carpenter’s pencil can add a unique and expressive quality to your portrait sketches. Embrace this texture by using cross-hatching techniques. Apply lines in different directions and densities to create depth and texture, mimicking the natural variations of the subject’s skin.
TIP: Vary the pressure you apply to the pencil while sketching to create lighter or darker lines, further enhancing the texture and dimensionality of your portrait.
Another technique is stippling, which involves creating small dots or strokes to build up texture and tone. Experiment with different levels of intensity and spacing to achieve the desired effect.
3. Focus on Proportions
When sketching a portrait, paying attention to proportions is crucial. Use the flat edge of a carpenter’s pencil to measure and compare different features of the subject’s face. This will help you accurately capture the relationships between the eyes, nose, mouth, and other facial elements.
Remember: Regularly step back from your sketch to assess the overall proportions and make any necessary adjustments.
By incorporating these techniques into your portrait sketches using a carpenter’s pencil, you can achieve intricate details, depth, and a unique artistic style. Experiment, practice, and enjoy the process of bringing your subjects to life on paper!
Benefits of Using a Carpenter’s Pencil for Portrait Sketching
When it comes to portrait sketching, many artists prefer to use a carpenter’s pencil. While traditional graphic pencils are commonly used, the unique characteristics of a carpenter’s pencil offer several benefits that make it an excellent choice for portrait artists.
1. Versatility
One of the main benefits of using a carpenter’s pencil for portrait sketching is its versatility. The thick, flat lead of a carpenter’s pencil allows artists to create a wide range of lines and strokes. From bold, dark lines to fine, delicate details, the carpenter’s pencil can easily adapt to various artistic styles and techniques.
2. Durability
A carpenter’s pencil is designed to withstand rough and rugged conditions, which makes it highly durable for portrait sketching. Unlike traditional graphic pencils that may break easily, the sturdy construction of a carpenter’s pencil ensures that it can handle the pressures and demands of sketching. This durability allows artists to apply more pressure and create bolder lines without worrying about the pencil snapping.
| Benefits of Using a Carpenter’s Pencil for Portrait Sketching |
|---|
| Versatility |
| Durability |
| Comfort |
| Distinctive Marks |
| Easy Erasing |
3. Comfort
Another advantage of using a carpenter’s pencil for portrait sketching is the comfort it provides. The larger size of the pencil makes it easier to grip and control, reducing hand fatigue during long drawing sessions. This enhanced comfort allows artists to focus on their work without the distraction of discomfort, resulting in smoother and more precise lines.
4. Distinctive Marks
The thick lead of a carpenter’s pencil creates distinct, bold marks on the paper. This unique characteristic adds a dynamic and expressive quality to portrait sketches, enhancing the visual impact of the artwork. The bold lines can also help to create depth and texture, making the portrait more lifelike and engaging.
5. Easy Erasing
Despite its bold and dark lines, a carpenter’s pencil is surprisingly easy to erase. The softness of the lead allows artists to remove mistakes or make adjustments without damaging the paper. This erasability is particularly advantageous for portrait artists who often need to refine and perfect their sketches throughout the creative process.
In conclusion, using a carpenter’s pencil for portrait sketching offers an array of benefits including versatility, durability, comfort, distinctive marks, and easy erasing. These advantages make it an excellent tool of choice for portrait artists looking to create bold, expressive, and detailed sketches.
Tips for Mastering Portraits with a Carpenter’s Pencil
Creating portraits with a carpenter’s pencil can add a unique and rustic touch to your artwork. Whether you are a beginner or an experienced artist, here are some tips to help you master the art of portrait sketching with a carpenter’s pencil.
1. Choose the Right Pencil
When sketching portraits with a carpenter’s pencil, it is important to choose the right pencil. Look for a pencil that has a medium hardness, as it will allow you to easily create both light and dark lines. Experiment with different brands and sizes to find the one that suits your style.
2. Set Up Proper Lighting
Good lighting is essential for capturing the details and shades of a portrait. Set up your drawing area near a window or use a lamp to provide a consistent light source. This will help you see the subtle lines and shadows, enabling you to create a more accurate and realistic portrait.
3. Start with Basic Shapes
Begin your portrait sketch by outlining the basic shapes of the face, such as oval for the head and circles for the eyes. Use light strokes to create the initial sketch, as the carpenter’s pencil allows for easy erasing and shading adjustments.
4. Work on the Features
Once the basic shapes are in place, start working on the facial features. Observe the proportions and details of the subject and use your pencil to draw them in accurately. Take your time and pay attention to the curves, angles, and shadows to capture the likeness of the individual.
5. Focus on Textures
A carpenter’s pencil is great for creating texture in portraits. Experiment with different angles and pressure to achieve a variety of tones and textures, especially when working on hair, skin, or clothing. This will give your portrait a unique and tactile quality.
6. Practice Regularly
Like any skill, mastering portrait sketching requires regular practice. Set aside dedicated time each week to work on your portraits and challenge yourself with different subjects. With continued practice, you will improve your technique and create more detailed and lifelike portraits.
Remember, mastering portrait sketching with a carpenter’s pencil takes time and patience. Enjoy the process and embrace the unique characteristics that the pencil brings to your artwork. With these tips and consistent practice, you will be able to create stunning portraits that showcase your artistic talent.
Exploring the Versatility of a Carpenter’s Pencil in Portrait Sketching
A carpenter’s pencil may not be the first tool that comes to mind when you think of portrait sketching, but its versatility can pleasantly surprise you. While traditional drawing pencils are commonly used for portrait sketching, the unique characteristics of a carpenter’s pencil lend themselves well to this artistic endeavor.
1. Bold and Expressive Lines
One of the key features of a carpenter’s pencil is its thick and durable lead. This thickness allows you to create bold and expressive lines, adding a sense of drama and depth to your portrait sketches. With a carpenter’s pencil, you can effortlessly capture the contours, shadows, and highlights of your subject’s face, bringing the portrait to life with every stroke.
2. Versatile Shading Techniques
The flat shape of a carpenter’s pencil lead opens up a wide range of shading techniques. By angling the pencil differently and varying the pressure you apply, you can achieve different levels of darkness and create intricate shading effects. This versatility enables you to capture the nuanced gradations of light and shadow in your portrait sketches, giving them a three-dimensional feel.
Here is an example of some shading techniques you can experiment with when using a carpenter’s pencil:
| Shading Technique | Description |
|---|---|
| Hatching | Parallel lines drawn in the same direction to create shading |
| Cross-Hatching | Intersecting lines drawn in different directions to create shading |
| Stippling | Creating shading with multiple small dots |
| Blending | Using a blending stump or your finger to smudge and soften lines |
These techniques, combined with the bold lines produced by a carpenter’s pencil, allow you to create intricate and realistic textures in your portrait sketches, making the subjects come to life on paper.
So, if you’re looking to add a unique touch to your portrait sketching, don’t be afraid to reach for a carpenter’s pencil. Its bold lines and versatile shading capabilities can help you create stunning and expressive portraits that stand out from the rest.


