If you’re working on a project that requires precise lines, like laying tiles or installing cabinetry, using a chalk line is essential. A chalk line helps you achieve straight lines quickly and accurately. However, achieving straight lines with a chalk line requires a few key steps to ensure precision and accuracy.
The first step is to prepare the surface where you’ll be using the chalk line. Make sure the surface is clean and free from any debris or dust that could interfere with the line. This will ensure that the chalk adheres properly and gives you a clear, straight line.
Next, choose the right type of chalk for your project. Different colors of chalk are available, but for better visibility, it’s recommended to use bright colors like red, blue, or yellow. The chalk should also be of good quality, as poor-quality chalk may break easily, resulting in an uneven line.
To mark a straight line with the chalk line, start by finding the two endpoints of the line you want to mark. Hold one end of the line firmly at one point, and stretch it towards the other point while keeping it level. It’s important to keep the line taut to ensure the accuracy of the mark. Once the line is taut, snap the string against the surface. This will create a straight chalk line marking your desired path.
In conclusion, achieving a straight chalk line requires careful preparation of the surface, choosing the right chalk, and taking the time to stretch and snap the line with precision. By following these steps, you can ensure that your chalk line is straight and accurate for your project.
Why Is a Straight Chalk Line Important?
A straight chalk line is important for a variety of reasons. Whether you’re working on a construction project, laying tiles, or installing cabinets, having a straight reference line is crucial for achieving accurate and professional-looking results.
1. Precision
A straight chalk line serves as a guide for ensuring precision in your work. By snapping a straight line, you can easily align and position your materials, helping you to create clean and precise cuts, joints, and installations. This is especially important when working with materials such as tiles, flooring, or trim, where even the slightest misalignment can be easily noticeable.
2. Symmetry
A straight chalk line helps to maintain symmetry and balance in your project. Whether you’re building a wall, installing shelves, or hanging artwork, a straight line ensures that everything is evenly spaced and aligned. This not only enhances the aesthetic appeal of your work but also adds a professional touch.
For example, when hanging a series of picture frames or shelves, a straight chalk line can help you ensure that each frame or shelf is level and evenly spaced. This creates a visually pleasing and organized display.
3. Time and Efficiency
Using a straight chalk line saves you time and increases efficiency. With a reference line in place, you can work more quickly and confidently, without the need to constantly measure and check for alignment. This can be especially helpful when working on larger projects or when working with a team.
Furthermore, a straight line eliminates the need for guesswork or trial and error, leading to fewer mistakes and corrections along the way. This not only saves you time but also reduces material wastage, as you can work with precision and avoid rework.
Overall, a straight chalk line is an essential tool for any DIY enthusiast or professional tradesperson. It helps ensure precision, symmetry, and efficiency in your projects, resulting in a higher quality finished product. So, next time you embark on a project, don’t forget to start with a straight chalk line!
Benefits of Using a Straight Chalk Line
Using a straight chalk line can provide several benefits when it comes to completing various projects that require straight lines, such as installing tile, laying out flooring, or painting walls. Here are some of the key advantages of using a straight chalk line:
1. Ensures Accuracy
When you need to create straight lines, accuracy is crucial. A chalk line not only helps you achieve precise results, but it also ensures that the lines are straight and level. The use of a chalk line eliminates the guesswork and allows you to confidently make accurate measurements and create straight lines, ultimately leading to a professional finish.
2. Saves Time and Effort
Using a straight chalk line can significantly save your time and effort compared to other methods. For example, manually marking straight lines with a ruler or a straight edge can be time-consuming and may not give you consistent results. By simply snapping a chalk line, you can quickly and effortlessly create a straight reference line across a large area, making your project more efficient.
A chalk line also saves you from the frustration of having to redo your work due to crooked lines or uneven patterns, further saving you time and effort in the long run.
3. Versatility
Another benefit of using a straight chalk line is its versatility. Whether you are working on a small DIY project or a large-scale construction job, a chalk line can be used to create straight lines on various surfaces. It can be used on walls, floors, ceilings, or any other area where straight lines are required.
Furthermore, a chalk line can be used with different materials such as tiles, wood, concrete, or metal. This versatility makes it a valuable tool for professionals and DIY enthusiasts alike.
In conclusion, using a straight chalk line offers many advantages, including increased accuracy, saved time and effort, and overall versatility. Whether you are a professional or a DIYer, incorporating a straight chalk line into your projects will help you achieve straight and level lines with ease.
Tools and Materials Needed
Before starting to use a chalk line to mark straight lines, it’s important to gather all the necessary tools and materials. Here is a list of items you will need:
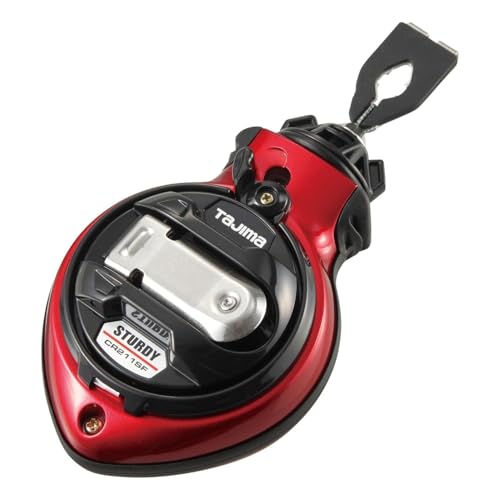
1. Chalk Line
The main tool required for this task is a chalk line. This tool consists of a reel containing a string coated with chalk powder. The chalk line allows you to create straight and accurate lines on various surfaces.
2. Chalk Line Powder
In order for the chalk line to work effectively, you will need chalk line powder. This powder is typically a brightly colored substance that adheres to the string when it is reeled out. It provides a visible mark that helps you ensure your lines are straight.
3. Measuring Tape
A measuring tape is necessary to determine the specific length or distance for the line you want to mark. This tool will help you accurately measure and mark the desired position for the chalk line, ensuring precision in your project.
4. Surface Preparation Materials
Before using the chalk line, it is important to prepare the surface you will be working on. This may include cleaning the surface, removing any debris or obstructions, and making sure it is smooth and flat. Depending on the surface material, you may need specific cleaning supplies or tools.
5. Safety Equipment
While not directly related to using the chalk line, it is always important to prioritize safety when working on any project. Be sure to wear appropriate safety equipment such as gloves, safety glasses, and protective clothing to minimize the risk of accidents or injuries.
By having these tools and materials on hand, you will be well-prepared to use a chalk line and ensure that your lines are straight and accurate.
Step-by-Step Guide for Creating a Straight Chalk Line
Creating a straight chalk line is an essential skill for any DIY enthusiast or professional builder. Whether you are doing carpentry, tiling, or any other project that requires straight lines, a chalk line can be your best friend. Follow these simple steps to ensure that your chalk line is straight and accurate every time:
Step 1: Gather Your Materials
Before you begin, make sure you have all the necessary materials. You will need a chalk line reel, chalk powder, a tape measure, and a straightedge or level.
Step 2: Prepare the Chalk Line
Start by filling the chalk line reel with chalk powder. Unscrew the cap, pour the powder into the reel, and then screw the cap back on tightly. Make sure the reel is fully loaded with chalk powder for a solid line.
Step 3: Measure and Mark the Desired Line
Use a tape measure to determine the length of your desired line. Measure the distance from the starting point to the ending point, and mark both locations with a pencil or any other visible marker.
Step 4: Attach the Chalk Line
Position the chalk line reel at the starting point of your line. Hold the end of the line against the mark you made and stretch it until it reaches the other mark. Make sure the line is taut and straight, and then ask a partner to hold it in place or secure it with a clamp if necessary.
Step 5: Snap the Chalk Line
With the chalk line properly set, pull it back slightly to create tension. Hold the chalk line reel firmly and release it. The recoil will cause the line to snap against the surface, leaving a straight line of chalk behind. Make sure you perform this step with a quick, steady motion to ensure an even and straight line.
Step 6: Check and Adjust
Once you have snapped the chalk line, step back and inspect it carefully. Use a straightedge or level to check its straightness. If you notice any areas that are not perfectly straight, gently tap the chalk line with your hand to straighten it out. Adjust as needed until you are satisfied with the result.
Following these six simple steps will guarantee a straight and accurate chalk line for your project. Remember to double-check your measurements and be patient while creating the line. With practice, you will become more comfortable and proficient in creating straight chalk lines.
Pro Tip: It is always a good idea to test the chalk line on a scrap piece of material before using it on your actual project to ensure the line is straight and the chalk adheres properly.