Setting up a Bosch laser level is a simple yet essential step in achieving accurate and precise measurements for your construction and DIY projects. Whether you are hanging pictures, aligning shelves, or installing tiles, a laser level can make your work much easier and more efficient.
Before you begin, it’s crucial to familiarize yourself with the different components of a Bosch laser level. The device typically consists of a laser unit, a leveling base, and a tripod mount. Additionally, it may have features like self-leveling capabilities, a bubble vial, or a remote control. Understanding how these parts work together will ensure you get the most out of your laser level.
To set up your Bosch laser level, start by finding a stable surface or a tripod to mount it on. Place the laser level on the base or attach it to the tripod mount, ensuring it is secure and level. If your laser level has self-leveling capabilities, activate this feature to make the leveling process easier. Next, adjust the laser level’s height and position according to your project requirements.
Once the laser level is set up, you can turn it on and adjust the laser beam to the desired height and direction. Take note of the laser’s visibility, as this may vary depending on the lighting conditions and the distance between the laser level and the target surface. Finally, double-check the accuracy of the laser level by using a measuring tape or a ruler. This will ensure that your measurements are precise and reliable.
By following these simple steps and taking the time to set up your Bosch laser level correctly, you can save yourself time and effort in your construction and DIY projects. The laser level will provide you with accurate measurements and a clear reference point, making it an indispensable tool for any handyman or DIY enthusiast.
Overview of Bosch Laser Level
A Bosch laser level is a versatile tool that helps in accurate and precise measurements for various construction and DIY projects. It uses laser technology to project a visible beam that serves as a reference line or point.
One of the key features of a Bosch laser level is its self-leveling capability. It automatically adjusts the beam to ensure that it is perfectly level, even on uneven surfaces. This eliminates the need for manual adjustments and saves time.
Bosch laser levels come in different types and models, including line laser levels and rotary laser levels. Line laser levels project a straight line, while rotary laser levels emit a 360-degree horizontal or vertical beam. Some models also offer additional features such as plumb dots, cross lines, and slope modes.
The Bosch laser level is designed with durability and user-friendliness in mind. It is built with sturdy materials to withstand the rigors of construction sites. The controls are intuitive and easy to use, allowing even beginners to operate the tool with confidence.
Overall, a Bosch laser level is an essential tool for professionals and DIY enthusiasts who require accurate and reliable measurements. Whether it’s laying tiles, installing shelves, or framing walls, this tool ensures precise alignment and makes the task much easier.
Step 1: Unpacking the Bosch Laser Level
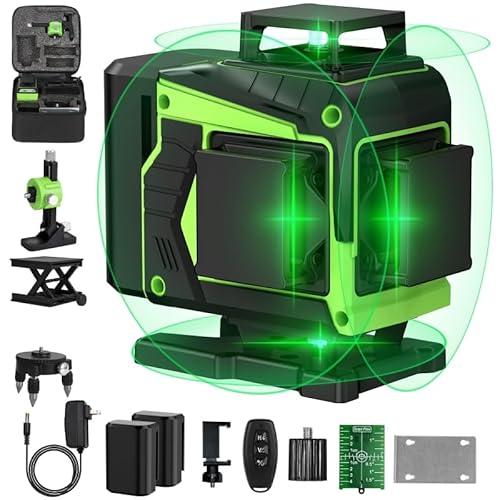
Before setting up your Bosch laser level, it is important to unpack it carefully and ensure that all the necessary components are present. The contents of the box may vary depending on the model of the laser level you have purchased, but generally, you can expect to find the following items:
| 1 | Bosch laser level |
| 2 | Mounting bracket |
| 3 | Batteries (if applicable) |
| 4 | Instruction manual |
| 5 | Carrying case or bag |
| 6 | Additional accessories (e.g. remote control) |
Check each item against the user manual’s checklist to ensure you have everything you need. If anything is missing or damaged, contact Bosch customer service for assistance.
Once you have confirmed that all the components are present, you can proceed to the next step of setting up your Bosch laser level.
Checking the Contents
Before you start setting up your Bosch laser level, it’s important to check that you have all the necessary components. Here is a list of the key items that should be included in the box:
Laser Level Unit
First and foremost, you should have the laser level unit itself. This is the main device that emits the laser beam and allows you to accurately measure and align objects. Make sure the unit is in good condition and free from any damage or defects.
Mounting Bracket
A mounting bracket is an essential accessory that helps you to fix the laser level to a tripod or attach it to a wall or ceiling. It provides stability and ensures that the laser lines are projected in the right direction. Check that the mounting bracket is included and is compatible with your specific Bosch laser level model.
Target Plate
A target plate is a useful tool that helps you to visualize and enhance the laser beam. It typically has a reflective surface that makes it easier to see the laser lines, especially over long distances or in bright lighting conditions. Ensure that the target plate is included in the package.
Batteries
Most Bosch laser levels are powered by batteries, so it’s important to check if batteries are included or if you need to purchase them separately. Make sure you have the correct type and number of batteries needed for your specific model.
Additionally, it’s a good idea to review the user manual or any other documentation that comes with the Bosch laser level. This will provide you with important information about the device’s features, setup instructions, and any additional accessories that should be included.
By thoroughly checking the contents of the package, you can ensure that you have all the necessary components to successfully set up your Bosch laser level.
Step 2: Assembling the Bosch Laser Level
Before you can start using your Bosch Laser Level, you need to assemble it properly. Follow these steps to assemble your laser level:
1. Attach the Tripod
Begin by attaching the tripod to the base of the laser level. The tripod should have a screw hole in the center of its surface. Align this hole with the threaded hole on the base of the laser level and gently screw the tripod onto the laser level until it is securely attached.
2. Install the Batteries
Locate the battery compartment on the laser level, usually located on the back or side. Open the compartment and insert the required batteries according to the manufacturer’s instructions. Close the compartment securely.
3. Mount the Laser Level
Choose a suitable location to mount your laser level, ensuring it is stable and level. You can place it directly on a flat surface or use the attached tripod for added stability. Insert the laser level into the tripod or place it on the chosen surface, ensuring it is secure.
4. Adjust the Leveling Mechanism
Most Bosch laser levels come with a built-in leveling mechanism. Adjust the leveling mechanism to ensure that the laser level is perfectly level. This will ensure accurate measurements and projections when you start using the laser level.
Once you have completed these steps, your Bosch Laser Level is assembled and ready to use. Proceed to the next step to learn how to calibrate your laser level.
Attaching the Tripod
To set up your Bosch laser level, you will need to attach it to a tripod. The tripod provides stability and allows you to adjust the height and position of the laser level to suit your needs.
Follow these steps to attach the tripod:
- Open the tripod legs and extend them to a comfortable working height.
- Ensure the tripod is placed on a stable and level surface.
- Locate the mounting hole on the bottom of the Bosch laser level.
- Position the laser level over the tripod mount, aligning the holes.
- Place the laser level onto the tripod mount and ensure it is securely attached.
| Warning: |
|---|
| Ensure the tripod is locked in place and the laser level is securely attached to avoid any accidents or damage. |
Once you have attached the tripod, you can proceed to set up the rest of the Bosch laser level according to the manufacturer’s instructions.
Step 3: Setting Up the Bosch Laser Level
Once you have ensured that the tripod is secure and stable, it’s time to set up the Bosch laser level. Follow these steps:
- Attach the laser level to the tripod by screwing it onto the mounting plate. Make sure it is tightly secured to avoid any movement during operation.
- Turn on the laser level by pressing the power button. Verify that the laser is working properly by checking for a visible laser beam.
- Adjust the leveling mechanism to ensure that the laser level is perfectly level. Most Bosch laser levels come with built-in leveling vials or electronic leveling systems to help you achieve this.
- Position the laser level at the desired location by adjusting the tripod legs. Ensure that it is at the right height and angle for your specific needs.
- Use the laser leveling function to create a level reference line on your desired surface. This can be done by rotating the laser level or using the tilt function, depending on the model you are using.
- Once the laser level is set up and leveled, you can begin using it for your projects. Keep in mind that some Bosch laser levels come with additional features such as distance measurements or laser plumb points, so make sure to familiarize yourself with these functions if applicable.
Following these steps will ensure that your Bosch laser level is set up correctly and ready for use. Always refer to the user manual for specific instructions pertaining to your model, as different models may have slight variations in setup procedures.
Choosing a Suitable Location
When setting up a Bosch laser level, it is important to choose a suitable location that will ensure accurate and efficient leveling. Here are some factors to consider when selecting a location:
1. Stability
Choose a stable surface, such as a flat table or a sturdy tripod, to place the laser level on. The stability of the surface will ensure that the laser remains steady and doesn’t move during operation.
2. Accessibility
Select a location that allows for easy access to the laser level controls and adjustments. This will make it more convenient to set up and make any necessary changes during the leveling process.
3. Lighting Conditions
Avoid areas with excessive brightness or direct sunlight, as it can interfere with the visibility of the laser beam. It is recommended to work in areas with controlled lighting or to use a laser target card to enhance visibility.
4. Distance
Consider the distance that the laser beam needs to reach. If you are working in a large area, ensure that the location provides enough space for the laser level to cover the required distance without obstruction.
5. Leveling Reference
Identify a fixed point or reference line that you will use as a guide for leveling. This can be a mark on a wall or an existing leveled surface. Position the laser level in relation to this reference point to achieve accurate leveling.
By carefully choosing a suitable location for your Bosch laser level, you can ensure that your leveling tasks are carried out accurately and efficiently.