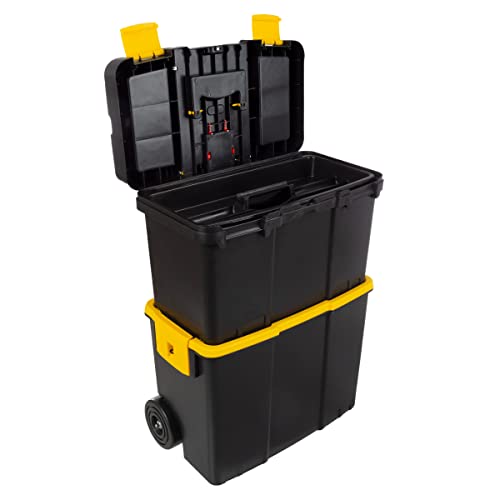
If you’re a professional or a weekend warrior who loves working with tools, you know the importance of having a well-organized tool chest. Milwaukee tool chests are known for their durability and high-quality construction, but they can quickly become a jumbled mess if you don’t have a system in place to keep everything in order.
The first step to organizing your Milwaukee tool chest is to take stock of what you have. Lay out all your tools and separate them into categories based on their function. This will help you determine the best way to arrange them in your tool chest for easy access.
Once you have your tools sorted into categories, it’s time to find a place for each group in your tool chest. Consider using foam inserts or drawer dividers to create compartments that will keep your tools from shifting around and getting damaged during transport.

Labeling is another crucial step in organizing your Milwaukee tool chest. Use labels or color-coded stickers to clearly mark each compartment or drawer with the type of tools it holds. This will make it easier for you to find what you need quickly, even in a busy work environment.
By following these simple tips, you can transform your jumbled mess of tools into a neatly organized Milwaukee tool chest that will save you time and frustration on your next project.
Tips for Organizing Your Milwaukee Tool Chest
If you own a Milwaukee tool chest, you know how important it is to keep your tools organized. A well-organized tool chest allows you to easily find and retrieve the tools you need, saving you time and frustration. Here are some tips to help you organize your Milwaukee tool chest:
| Tip | Description |
|---|---|
| 1 | Sort and categorize your tools |
| 2 | Use foam cutouts or liners |
| 3 | Utilize drawer dividers or organizers |
| 4 | Label your tool chest |
| 5 | Arrange your tools by frequency of use |
| 6 | Keep your tool chest clean and clutter-free |
By following these tips, you can ensure that your Milwaukee tool chest is properly organized and your tools are easily accessible. This will not only save you time but also prolong the life of your tools by preventing damage and loss.
Purchasing the Right Storage Accessories
When it comes to organizing your Milwaukee Tool Chest, purchasing the right storage accessories is key. Here are some factors to consider when choosing the right accessories:
1. Size and Shape
First and foremost, you need to consider the size and shape of the accessories. Take measurements of your tool chest and determine the available space for accessories. Consider the different compartments and drawers in your tool chest and choose accessories that fit perfectly in those spaces.
2. Material
Next, consider the material of the storage accessories you are purchasing. Look for durable materials such as metal or high-quality plastic that can withstand the weight of your tools and provide long-lasting use. Avoid accessories made of flimsy or low-quality materials that may break easily.
3. Compatibility
Make sure the storage accessories you purchase are compatible with your Milwaukee Tool Chest. Check the manufacturer’s specifications and recommendations to ensure a proper fit. Compatibility is important to ensure the accessories can be securely attached or placed within your tool chest.
4. Functionality
Consider the functionality of the accessories you are purchasing. Think about how you plan to use them and what specific tools or items you need to store. Look for accessories that have compartments, dividers, or slots to keep your tools organized and easily accessible. Additionally, consider accessories that have handles or wheels for easy transportation.
5. Price
Lastly, consider the price of the storage accessories. Set a budget and look for accessories that fit within that budget. Remember that quality is important, so don’t just choose the cheapest option. Look for accessories that offer a good balance between price and quality.
By considering these factors, you can ensure that you purchase the right storage accessories for your Milwaukee Tool Chest. These accessories will help you maximize the space in your tool chest and keep your tools organized for easy access and efficient workflow.
Sorting and Categorizing Your Tools
Organizing your Milwaukee tool chest can be a daunting task, but by sorting and categorizing your tools, you can make the process much easier. Here are some steps to help you get started:
- Assess your tools: Take an inventory of all the tools in your chest. Lay them out and make note of what you have.
- Group similar tools together: Once you have assessed your tools, begin organizing them into groups based on their function or type. For example, group all the wrenches together and all the screwdrivers together.
- Create designated spaces: Assign specific spaces in your tool chest for each group of tools. This will help keep everything organized and make it easier to find what you need.
- Label your tool chest: Consider labeling each designated space in your tool chest so you know exactly where each type of tool belongs.
- Invest in dividers or trays: To further aid in organization, consider purchasing dividers or trays to keep smaller tools or parts separate within each group.
- Keep frequently used tools accessible: Place the tools you use most often in an easily accessible spot in your tool chest. This will save you time and effort when you need to quickly grab a tool.
- Maintain your organization: Once you have sorted and categorized your tools, make an effort to keep them organized. Return each tool to its designated space after each use.
By sorting and categorizing your tools, you’ll be able to quickly and efficiently find what you need, saving you time and frustration. Plus, maintaining an organized tool chest will help prolong the life of your tools and keep them in good condition.
Utilizing Drawer Dividers and Foam Inserts
If you want to maximize the organization and efficiency of your Milwaukee tool chest, using drawer dividers and foam inserts can be a game-changer.
Drawer dividers are essential for dividing your tools and accessories into specific compartments, making it easier to find what you need quickly. You can find a variety of drawer dividers made specifically for Milwaukee tool chests, or you can create your own using materials like wood or plastic.
When using drawer dividers, consider the types of tools you have and their sizes. Adjustable dividers are ideal if you have a mix of large and small tools, allowing you to customize the compartments to fit your needs. Keep similar tools together to further streamline your organization.
Another useful tool chest organization technique is using foam inserts. Foam inserts are custom cut to fit each tool, providing a snug and secure fit. This prevents tools from shifting and clanging against each other, reducing the risk of damage. Plus, it makes it easy to see if any tools are missing or misplaced.
To create foam inserts, measure the dimensions of your tools and cut the foam to fit. You can use a utility knife or a foam-cutting tool for precise cuts. Place the foam at the bottom of each compartment or on top of a divider, ensuring a snug fit for each tool.
Utilizing drawer dividers and foam inserts not only keeps your tools organized but also helps protect them from unnecessary wear and tear. With a well-organized tool chest, you’ll be able to find the right tool for the job without wasting time searching for it.
So, invest some time in setting up drawer dividers and foam inserts in your Milwaukee tool chest – you’ll be amazed at how much more efficient and organized your workspace will become.
Maintaining a Regular Cleaning and Maintenance Routine
Keeping your Milwaukee Tool Chest organized and functional requires regular cleaning and maintenance. Here are some steps you can follow to ensure your tool chest stays in top condition:
1. Remove all tools and equipment: Start by emptying the tool chest completely. Remove all tools, accessories, and any other items stored in the chest. This allows you to thoroughly clean and inspect the chest.
2. Clean the exterior: Use a damp cloth or sponge to clean the exterior of the tool chest. Wipe away any dust, dirt, or grease from the surface. If necessary, use a mild detergent or cleaning solution to remove stubborn stains. Dry the chest thoroughly before moving on to the next step.
3. Clean the drawers: Open each drawer and remove any loose debris or dust. Wipe down the interior of the drawers with a damp cloth or vacuum them to remove any dirt or debris. Pay special attention to the corners and edges of the drawers, where dust and dirt tend to accumulate.
4. Inspect the drawers and slides: While cleaning the drawers, inspect them for any signs of damage or wear. Check the slides and glides to ensure they are functioning smoothly. If you notice any issues, such as broken or sticking slides, consider replacing them to maintain the functionality of your tool chest.
5. Organize and arrange tools: Before returning the tools to the tool chest, take the opportunity to reorganize and arrange them in a way that makes sense for your needs. Group similar tools together and use dividers or foam inserts to keep them separate and prevent them from shifting during transportation or use.
6. Check for rust or corrosion: Inspect your tools for any signs of rust or corrosion. Use a rust remover or steel wool to remove any rust spots. Consider applying a protective coating or lubricant to prevent future rust and corrosion.
7. Regularly maintain locks and latches: Ensure that the locks and latches on your tool chest are functioning properly. Apply lubricant to keep them working smoothly and prevent them from rusting or seizing up.
8. Keep the chest in a clean, dry environment: To prevent rust and maintain the integrity of the tool chest, store it in a clean, dry environment. Avoid exposing it to extreme temperature changes or moisture.
Following these steps and maintaining a regular cleaning and maintenance routine will help ensure that your Milwaukee Tool Chest remains organized, functional, and in top condition for years to come.
FAQ
What are the benefits of organizing a Milwaukee tool chest?
Organizing a Milwaukee tool chest has several benefits. Firstly, it allows for easy access to tools, saving valuable time during projects. Additionally, organizing the chest helps to prolong the life of tools by reducing the risk of damage. Finally, an organized tool chest promotes a clean and efficient workspace.
How can I start organizing my Milwaukee tool chest?
To start organizing your Milwaukee tool chest, first empty out all the tools and clean the interior of the chest. Next, sort the tools into categories based on their type or function. Then, invest in a variety of tool storage solutions such as trays, dividers, and foam inserts to keep each tool in its designated place. Finally, label each compartment or drawer for easy identification.
What are some tips for maximizing the space in a Milwaukee tool chest?
Maximizing space in a Milwaukee tool chest is essential for efficient organization. One tip is to utilize vertical space by adding shelves or using hanging storage solutions. Additionally, nesting smaller tools within larger ones can help save space. It’s also important to regularly review the tools and remove any unnecessary items to free up space for new ones.
How often should I clean and reorganize my Milwaukee tool chest?
It is recommended to clean and reorganize a Milwaukee tool chest at least once every few months. However, the frequency may vary depending on the amount of use and the type of work being done. Regular cleaning and reorganization will help maintain an efficient and functional tool chest.
What are some common mistakes to avoid when organizing a Milwaukee tool chest?
When organizing a Milwaukee tool chest, there are a few common mistakes to avoid. One mistake is not labeling compartments or drawers, which can lead to confusion and time wasted searching for tools. Another mistake is failing to regularly review the contents of the tool chest and remove any unnecessary items. Overloading the chest with too many tools is also a common mistake that can make it difficult to find what you need.