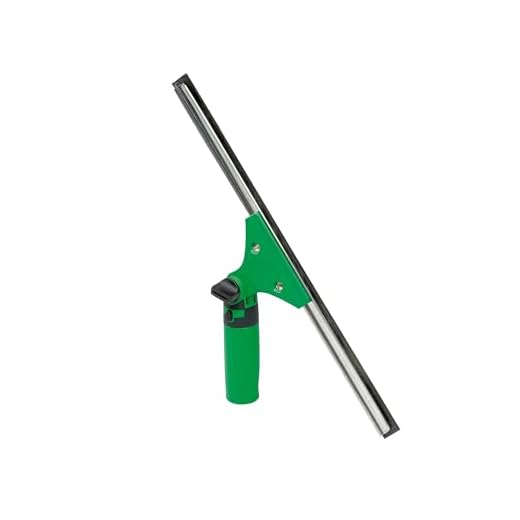


When it comes to maintaining clean and shiny floors, a floor scrubber is an essential tool. However, in order to achieve the best cleaning results, it is important to ensure that the squeegee on the floor scrubber is properly adjusted.
The squeegee plays a crucial role in the cleaning process as it removes the dirty water and cleaning solution from the floor, leaving it dry and streak-free. If the squeegee is not adjusted correctly, it can leave behind water streaks or even damage the floor.
Adjusting the squeegee on a floor scrubber may seem like a daunting task, but with the right steps, it can be easily done. In this article, we will guide you through the process of adjusting the squeegee on a floor scrubber for optimal cleaning performance.
Step 1: Prepare the floor scrubber
Before adjusting the squeegee, make sure the floor scrubber is turned off and unplugged. This will ensure your safety during the adjustment process. Also, remove any excess water or debris from the squeegee and the surrounding area.
Step 2: Determine the correct squeegee angle
The angle of the squeegee is crucial for effective cleaning. Most floor scrubbers have adjustable squeegee angles, usually between 30 and 45 degrees. The correct angle depends on the type of floor and the condition of the floor.
Tip: A steeper angle is usually better for uneven or heavily soiled floors, while a shallower angle works well for smooth and lightly soiled floors.
Step 3: Adjust the squeegee height
Proper squeegee height is important for achieving optimal cleaning results. The squeegee should be set at a height that allows it to make good contact with the floor without causing any damage. Adjust the height by loosening the locking nut or bolt and sliding the squeegee up or down. Once the desired height is reached, tighten the locking nut or bolt to secure the squeegee in place.
Tip: It is recommended to start with a lower squeegee height and gradually adjust it until the desired results are achieved. This will help prevent any damage to the floor.
Step 4: Test and fine-tune
After adjusting the squeegee, it is important to test the floor scrubber on a small section of the floor. Observe the cleaning results and make any necessary fine-tuning adjustments to the squeegee angle and height to ensure optimal performance.
By following these steps, you can easily adjust the squeegee on your floor scrubber and achieve clean, dry, and streak-free floors. Regularly checking and adjusting the squeegee will help prolong its lifespan and ensure consistent cleaning results.
Understanding the Importance of Adjusting the Squeegee
When it comes to using a floor scrubber, one of the most critical elements to consider is the adjustment of the squeegee. The squeegee plays a vital role in the cleaning process as it helps to remove dirt, debris, and excess liquid from the surface being cleaned. Therefore, understanding the importance of properly adjusting the squeegee is key to achieving optimum cleaning results.
The Role of the Squeegee
The squeegee is a rubber blade that is mounted at the rear of a floor scrubber machine. Its main function is to collect the solution and debris that is left behind after the scrubbing brushes have agitated the surface. As the machine moves forward, the squeegee blade comes into contact with the surface and effectively channels the liquid into a collection tank or a vacuum system.
Benefits of Proper Adjustment
Properly adjusting the squeegee is crucial for several reasons:
- Improved Cleaning Performance: A well-adjusted squeegee ensures that the correct amount of pressure is applied to the surface, allowing for efficient liquid and debris collection. This results in a cleaner and dryer surface.
- Reduced Streaking and Residue: When the squeegee is not properly adjusted, it may leave streaks or residue on the surface. This can deface the floor and compromise the overall cleanliness of the area.
- Extended Squeegee Lifespan: By adjusting the squeegee properly, you can avoid unnecessary wear and tear. This helps to prolong the lifespan of the squeegee and minimizes the need for frequent replacements.
Considering these benefits, it is evident that adjusting the squeegee should not be overlooked. It is recommended to refer to the manufacturer’s instructions or seek guidance from a professional to ensure that the squeegee is adjusted correctly for your specific floor scrubber model and the surface being cleaned.
Steps to Adjust the Squeegee on Your Floor Scrubber
Adjusting the squeegee on your floor scrubber is an important step to ensure optimal cleaning results. Here are the steps to adjust the squeegee on your floor scrubber:
- Start by turning off the floor scrubber and unplugging it from the power source.
- Locate the squeegee assembly, which is typically located behind the scrub brush.
- Check the condition of the squeegee blade. If it is worn or damaged, replace it with a new one.
- Loosen the bolts or screws that secure the squeegee assembly in place.
- Adjust the height of the squeegee by raising or lowering it. The ideal height is usually determined by the type of flooring you are cleaning.
- Make sure the squeegee is level and properly aligned with the scrub brush.
- Tighten the bolts or screws to secure the squeegee assembly in its new position.
- Turn on the floor scrubber and test the squeegee on a small section of the floor.
- Observe the squeegee’s performance. If it is not leaving the floor dry or if it is leaving streaks, make further adjustments.
- Repeat the adjustment process until the squeegee is functioning optimally.
Following these steps will help you adjust the squeegee on your floor scrubber and ensure that it provides efficient and effective cleaning results on various floor surfaces.
Tips and Tricks for Properly Adjusting the Squeegee
1. Check the condition of the squeegee: Before adjusting the squeegee on your floor scrubber, make sure to inspect its condition. Look for any signs of wear or damage, such as cracks or tears in the rubber blade. Replace the squeegee if necessary to ensure optimal performance.
2. Set the correct angle: Adjusting the angle of the squeegee is crucial for effective cleaning. Start by loosening the adjustment knobs or screws that hold the squeegee assembly in place. Then, set the angle depending on the type of floor being cleaned. For rough surfaces, a steeper angle is generally recommended, while a less aggressive angle is suitable for smoother floors.
3. Adjust the pressure: Proper pressure adjustment is key to achieving a streak-free finish. If the squeegee applies too much pressure, it may leave excess water or solution behind, causing streaks. Conversely, insufficient pressure can result in poor water recovery. Experiment with different pressure settings to find the optimal level for your specific floor surface.
4. Check for proper alignment: To ensure that the squeegee is properly aligned, observe its contact with the floor. It should make consistent contact across the entire length of the blade. If you notice uneven wear or gaps between the blade and the floor, readjust the squeegee accordingly.
5. Replace worn blades: Over time, the squeegee blade may wear down, leading to decreased performance. Regularly inspect the blade for signs of wear and replace it when necessary. A well-maintained squeegee blade is essential for effective water and solution recovery.
6. Regularly clean the squeegee: To maintain optimal performance, it is important to clean the squeegee regularly. Remove any debris or buildup from the blade to prevent blockages, which can compromise water recovery. Wipe the squeegee with a damp cloth or rinse it under clean water to remove any residue.
7. Test and adjust: After making any adjustments to the squeegee, it’s important to test the floor scrubber on a small area first. This will allow you to observe the cleaning results and make further adjustments if necessary. This trial and error process can help you fine-tune the squeegee settings for optimal performance.
By following these tips and tricks, you can properly adjust the squeegee on your floor scrubber, ensuring efficient and effective cleaning results.
Common Mistakes to Avoid When Adjusting the Squeegee
Adjusting the squeegee on a floor scrubber is an important task that can greatly impact the cleaning performance. However, it is also a task that is often done incorrectly, resulting in poor cleaning results and potential damage to the machine. To ensure proper adjustment of the squeegee, it is important to avoid the following common mistakes:
1. Incorrect Angle
One of the most common mistakes is setting the squeegee at the wrong angle. The angle of the squeegee should be adjusted depending on the type of floor and the condition it is in. If the angle is too steep, the squeegee may leave behind excess water and create streaks. On the other hand, if the angle is too shallow, the squeegee may not pick up all the water, leading to wet spots and potential slip hazards. It is important to consult the user manual or seek professional advice to determine the correct angle.
2. Uneven Pressure
Another mistake to avoid is applying uneven pressure on the squeegee. The squeegee should make even contact with the floor surface to ensure effective water pick-up. Uneven pressure can result in streaks or areas of water that are not properly removed. To prevent this mistake, it is important to check the evenness of the pressure across the entire length of the squeegee and adjust if necessary.
3. Neglecting Wear and Tear
The condition of the squeegee blade is crucial for optimal cleaning performance. Over time, the blade can wear down or become damaged, affecting its ability to effectively remove water. Neglecting to regularly inspect and replace the squeegee blade can lead to poor cleaning results and potential damage to the floor scrubber. It is recommended to regularly check the condition of the blade and replace it when signs of wear or damage are observed.
4. Improper Positioning
Proper positioning of the squeegee on the floor scrubber is essential for efficient water pick-up. Some common mistakes include not aligning the squeegee properly with the machine or failing to secure it tightly. These mistakes can result in the squeegee not making proper contact with the floor surface, leaving behind water and decreasing the cleaning effectiveness. It is important to carefully position and secure the squeegee according to the manufacturer’s instructions.
Avoiding these common mistakes when adjusting the squeegee on a floor scrubber can help ensure optimal cleaning performance and extend the lifespan of the machine. By paying attention to the angle, pressure, blade condition, and positioning, you can achieve efficient water pick-up and achieve the best cleaning results.


