

Commercial floor scrubbers are becoming increasingly popular in Bowling Green, Kentucky, for their ability to efficiently and effectively clean large spaces. Whether you own a restaurant, office building, or warehouse, a commercial floor scrubber can save you time and money, while also ensuring a deep clean.
Using a commercial floor scrubber may seem intimidating at first, but with the right knowledge and technique, it can be a straightforward and efficient process. In this article, we will walk you through the steps of using a commercial floor scrubber in Bowling Green, KY, so you can make the most of this powerful cleaning tool.
Step 1: Preparation
Before starting, it’s essential to prepare the area you will be cleaning. Remove any obstacles such as furniture, debris, or loose objects that could interfere with the scrubber’s movement. Sweep or vacuum the floor to remove any loose dirt or dust. Ensure that the scrubber’s water tank is filled with clean water and the appropriate cleaning solution.
Step 2: Familiarize Yourself with the Controls
Take a few moments to familiarize yourself with the controls of the commercial floor scrubber. Each machine may have slightly different settings and buttons, so it’s important to understand how to operate the scrubber properly. Common controls include an on/off switch, water flow control, brush pressure adjustment, and forward/reverse movement.
Step 3: Start Cleaning
Begin by positioning yourself at one corner of the area to be cleaned. Turn on the scrubber and slowly push it forward, allowing the machine’s brushes to come into contact with the floor. Move in a straight line, overlapping each pass slightly to ensure thorough coverage. If the scrubber has multiple brushes, adjust the brush pressure as needed for different floor surfaces.
Benefits of Using a Commercial Floor Scrubber
Using a commercial floor scrubber can provide numerous benefits for businesses in Bowling Green, KY. These machines are specifically designed to effectively clean and maintain various types of flooring, saving both time and effort in the process.
1. Efficient Cleaning: One of the major advantages of using a commercial floor scrubber is its ability to efficiently clean large areas. With their powerful motors and scrubbing brushes, these machines can quickly and thoroughly clean dirt, grime, and stains from the floors.
2. Time-saving: Traditional methods of floor cleaning, such as mopping or using a broom, can be time-consuming and tedious. However, a commercial floor scrubber can significantly reduce cleaning time. These machines can cover a large area in a short amount of time, allowing businesses to focus on other important tasks.
3. Enhanced Safety: A clean and well-maintained floor is essential for maintaining a safe working environment. With a commercial floor scrubber, businesses can ensure that their floors are free from hazards such as spills or slippery surfaces. By removing dirt and debris, these machines minimize the risk of accidents and injuries caused by slips and falls.
4. Cost-effective: While the initial cost of purchasing or renting a commercial floor scrubber may seem high, it can lead to long-term cost savings. Regular use of this machine can prolong the lifespan of flooring by preventing damage from dirt buildup. Additionally, it eliminates the need for costly cleaning products and reduces labor costs associated with traditional cleaning methods.
5. Improved Floor Appearance: A clean and well-maintained floor can enhance the overall appearance of a business. Using a commercial floor scrubber ensures that floors are consistently clean and presentable, showcasing professionalism and attention to detail.
6. Environmental Friendliness: Commercial floor scrubbers often use cleaning solutions and techniques that are environmentally friendly. These machines are designed to use less water and cleaning agents compared to traditional cleaning methods, reducing waste and minimizing the impact on the environment.
Overall, using a commercial floor scrubber offers a range of benefits for businesses in Bowling Green, KY. From efficient cleaning and time savings to improved safety and cost-effectiveness, these machines are a valuable asset for maintaining clean and presentable floors.
Tips for Choosing the Right Commercial Floor Scrubber
Choosing the right commercial floor scrubber for your business is essential to maintain a clean and safe working environment. The perfect floor scrubber can efficiently remove dirt, grime, and stains from various types of flooring, ensuring that your facility always looks its best. Here are some tips to help you select the right commercial floor scrubber:
1. Assess your needs: Determine the size and type of area that needs to be cleaned. Measure the square footage and consider the layout of your facility. This will help you determine the type and size of the floor scrubber that would be most suitable.
2. Consider the floor type: Different floor scrubbers are designed to work on different types of flooring, such as tile, concrete, or hardwood. Make sure to choose a floor scrubber that is compatible with the type of flooring in your facility to avoid causing any damage.
3. Evaluate the cleaning requirements: Think about the specific cleaning needs of your business. Do you need a floor scrubber that can handle heavy-duty cleaning or just regular maintenance? Consider the frequency and intensity of the cleaning tasks to find a floor scrubber with the right features and capabilities.
4. Look for user-friendly features: A good commercial floor scrubber should be easy to use and maintain. Look for features such as adjustable handles, intuitive controls, and easy-to-replace brushes or pads. This will ensure that your employees can use the machine efficiently and safely.
5. Consider the size and maneuverability: Depending on the layout of your facility, you may need a compact floor scrubber that can easily maneuver through tight spaces or narrow aisles. Consider the size and weight of the floor scrubber to determine if it is suitable for your facility’s needs.
6. Check the durability: Commercial floor scrubbers are an investment, so it’s important to choose a model that is built to last. Look for sturdy construction, quality materials, and a reputable brand to ensure that the floor scrubber can withstand regular use and provide reliable performance.
7. Compare prices and warranties: Before making a final decision, compare the prices and warranties of different floor scrubber models. Consider the long-term costs and the availability of replacement parts or maintenance services. Choose a floor scrubber that offers the best value for your budget.
By following these tips, you can select a commercial floor scrubber that meets your specific cleaning needs and helps you maintain a clean and attractive work environment. A well-chosen floor scrubber will not only improve the appearance of your facility but also contribute to the overall safety and satisfaction of your employees and customers.
Step-by-Step Guide: Using a Commercial Floor Scrubber
Using a commercial floor scrubber can help make the cleaning process more efficient and effective. Whether you are a janitor or a business owner, knowing how to properly use a commercial floor scrubber can save you time and effort. Follow this step-by-step guide to learn how to use a commercial floor scrubber:
Step 1: Preparation
Before using a commercial floor scrubber, make sure the area is clear of any debris or furniture. Sweep or vacuum the floor to remove loose dirt and dust. Also, check the floor for any spills or stains that may need pre-treatment.
Step 2: Dilute Cleaning Solution
If the commercial floor scrubber requires a cleaning solution, dilute it according to the manufacturer’s instructions. Use a bucket or a mixing container to prepare the cleaning solution. Make sure to use the recommended amount of solution for the size of the water tank in the scrubber.
Step 3: Fill the Water Tank
Fill the water tank of the floor scrubber with the diluted cleaning solution. Ensure that the tank is filled to the appropriate level, as indicated by the manufacturer’s instructions. Be careful not to overfill the tank.
Step 4: Adjust the Settings
Depending on the type of commercial floor scrubber you are using, you may need to adjust the settings such as brush pressure, water flow, and speed. Consult the user manual of the floor scrubber to understand how to adjust these settings appropriately for your specific machine.
Step 5: Start Cleaning
Once the floor scrubber is prepared and the settings are adjusted, you are ready to start cleaning. Hold onto the handle of the machine and turn it on. Begin by slowly pushing the scrubber forward, allowing the rotating brushes or pads to make contact with the floor.
Step 6: Overlap and Crosshatch
To ensure thorough cleaning, it is important to overlap each pass slightly. This will prevent any missed spots. Additionally, consider using a crosshatch pattern, moving the machine in the opposite direction for a second pass. This helps to remove any stubborn stains or dirt build-up.
Step 7: Empty and Refill
As the water tank fills up with dirt and debris, it is important to empty it regularly. Most commercial scrubbers have a waste water tank that can be easily removed and emptied into a drain or sink. After emptying the tank, refill it with fresh clean water and cleaning solution as needed.
Step 8: Finish and Drying
After you have covered the entire floor surface with the scrubber, turn off the machine and allow the floor to air dry. Depending on the humidity and conditions, it may take some time for the floor to fully dry. Make sure to close off the area to foot traffic until the floor is completely dry.
Following these steps will help you properly use a commercial floor scrubber and achieve optimal cleaning results. Regular maintenance and cleaning of the scrubber itself will also ensure its longevity and performance. Remember to always consult the user manual for specific instructions regarding your particular floor scrubber model.
Preparation
Before using a commercial floor scrubber in Bowling Green, KY, it’s important to properly prepare the area to be cleaned. Following these steps will help ensure the best results:
1. Clear the Area
Remove any loose objects, furniture, or obstacles from the floor to be cleaned. This will allow the floor scrubber to have full access to the entire surface without any obstructions.
2. Sweep or Vacuum
Prior to using the floor scrubber, sweep or vacuum the area to remove any debris, dust, or loose dirt. This will prevent the scrubber from pushing around dirt or creating a muddy mess on the floor.
3. Protect Nearby Surfaces
If there are any nearby surfaces that could be affected by water or cleaning solution splashing, such as walls or sensitive equipment, it’s essential to protect them. Use plastic sheeting or coverings to shield these surfaces from potential damage.
4. Check the Equipment
Before using the commercial floor scrubber, ensure it is in good working condition. Check the scrubbing pads or brushes for wear and tear, and replace them if necessary. Also, inspect the water and cleaning solution tanks to ensure they are clean and properly filled.
5. Test in an Inconspicuous Area
Prior to starting the full cleaning process, it’s advisable to test the floor scrubber in a small, inconspicuous area to ensure it doesn’t damage or affect the flooring material. This is especially important if you are using a new floor scrubber or if the flooring is particularly sensitive or delicate.
By following these preparation steps, you’ll be ready to effectively and safely use a commercial floor scrubber for your cleaning needs in Bowling Green, KY.
Starting the Machine
Before you start using a commercial floor scrubber in Bowling Green, KY, it’s important to know how to properly start the machine. Follow these steps to get started:
1. Safety First
Prior to starting the machine, make sure you are wearing appropriate personal protective equipment (PPE) such as gloves, safety glasses, and non-slip shoes. This will help protect you from any potential hazards.
2. Preparation
Check the water and detergent levels in the machine’s tanks. Make sure they are filled to the recommended levels for optimal cleaning performance. Additionally, ensure that the machine’s brushes or pads are properly installed and in good condition.
Next, plug the power cord into a grounded electrical outlet. It’s important to use a properly grounded outlet to prevent electrical accidents.
3. Machine Start-up
Once you have completed the necessary safety checks and preparations, it’s time to start the machine. The exact steps may vary depending on the model and manufacturer of the floor scrubber, so be sure to consult the user manual for specific instructions. However, the general procedure is as follows:
| 1. | Turn the machine’s power switch to the “On” position. This will supply power to the machine’s motors. |
| 2. | If applicable, adjust the machine’s settings such as brush pressure, water flow rate, or speed control to meet your cleaning needs. |
| 3. | Engage the machine’s drive system by either pushing a lever or pressing a button, depending on the specific machine design. This will allow the machine to move forward or backward during operation. |
Once you have started the machine, you are ready to begin using the commercial floor scrubber to clean the floors in Bowling Green, KY.
Scrubbing the Floor
Using a commercial floor scrubber is an efficient and effective way to clean your floors. Here are the steps to properly scrub the floor using a floor scrubber:
1. Prepare the area: Before starting, remove any obstacles or debris from the area you will be scrubbing. This will ensure that the floor scrubber can navigate smoothly without any obstructions.
2. Fill the solution tank: Check the solution tank of the floor scrubber and make sure it is properly filled with the appropriate cleaning solution. Follow the manufacturer’s instructions for the correct dilution ratio.
3. Turn on the machine: Switch on the floor scrubber and adjust the settings according to the type of floor you are cleaning. Different types of floors may require different settings, so refer to the manufacturer’s guidelines.
4. Start scrubbing: Slowly push the floor scrubber forward while the brushes or pads on the machine rotate and agitate the cleaning solution on the floor. Make sure to cover the entire area, working in straight lines or overlapping patterns.
5. Pay attention to corners and edges: When scrubbing, pay special attention to corners and edges of the floor. These areas tend to accumulate dirt and grime, so go over them multiple times with the floor scrubber to ensure a thorough clean.
6. Empty and rinse the recovery tank: Once you have finished scrubbing the floor, turn off the machine and remove the recovery tank. Empty the tank and rinse it thoroughly to remove any residual cleaning solution or dirt that has been collected.
7. Let the floor dry: After scrubbing the floor, allow it to air dry completely before allowing foot traffic. This will prevent slips and falls due to a wet surface.
By following these steps, you can ensure that your floors are effectively cleaned using a commercial floor scrubber. Remember to read the manufacturer’s guidelines and always prioritize safety when using any type of machinery.
Drying the Floor
After scrubbing the floor with a commercial floor scrubber, it is important to properly dry the surface to prevent any accidents or further dirt accumulation. Here are some steps to effectively dry the floor:
Step 1: Remove Excess Moisture
Before you begin the drying process, it is essential to remove any excess moisture on the floor. You can do this by using a mop or a wet vacuum to soak up the water. Make sure to go over the entire floor surface to ensure no areas are left wet.
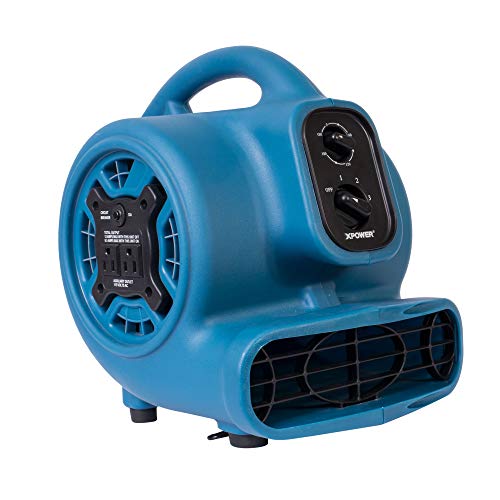
Step 2: Use a Floor Dryer
Next, use a floor dryer or a fan to accelerate the drying process. Position the dryer or fan to blow air directly onto the wet floor. This will help to evaporate the remaining moisture more quickly. Ensure that the airflow covers the entire floor surface for even drying.
Step 3: Open Doors and Windows
To aid in the drying process, open doors and windows to allow fresh air circulation. This will help to dissipate moisture and speed up the drying time. It is important to ensure proper ventilation in the area where the scrubbing was done.
Step 4: Check for Dryness
After a sufficient amount of time has passed, check the floor for dryness. Use a moisture meter or simply touch the surface to determine if any moisture remains. If the floor is still damp, continue the drying process until it is completely dry.
By following these steps, you can effectively dry the floor after using a commercial floor scrubber. Remember to take the necessary precautions and allow enough time for the floor to dry thoroughly before allowing foot traffic or applying any floor finishes or treatments.