


Karcher Anniversary Window Vac is a handy and efficient tool for cleaning windows and other smooth surfaces. With regular use, the battery of your Window Vac will eventually need to be recharged. In this article, we will guide you on how to properly charge your Karcher Anniversary Window Vac.
Step 1: Prepare the charging station
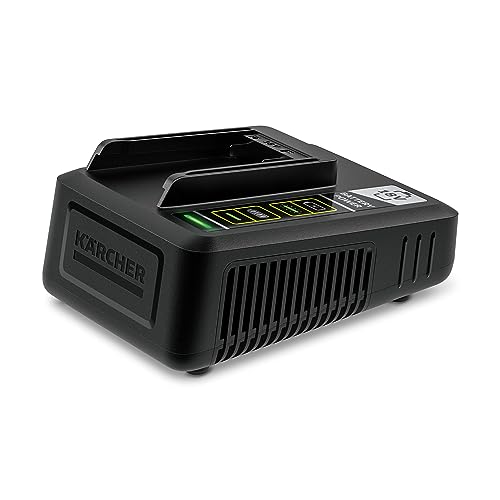
Before you start charging your Window Vac, make sure you have a clean, flat surface to place the charging station. The charging station should be positioned near an electrical outlet for easy access to power. It is important to set up the charging station in a safe and dry location, away from water or any flammable materials.
Step 2: Connect the charging cable
Take the charging cable that came with your Karcher Anniversary Window Vac and connect it to the charging station. The cable should have a USB end that plugs into the charging station and a micro USB end that connects to the Window Vac. Ensure that both ends are securely connected to their respective ports.
Step 3: Attach the Window Vac

Once the charging cable is properly connected, you can now attach your Karcher Anniversary Window Vac to the charging station. There should be a designated slot where you can securely place the Window Vac. Make sure it is positioned correctly to ensure a proper connection and charging process.
Step 4: Charging status
After attaching your Window Vac to the charging station, check if the device starts charging. There may be a charging indicator light on the charging station or on the Window Vac itself. This light will indicate the charging status – whether it is charging or already fully charged. Leave your Window Vac connected until it reaches a full charge.
Step 5: Disconnect and store
Once your Karcher Anniversary Window Vac is fully charged, you can disconnect it from the charging station. Gently remove the Window Vac from the slot and unplug the charging cable from both the charging station and the device. Store the charging cable and the Window Vac in a safe place until the next use.
Following these steps will ensure that you properly charge your Karcher Anniversary Window Vac, allowing you to enjoy its efficient cleaning power whenever you need it.
What is Karcher Anniversary Window Vac
Karcher Anniversary Window Vac is a specialized cleaning device designed for effortless cleaning of windows, mirrors, and other smooth surfaces. It is a cordless and lightweight vacuum cleaner that efficiently removes water and dirt from surfaces, leaving them streak-free and spotless.
This window vac is a special edition product offered by Karcher to celebrate their anniversary. It features advanced technology and innovative design to make window cleaning quick and hassle-free. The Anniversary Window Vac is equipped with a powerful rechargeable battery that provides long-lasting cleaning performance.
With its versatile cleaning capabilities, the Karcher Anniversary Window Vac can also be used for cleaning flat surfaces such as tiles, countertops, and glass tables. Its compact size and ergonomic handle make it easy to maneuver and handle while cleaning.
The Karcher Anniversary Window Vac comes with a range of accessories and attachments, such as a spray bottle, microfiber cloth, and detergent, to further enhance the cleaning experience. It is a popular choice among homeowners and professional cleaners for its efficiency and convenience.
Using the Karcher Anniversary Window Vac is simple and straightforward. The device can be easily charged using the included charger, and a full charge typically provides enough power for multiple cleaning sessions. The vacuum’s intuitive controls and easy-to-empty waste container make it user-friendly and convenient to use.
Overall, the Karcher Anniversary Window Vac is a reliable and efficient cleaning tool that makes window cleaning a breeze. Its innovative features, high-quality construction, and sleek design set it apart from traditional cleaning methods, making it a must-have for anyone looking to achieve sparkling clean windows and surfaces.
Why do you need to charge it
The Karcher Anniversary Window Vac is a cordless window vacuum cleaner that allows you to effortlessly clean your windows, mirrors, and other smooth surfaces. It is powered by a rechargeable lithium-ion battery that provides the necessary suction power to effectively remove dirt, grime, and streaks from your windows.
Charging the Karcher Anniversary Window Vac is essential for its proper functioning. Here are a few reasons why you need to charge it:
Battery Power:
The vacuum cleaner operates on a battery, which needs to be charged in order for the device to work. Charging the battery ensures that you have enough power to complete your cleaning tasks without interruption. It is recommended to fully charge the battery before using the window vac for the best performance.
Extended Usage:
A fully charged battery provides extended usage time, allowing you to clean multiple windows or surfaces without the need to recharge frequently. By charging it beforehand, you can ensure that you have enough power to clean all the desired areas without any inconvenience.
Overall, charging the Karcher Anniversary Window Vac is crucial to enjoy its cordless convenience and ensure optimal performance during your cleaning tasks. It is always recommended to follow the manufacturer’s instructions for charging the device to maintain the battery life and ensure safe operation.
Charging Process
To charge your Karcher Anniversary Window Vac, follow these simple steps:
- Locate the charging port on the device. It is usually located on the back or bottom of the unit.
- Insert the plug of the charging cable into a power outlet.
- Connect the other end of the charging cable to the charging port of the Window Vac.
- Make sure the device is turned off before charging.
- Once connected, a red light will indicate that the device is charging.
- Leave the Window Vac connected to the charger until the battery is fully charged. This may take up to 2 hours.
- When the battery is fully charged, the red light will turn green.
- Disconnect the charger from the device.
- Your Karcher Anniversary Window Vac is now ready to be used.
It is important to note that the charging process may vary slightly depending on the model of your Window Vac. Always refer to the user manual for specific instructions for your device.
Step 1: Prepare the charger
Before you can start charging your Karcher Anniversary Window Vac, you will need to prepare the charger. Here are the steps:
- Make sure you have the charger that came with your Karcher Anniversary Window Vac. If you don’t, you can purchase a compatible charger from Karcher or an authorised retailer.
- Plug the charger into a power outlet. Ensure that the outlet is in good condition and working properly.
- Check the charger for any signs of damage, such as frayed wires or loose connections. If you notice any damage, do not use the charger and contact Karcher for a replacement.
- Inspect the charging contacts on the charger. These contacts should be clean and free from any dirt or debris. If necessary, use a clean and dry cloth to wipe them clean.
- Position the charger in a convenient location where you can easily access it. Make sure there is enough space for the Karcher Anniversary Window Vac to be placed on the charger without any obstructions.
Once you have prepared the charger, you are now ready to proceed to the next step of charging your Karcher Anniversary Window Vac.
Step 2: Connect the charger to the Karcher Anniversary Window Vac
Once you have located the charger, follow these steps to connect it to your Karcher Anniversary Window Vac:
- Ensure that the charger is plugged into a power source.
- Take the charger cable and insert the connector into the charging port located on the bottom of the Karcher Anniversary Window Vac.
- Make sure that the connector is inserted fully and securely.
- You should see a small LED light on the charger. This indicates that the charger is connected properly.
It is important to ensure that the charger is securely connected to the Karcher Anniversary Window Vac to ensure that it charges properly. Once the charger is connected, you can proceed to the next step.
Step 3: Wait for the device to charge
Once you have connected the Karcher Anniversary Window Vac to a power source, you will need to wait for the device to fully charge. The charging process typically takes around two hours, but this may vary depending on the model and the battery level.
During the charging process, you can use the time to clean the windows or carry out other tasks. However, it is important not to disconnect the device from the power source until it has finished charging.
You can check the battery status by looking at the LED indicators on the device. The indicators will typically show different colors or blinking patterns to indicate the charging progress.
Once the device is fully charged, you are ready to use it for your window cleaning needs. Make sure to disconnect the charger from the power source before using the device.
Tips for charging
Here are some useful tips for charging your Karcher Anniversary Window Vac:
-
Before charging, make sure the battery is completely drained. This will help to optimize the battery’s performance and lifespan.
-
Use the charging cable provided with your Window Vac. Using a different cable may not provide the correct voltage and could damage the device.
-
Connect the charging cable to the charging port on the Window Vac. Ensure the connection is secure to ensure proper charging.
-
Plug the other end of the charging cable into a power source. Ensure the power source is stable and not prone to power fluctuations.
-
Leave the Window Vac to charge for the recommended amount of time. This can vary depending on the model, so consult the user manual for precise charging instructions.
-
Do not leave the Window Vac charging for an extended period of time once it is fully charged. Overcharging can shorten the battery’s lifespan.
-
If you notice any issues with the charging process or the performance of the Window Vac, consult the user manual or contact Karcher customer support for assistance.
By following these tips, you can ensure proper and effective charging of your Karcher Anniversary Window Vac, allowing you to enjoy clean and streak-free windows every time.
Tip 1: Use the original charger
When it comes to charging your Karcher Anniversary Window Vac, it is recommended to use the original charger provided by the manufacturer. The original charger is specifically designed for the Window Vac, ensuring optimal charging performance and compatibility.
Using a different charger or a charger from another device may not provide the correct voltage and current required by the Window Vac, which could result in slower charging times or even damage to the battery.
To ensure efficient and safe charging, always connect your Karcher Anniversary Window Vac to the original charger and plug it into a suitable power outlet. Avoid using third-party chargers or USB ports, as they may not provide sufficient power for fast and reliable charging.