


Karcher Wv50 Window Vac is a popular and efficient cleaning tool that many people use to clean their windows. However, just like any other cleaning device, it requires regular maintenance to ensure its optimal performance. Cleaning the Karcher Wv50 Window Vac is a simple process that can be done with just a few easy steps.
The first step in cleaning your Karcher Wv50 Window Vac is to ensure that it is turned off and unplugged from the power source. This is an important safety precaution that should never be skipped.
Once the device is safely unplugged, it is time to remove the dirty water tank. The dirty water tank can easily be detached by pressing the release button located on top of the device. Once released, you can simply pull the tank away from the main unit.
After removing the dirty water tank, empty its contents into a sink or toilet. Rinse the tank thoroughly with clean water to remove any remaining dirt or debris. Be sure to also clean the tank’s filter and remove any blockages that may be present.
Next, it is time to clean the device’s suction nozzle. The suction nozzle can be detached by pressing the release button located near its base. Once released, rinse the suction nozzle with clean water to remove any dirt or residue. Use a soft brush to gently scrub the nozzle, ensuring all dirt and debris are removed.
Finally, allow all the detached parts to dry completely before reassembling the Karcher Wv50 Window Vac. Once dry, attach the clean filter back onto the dirty water tank and secure it in place. Then, attach the suction nozzle back onto the main unit and lock it into place by pressing it firmly.
In conclusion, cleaning your Karcher Wv50 Window Vac is a simple and important task that should be done regularly to maintain its efficiency. By following these easy steps, you can ensure that your window vac is always ready to tackle any cleaning job with ease and effectiveness.
Understanding the Karcher Wv50 Window Vac
The Karcher Wv50 Window Vac is a versatile and efficient cleaning tool specifically designed for streak-free window cleaning. This handheld device is lightweight and easy to use, making it a popular choice for both residential and commercial cleaning tasks.
Featuring a powerful suction mechanism and a durable rubber blade, the Karcher Wv50 Window Vac effectively removes water and dirt from windows, leaving them sparkling clean and dry in no time. With its innovative design, this window vac can be used on a variety of surfaces, including mirrors, tiles, shower screens, and even glass tables.

Using the Karcher Wv50 Window Vac is straightforward. Simply spray the window or surface with a cleaning solution, and then use the Window Vac to suck up the dirty water. The device collects the water in its built-in reservoir, which can be emptied easily and quickly, thanks to its simple and hygienic tank system.
Aside from its exceptional cleaning capabilities, the Karcher Wv50 Window Vac offers several other features that enhance its usability. These include a long battery life, quick charging time, and a lightweight design that reduces strain on the user’s hand and arm during prolonged cleaning tasks.
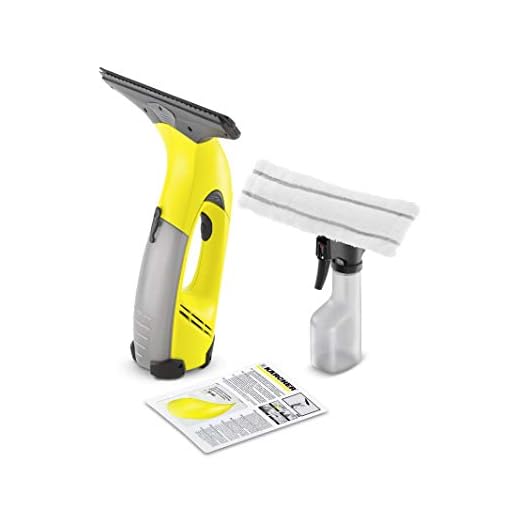
Furthermore, the Karcher Wv50 Window Vac comes with a set of accessories that allow for even more versatile cleaning. These accessories include a spray bottle, a microfiber cleaning cloth, and a window cleaning detergent, making it a comprehensive cleaning solution for a range of household chores.
Regular cleaning and maintenance are essential to ensure the longevity and optimal performance of the Karcher Wv50 Window Vac. It is recommended to clean the device thoroughly after each use to prevent the accumulation of dirt and debris. The user manual provides detailed instructions on how to disassemble and clean the various components of the window vac.
In conclusion, the Karcher Wv50 Window Vac is a reliable and efficient cleaning tool that is popular for its streak-free window cleaning capabilities. With its powerful suction and durable blade, it effortlessly removes water and dirt from various surfaces, leaving them clean and dry. Its additional features and accessories further enhance its usability, making it an excellent choice for all your cleaning needs.
Step 1: Prepare the Window Vac for Cleaning
Before cleaning your Karcher WV50 Window Vac, make sure to prepare it properly:
- Disconnect the Window Vac from its power source.
- Check the dirty water tank and empty it if it is full. Simply slide it out and empty the contents into a sink or toilet.
- If necessary, remove the spray bottle attachment by pressing the release button and sliding it off.
- Take a soft cloth or sponge and dampen it with warm water. This will be used to clean the exterior of the Window Vac.
Once you have completed these steps, you are ready to move on to the next step in the cleaning process.
Gather the necessary cleaning supplies
Before you start cleaning your Karcher WV50 Window Vac, it is important to gather all the necessary cleaning supplies. Having everything ready will make the cleaning process go smoothly and efficiently.
Here is a list of the cleaning supplies you will need:
| 1. | A Karcher WV50 Window Vac |
| 2. | A clean and dry microfiber cloth |
| 3. | A spray bottle filled with a mixture of water and window cleaning solution |
| 4. | A small soft brush or toothbrush |
| 5. | A bowl or bucket of warm soapy water |
| 6. | Paper towels or lint-free cloth |
| 7. | A screwdriver (if necessary) |
Having these cleaning supplies ready will ensure that you have everything you need to properly clean your Karcher WV50 Window Vac and achieve streak-free, sparkling clean windows.
Step 2: Emptying the Dirty Water Tank
When your Karcher WV50 Window Vac is full of dirty water, it’s important to empty the tank before cleaning it. Here are the steps to properly empty the dirty water tank:
- Locate the release button on the top or bottom of the vacuum.
- Press the release button to detach the dirty water tank from the rest of the device.
- Hold the tank over a sink or drain to avoid spills.
- Remove the rubber plug or stopper from the bottom of the tank to release the dirty water.
- Allow all of the dirty water to drain out completely.
- Once the tank is empty, rinse it with clean water to remove any remaining dirt or debris.
- Shake the tank gently to remove excess water.
- Reattach the rubber plug or stopper to the bottom of the tank.
- Click the dirty water tank back into place on the window vac.
By emptying the dirty water tank regularly, you can ensure that your Karcher WV50 Window Vac continues to clean effectively. Remember to clean the tank after each use to prevent the buildup of dirt and debris that can affect the performance of your device.
Prepare the Karcher Wv50 Window Vac for Cleaning
Before you start cleaning your Karcher Wv50 Window Vac, it’s important to properly prepare the device. Follow these steps to ensure a thorough and efficient cleaning process:
| Step 1: | Ensure the device is powered off and unplugged from the electric socket. |
| Step 2: | Detach the dirty water tank from the main unit. To do this, press the tank release button and lift it upwards. |
| Step 3: | Remove the rubber strip from the dirty water tank. Gently pull it out and set it aside. |
| Step 4: | Empty any residual water from the dirty water tank. You can do this by pouring it down the sink or a drain. |
| Step 5: | Rinse the dirty water tank with clean water to remove any debris or residue. Make sure to clean all sides of the tank thoroughly. |
| Step 6: | Clean the rubber strip with warm soapy water. Use a cloth or sponge to remove any dirt or grime from the strip. Rinse it well and let it dry completely before reattaching it to the tank. |
| Step 7: | Inspect the suction nozzle and the blades for any dirt or obstructions. Use a small brush or cloth to remove any debris. Make sure the blades move freely. |
| Step 8: | Wipe the main unit and handle with a damp cloth to remove any dust or dirt. |
Once you have completed these preparation steps, your Karcher Wv50 Window Vac is now ready for cleaning. Remember to always follow the instructions provided by the manufacturer to ensure the safe and effective use of your device.
Step 3: Cleaning the Squeegee Blades
To ensure optimal performance of your Karcher WV50 Window Vac, it is important to regularly clean the squeegee blades. Over time, these blades can accumulate dirt, debris, and residue from previous cleaning tasks, which can affect their effectiveness.
Here are the steps to clean the squeegee blades:
-
First, detach the squeegee blade assembly from the main unit. This can be done by sliding the button or clip located on the side of the unit.
Value Choice Verooc Two-Piece Floor Squeegee BladeCompatible with Karcher Floor ScrubbersThis two-piece floor squeegee blade is designed to enhance the performance of Karcher BD90/160 scrubbers. It effectively collects sewage and keeps floors dry, ensuring optimal cleaning results for commercial spaces. -
Once the assembly is detached, inspect the squeegee blades for any visible debris or residue.
-
Using a damp cloth or sponge, gently wipe the squeegee blades to remove any dirt or residue. Take care not to apply excessive pressure that may damage the blades.
-
If there are stubborn stains or residue that cannot be removed with a damp cloth, you can use a mild detergent diluted in water. Apply the solution to the blades and wipe them clean.
-
After cleaning, rinse the squeegee blades with clean water to remove any detergent or residue.
-
Allow the squeegee blades to air-dry completely before reattaching them to the main unit.
Regularly cleaning the squeegee blades will help maintain their effectiveness and ensure streak-free cleaning results with your Karcher WV50 Window Vac.
Clean the dirty surface with the Karcher Wv50 Window Vac
Keeping your windows clean can be a tedious task, but with the Karcher Wv50 Window Vac, it becomes a breeze. This powerful and efficient cleaning tool is designed to quickly and effectively remove dirt, grime, and streaks from glass surfaces, leaving them sparkling clean.
Step 1: Prepare the Window Vac
Before you begin cleaning, ensure that the Karcher Wv50 Window Vac is fully charged. It is recommended to charge it for at least 3 hours before use. Once charged, make sure the cleaning head and the squeegee are clean and free from any debris.
Step 2: Spray the Surface
If the glass surface is heavily soiled, it is advisable to pre-spray it with a suitable window cleaning solution. This will help to loosen the dirt and make it easier to clean. Apply the cleaning solution evenly across the surface using a spray bottle or a sponge.
Step 3: Clean with the Window Vac
Turn on the Karcher Wv50 Window Vac by pressing the power button, located on the handle of the device. Place the cleaning head against the glass surface, ensuring it is firmly pressed against it. Slowly glide the Vac across the surface in an upwards or downwards motion.
The Window Vac features a powerful suction function that efficiently removes the dirty cleaning solution from the glass surface, leaving it streak-free and dry. The handy squeegee ensures that every inch of the surface is thoroughly cleaned.
For larger windows or surfaces, you may need to empty the dirty water tank of the Window Vac periodically. Simply open the tank, which is typically located at the top or the side of the device, and pour out the contents. Rinse the tank with clean water before reattaching it to the Window Vac.
Step 4: Finish and Maintain the Window Vac
Once you have finished cleaning, turn off the Karcher Wv50 Window Vac and wipe down the cleaning head and squeegee with a clean cloth. Empty and rinse the dirty water tank thoroughly to prevent any build-up of residue.
It is also advisable to occasionally clean the Suction Nozzle, which is located at the cleaning head, to remove any trapped debris or particles. Regular maintenance of the Window Vac will ensure its optimal performance and longevity.
Cleaning your windows has never been easier than with the Karcher Wv50 Window Vac. With its powerful suction and efficient cleaning capabilities, you can achieve streak-free and spotless windows in no time. Say goodbye to tedious cleaning tasks and hello to sparkling clean windows!
| Pros | Cons |
|---|---|
| Efficient and powerful cleaning | Requires occasional emptying of the dirty water tank |
| Leaves windows streak-free and dry | May need to pre-spray heavily soiled surfaces |
| Easy maintenance and cleaning | Charging time may take a few hours |
| Time-saving solution for window cleaning |