


Do you find yourself needing a powerful tool to cut down trees and chop through thick branches? Look no further than the lumber axe! This versatile tool is specifically designed to make your lumber cutting tasks easier and more efficient. Whether you are a professional lumberjack or a DIY enthusiast, building your own lumber axe can be a satisfying and cost-effective solution. In this article, we will guide you through the process of building your own lumber axe, providing step-by-step instructions and valuable tips to ensure its success.
Step 1: Gather the Necessary Materials
Before you start building your lumber axe, it is important to gather all the necessary materials. You will need a strong and durable axe head, typically made of high-quality steel. Look for an axe head with a sharp blade and a solid construction. Additionally, you will need a sturdy wooden handle, preferably made of ash or hickory, as these woods are known for their strength and shock resistance. Other materials you will need include epoxy resin, sandpaper, and wood finish.

Disclaimer: The process of building a lumber axe involves the use of sharp tools and potentially dangerous materials. Always prioritize safety by wearing appropriate protective gear such as goggles and gloves, and exercising caution throughout the construction process.
Choosing the right materials
When building a lumber axe, it is important to choose the right materials to ensure durability and effectiveness. Here are some key factors to consider when selecting the materials for your lumber axe:
|
Head: The head of the axe is the most important part, as it is responsible for cutting through the wood. It is recommended to use a high-quality steel head for maximum durability. Look for a head with a sharp and well-shaped blade, as this will make cutting through the wood much easier. |
|
Handle: The handle of the axe should be made from a strong and sturdy material, such as hickory or ash wood. These materials provide a good balance between strength and flexibility. Make sure the handle is straight and smooth, as this will allow for a comfortable grip and reduce the chances of slippage while using the axe. |
|
Grip: The grip of the axe is another important consideration, as it affects the user’s control and comfort. Look for a grip that is ergonomically designed and provides a firm hold. Rubber or textured grips can help prevent slipping and reduce fatigue during prolonged use. |
|
Additional materials: Depending on your personal preferences, you may want to consider adding additional materials to enhance the performance of your lumber axe. For example, adding a metal wedge to secure the head to the handle can provide extra stability. It is also a good idea to use epoxy or wood glue to reinforce the connection between the head and handle for added strength. |
By carefully selecting the right materials for your lumber axe, you can ensure that it will be durable, effective, and comfortable to use.
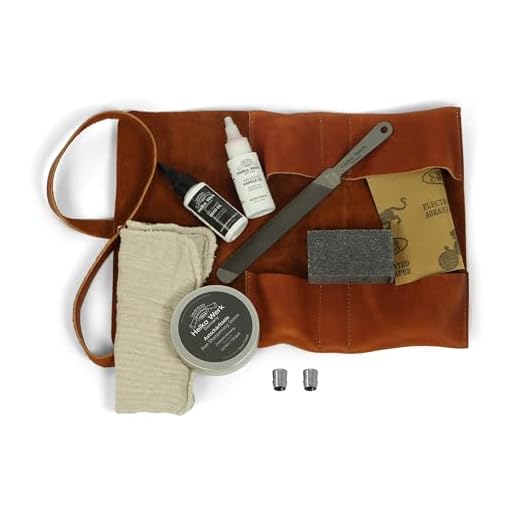
Tools needed for the construction process
Constructing a lumber axe requires a few essential tools to ensure smooth and accurate assembly. Here is a list of the tools you will need:
- Power Drill: A power drill is necessary for drilling holes and attaching components. Make sure to have a selection of drill bits in various sizes for different tasks.
- Saw: A saw, such as a circular saw or a handsaw, is needed to cut the wooden components to the desired lengths. Ensure the saw is sharp and suitable for cutting through wood.
- Chisel: A chisel is required for shaping and fine-tuning the wooden pieces. It helps create precise cuts and smooth edges.
- Measuring tape: Accurate measurements are crucial in the construction process. A measuring tape will ensure that all components fit together properly.
- Square: A square is used to check and maintain the accuracy of right angles during the assembly process. A combination square can also be helpful for measuring and marking.
- Clamps: Clamps are essential for holding the pieces together while glue or screws are being applied. They help ensure a secure and sturdy construction.
- Screwdriver: Depending on the type of screws used, you may need a flathead or Phillips head screwdriver. Make sure to have the appropriate screwdriver size for the screws you are using.
- Safety equipment: Safety should always be a priority. Wear protective goggles to protect your eyes from flying debris and gloves to protect your hands.
Having these tools ready before you start building your lumber axe will make the construction process much easier and more efficient. Remember to always follow safety guidelines and take the necessary precautions while working with tools.
Step-by-step guide on building a lumber axe
Building your own lumber axe can be a fun and rewarding DIY project. With the right tools and materials, you can create a high-quality axe that will make quick work of any woodcutting task. Follow these steps to build your own lumber axe:
- Start by gathering all the necessary materials. You will need a wooden handle, a steel axe head, epoxy adhesive, sandpaper, and a drill with various sizes of drill bits.
- Next, prepare the wooden handle. Measure and mark the desired length for your axe handle, ensuring it’s a comfortable size for your grip. Use the sandpaper to smooth out any rough edges.
- Once your handle is prepared, it’s time to attach the axe head. Apply a generous amount of epoxy adhesive to the end of the handle. Make sure to spread the adhesive evenly.
- Carefully insert the axe head into the epoxy-covered end of the handle. Twist and push the head down firmly to ensure a secure fit. Wipe away any excess adhesive.
- Allow the adhesive to cure according to the manufacturer’s instructions. This will typically take a few hours.
- After the adhesive has cured, reinforce the connection between the axe head and handle by drilling through the head and handle. Drill two holes vertically through both parts, ensuring they align.
- Insert wooden dowels into the drilled holes, cutting them to fit if necessary. Apply a small amount of epoxy adhesive to the dowels before inserting them to further strengthen the connection.
- Allow the epoxy to fully cure before testing your lumber axe.
Remember to take proper safety precautions when using your lumber axe and always wear appropriate protective gear such as gloves and safety glasses. With your newly built lumber axe, you’ll be ready to tackle any woodcutting project with ease!
Sanding and Finishing Techniques
Once you have built your lumber axe, it is important to properly sand and finish the handle to ensure its durability and longevity. Here are some important techniques to consider:
1. Sanding: Start by using a coarse-grit sandpaper (around 80 grit) to remove any rough spots or imperfections on the handle. Sand in the direction of the wood grain to achieve a smooth finish. Gradually move to finer-grit sandpapers (such as 120 grit and 220 grit) to achieve a polished surface.
2. Seal or Stain: After sanding, you can choose to seal or stain the handle to enhance its appearance and protect it from moisture and wear. Apply a sealant or wood stain using a clean brush or cloth, following the manufacturer’s instructions. Allow it to dry completely before proceeding.
3. Finishing: To further protect your lumber axe handle, you can apply a protective finish, such as polyurethane or varnish. Apply thin and even coats, using a brush or cloth. Allow each coat to dry before applying the next. This will create a durable and glossy finish.
4. Polishing: For a truly smooth and shiny finish, consider polishing the handle. Use a fine-grit sandpaper or steel wool to gently buff the surface in circular motions. This will remove any remaining imperfections and make the handle look beautiful.
5. Maintenance: Regularly inspect your lumber axe handle for any signs of wear or damage. If necessary, sand and refinish the handle to maintain its beauty and functionality. Additionally, store your lumber axe in a dry and cool place to prevent any moisture damage.
By following these sanding and finishing techniques, you can ensure that your lumber axe handle remains strong and beautiful for years to come.
Tips for maintaining and preserving your lumber axe
Building a lumber axe is just the first step. To ensure its longevity and optimal performance, proper maintenance and preservation are essential. Follow these tips to keep your lumber axe in top shape:
1. Clean your lumber axe after each use
After using the lumber axe, make sure to clean it thoroughly. Remove any dirt, debris, or wood particles that may have accumulated. Use a brush or compressed air to clean hard-to-reach areas. Cleaning your axe after use prevents rust and corrosion, ensuring its durability.
2. Dry your lumber axe properly
A wet or damp axe is prone to rusting. After cleaning, dry your lumber axe thoroughly using a cloth or towel. Ensure all surfaces, including the blade and handle, are completely dry before storing it. If your axe gets wet during use, dry it as soon as possible to minimize the risk of rust.
3. Oil the axe head and handle
Regular oiling is crucial to preserving your lumber axe. Apply a light coat of oil on the axe head and handle to prevent rust and maintain the wood’s integrity. Be sure to use a rust-preventing oil or axe-specific oil for maximum effectiveness. Remember to wipe off any excess oil to avoid a slippery grip.
4. Store the lumber axe properly
When not in use, store your lumber axe in a safe and dry place. Avoid areas with high humidity or temperature fluctuations, as these can damage the axe. Hang the axe vertically or store it in a designated sheath or cover to protect it from dust and accidental damage.
5. Sharpen the axe blade regularly
A sharp blade is crucial for efficient and safe woodcutting. Regularly sharpen your lumber axe to maintain its cutting performance. Use a sharpening stone or file to remove any nicks or dullness. Follow proper sharpening techniques and angles specific to your axe type.
By following these maintenance and preservation tips, you will ensure that your lumber axe remains in great condition for years to come. Take the time to care for your axe, and it will reward you with optimal performance and longevity.


