


If you are a guitar enthusiast or a professional musician, you might be familiar with the Axe-Fx, a digital amp modeler and multi-effects processor that has revolutionized the way guitarists create and shape their tone. One of the key components in getting the best sound out of your Axe-Fx is connecting it to a power amp.
A power amp is an essential part of any guitar rig, as it amplifies the signal from the Axe-Fx and sends it to your speakers. Without a power amp, the signal from the Axe-Fx would be too weak to produce the desired volume and sound quality.
To connect your Axe-Fx to a power amp, you will need a few cables and a basic understanding of audio connections. First, you will need a 1/4″ instrument cable to connect the output of the Axe-Fx to the input of the power amp. Make sure to use a high-quality cable to minimize signal loss and interference.
Next, locate the output jacks on your Axe-Fx. These are usually labeled as “Main Outs” or “Line Outs.” Connect one end of the instrument cable to the left or mono output jack and the other end to the input jack of the power amp. Repeat the process for the right or stereo output if your power amp supports stereo operation.

Now, it’s time to connect your power amp to your speakers. Most power amps have speaker outputs in the form of binding posts or speakON connectors. Make sure to consult the manual of your specific power amp to determine the appropriate connection method for your speakers. Connect the positive (+) and negative (-) terminals of each speaker to the corresponding terminals on the power amp.
Once everything is connected, power on your Axe-Fx and power amp. Adjust the volume levels on your Axe-Fx and power amp to achieve the desired sound. Remember that the output level of the Axe-Fx should typically be set lower than the input gain of the power amp to avoid clipping and distortion.
By following these steps, you can connect your Axe-Fx to a power amp and unlock the full potential of your guitar rig. Experiment with different settings and configurations to find the sound that suits your musical style and preferences. Happy playing!
Getting started: connecting Axe-Fx to power amp
Connecting your Axe-Fx guitar processor to a power amp is a crucial step in getting the best possible sound from your rig. By using a power amp, you can amplify the signal from the Axe-Fx and send it to your speakers or cabinet for a full and powerful sound. Here’s how to get started:
What you’ll need:
Before you begin, make sure you have the following items:
- An Axe-Fx guitar processor
- A power amp
- A set of cables (usually XLR or 1/4″ cables)
- A speaker or cabinet
Step 1: Make the hardware connections
Start by turning off all your equipment, including the Axe-Fx, power amp, and speakers. Then, connect one end of the cable to the output of your Axe-Fx and the other end to the input of your power amp. If you’re using XLR cables, make sure to connect them in a balanced configuration for the best audio quality. If you’re using 1/4″ cables, connect them in an unbalanced configuration.
Next, connect the output of your power amp to your speakers or cabinet using the appropriate cables. Make sure to match the impedance of your power amp and speakers to avoid any damage to your equipment.
Step 2: Set the levels
Once all the connections are made, it’s time to set the levels on your Axe-Fx and power amp. Start by turning the volume on your Axe-Fx to a low setting, then slowly increase it until you reach your desired listening level. Be cautious not to set the volume too high, as it can lead to distortion or damage your speakers.
Next, adjust the gain or volume controls on your power amp to match the level of your Axe-Fx. Take your time and make small adjustments until the sound is balanced and clear.
Step 3: Test and fine-tune
With everything connected and the levels set, it’s time to test your setup. Play your guitar through the Axe-Fx and listen for any issues or inconsistencies in the sound. If needed, you can further fine-tune the settings on your Axe-Fx and power amp to achieve the desired tone.
Remember to periodically check the connections and cables for any loose or faulty connections. A solid and secure connection is essential for optimal sound quality and performance.
| Step | Action |
|---|---|
| Step 1 | Make the hardware connections |
| Step 2 | Set the levels |
| Step 3 | Test and fine-tune |
Understanding the basics of axe fx
The Axe FX is a powerful digital signal processor designed specifically for guitarists and bassists. It offers a wide range of effects, amp simulations, and speaker cabinet models, allowing musicians to create studio-quality tones for live performances and recordings.
What is the Axe FX?
The Axe FX is a hardware unit that emulates the sound and response of real amplifiers and effects. It uses advanced digital algorithms to recreate the characteristics of different amplifiers, cabinets, and effects pedals. With the Axe FX, guitarists can achieve a huge variety of tones without the need for multiple amps and pedals.
The Axe FX is designed to be used in a professional audio environment, whether that’s in a recording studio or on stage. It offers a wide range of connectivity options, including XLR and 1/4″ outputs for connecting to power amps, audio interfaces, and mixing consoles.
How does the Axe FX work?
The Axe FX processes the guitar signal digitally, allowing for precise control over every aspect of the tone. It starts with the input stage, where the guitar signal is converted from analog to digital. From there, the signal is processed through various blocks, such as amp simulations, effects, and cabinet models.
Each block can be customized to create the desired tone. For example, in the amp simulation block, musicians can choose from a range of amplifier models and adjust parameters like gain, tone, and presence. In the effects block, they can add pedals like overdrive, delay, and reverb, with control over parameters like mix, feedback, and decay.
Once the signal has been processed, it is sent to the output stage, where it is converted back to analog and sent to the desired destination, such as a power amp or audio interface. This allows musicians to tailor their tone to the specific requirements of their setup, whether they’re performing live or recording in the studio.
Using the Axe FX with a power amp
To connect the Axe FX to a power amp, you will need a suitable cable, such as a 1/4″ TRS or XLR cable, depending on the connections available on your equipment. Simply connect one end of the cable to the output of the Axe FX and the other end to the input of the power amp.
Before connecting the power amp, it’s important to ensure that the output level of the Axe FX is set correctly. This can be adjusted in the settings menu of the Axe FX unit. It’s also a good idea to consult the manuals for both the Axe FX and the power amp to ensure proper connection and configuration.
Once connected, the Axe FX will send its processed signal to the power amp, which will then amplify the signal and send it to the connected speakers or audio system. This allows you to take advantage of the Axe FX’s wide range of amp simulations and effects while utilizing the power and versatility of a dedicated power amp.
| Advantages of using the Axe FX with a power amp |
|---|
| High-quality amp simulations and effects |
| Flexibility and versatility for live performances and studio recordings |
| No need for multiple amps and pedals |
| Ability to tailor the tone to specific requirements |
| Compatibility with various audio setups |
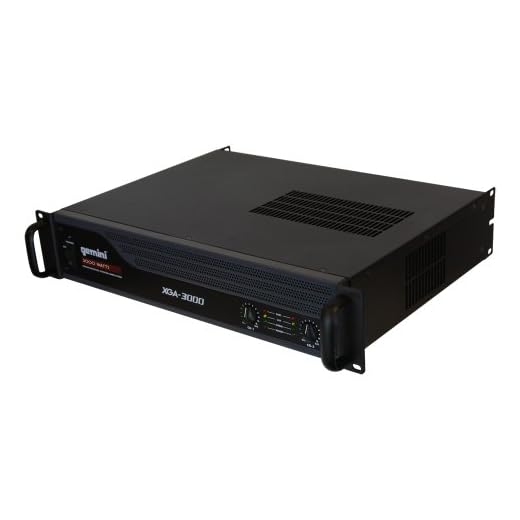
Choosing the right power amp for your setup
When connecting your Axe-Fx to a power amp, it is essential to choose the right power amp that suits your setup and audio requirements. The power amp is a crucial component in the signal chain that amplifies the signal from the Axe-Fx and ultimately delivers it to your speakers. Here are some factors to consider when choosing a power amp:
Power Rating
The power rating of the power amp is an important consideration. It determines how much power the power amp can output and directly affects the volume and headroom of your audio. It is essential to match the power amp’s rating with the power requirements of your speakers. Too little power can result in a weak and distorted sound, while too much power can damage your speakers.
Connection Options
Consider the connection options available on the power amp. Most power amps offer both balanced XLR and unbalanced RCA inputs, so make sure to choose a power amp that provides the necessary input connections for your setup. Additionally, check if the power amp offers speakers outputs that match the connectors on your speakers.
Tonal Character
The tonal character of the power amp can significantly impact your audio. Some power amps have a more transparent and neutral sound, while others may add some coloration or saturation to the signal. It is important to choose a power amp that complements your desired sound and works well with your other gear, such as the Axe-Fx and speakers.
Budget
Your budget is another crucial factor to consider when choosing a power amp. Power amps can vary significantly in price, depending on their features, power rating, and overall quality. Determine your budget beforehand and look for power amp options that fit within your financial constraints without compromising on essential features and audio quality.
By considering these factors, you can choose the right power amp that enhances your Axe-Fx setup and delivers the audio performance you desire.
Step-by-step guide to connecting axe fx to power amp
Connecting your Axe FX to a power amp can greatly enhance your guitar tones and give you more control over your sound. Follow these steps to properly connect your Axe FX to a power amp:
Step 1: Gather the necessary equipment
Before you start, make sure you have the following equipment:
- Axe FX unit
- Power amp
- Guitar cables
- Speaker cables
- Two 1/4-inch instrument cables
Step 2: Power off and make physical connections
Turn off your Axe FX unit and power amp before making any connections. Then, follow these steps:
- Connect one end of a guitar cable to the “Output” or “Main Out” on the Axe FX unit.
- Connect the other end of the guitar cable to the input on your power amp.
- Use a speaker cable to connect the “Speaker Out” on your power amp to the input on your speaker cabinet.
Step 3: Set up the Axe FX
Once the physical connections are made, power on your Axe FX unit and follow these steps:
- Go to the “Setup” menu on your Axe FX unit.
- Select the appropriate output mode (stereo or mono) based on your setup.
- Choose the desired output mode for your power amp (e.g., “Line Output”) and adjust the volume accordingly.
Step 4: Test and fine-tune your setup
With everything connected, it’s time to test your setup and make any necessary adjustments:
- Play your guitar and listen for any sound issues or distortion.
- If needed, adjust the output level on your Axe FX unit or power amp to avoid clipping or distortion.
- Make sure the sound is balanced and the desired tone is achieved.
Remember to always consult the user manuals for your specific equipment for more detailed instructions. Enjoy exploring new tones and possibilities with your Axe FX and power amp setup!
Troubleshooting common issues with the connection
When connecting your Axe-Fx to a power amp, you may encounter a few common issues. Here are some troubleshooting steps to help you resolve these problems:
No sound coming out from the power amp
If you’re not getting any sound from your power amp, check the following:
- Make sure the power amp is turned on and connected to the Axe-Fx correctly.
- Ensure that the volume on the power amp is turned up and not on mute.
- Verify that the cables connecting the Axe-Fx to the power amp are functioning properly. Try using different cables.
- Check the settings on the Axe-Fx to ensure that the output is configured correctly for the power amp.
- Test the power amp with another audio source to rule out any hardware issues.
Unwanted noise or distortion in the output
If you’re experiencing noise or distortion in the output of your power amp, try the following troubleshooting steps:
- Check the cables for any loose connections or damage. Replace them if necessary.
- Ensure that the Axe-Fx is not set to an excessively high output level, which can cause distortion or clipping in the power amp.
- Verify that both the Axe-Fx and the power amp are grounded properly.
- If you’re using any effects pedals or processors in your signal chain, try bypassing them to see if the noise or distortion goes away.
- Isolate the issue by connecting the Axe-Fx to a different power amp or audio system to determine if the issue lies with the amp or with the Axe-Fx.
If you’re still experiencing issues after troubleshooting, it may be helpful to consult the user manual for both your Axe-Fx and power amp, or reach out to the manufacturer’s support for further assistance.


