When it comes to axe handles, the Marbles No.5 is a popular choice among woodworkers and outdoor enthusiasts. Its sturdy construction and ergonomic design make it a reliable tool for various tasks, from chopping firewood to carving wooden sculptures. If you’re looking to create your own Marbles No.5 axe handle, you’ve come to the right place. In this guide, we’ll walk you through the step-by-step process of crafting a high-quality handle that will ensure a comfortable grip and long-lasting durability.
Step 1: Choosing the right wood
First and foremost, you need to select the appropriate wood for your axe handle. Ideally, you’ll want to choose a strong and durable wood species that can withstand the rigors of axe work. Hickory is a popular choice for axe handles due to its exceptional strength and shock resistance. Other suitable options include ash, oak, and birch. Make sure the wood you choose is straight and free from knots, as any imperfections can weaken the handle.
Step 2: Preparing the wood
Once you’ve selected the wood, it’s time to prepare it for shaping. Start by cutting the wood to the desired length, keeping in mind that the handle should be proportionate to the axe head. Next, remove the bark and any excess knots or rough spots using a sharp chisel or knife. Smooth the surface of the wood with sandpaper to achieve a polished finish.
Step 3: Shaping the handle
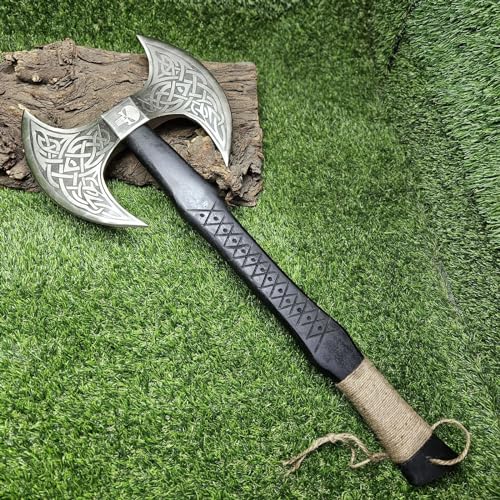
Now comes the fun part – shaping the handle. Use a drawknife or a spokeshave to shape the wood, gradually working your way from the thicker end to the thinner end. Be sure to maintain an even and symmetrical shape throughout the process. Pay extra attention to the grip area, ensuring it fits comfortably in your hand. You can also add decorative elements, such as grooves or patterns, to enhance the aesthetics of the handle.
Step 4: Finishing touches
Finally, it’s time to apply a finish to protect and enhance the beauty of the handle. You can use a variety of finishes, such as boiled linseed oil, tung oil, or varnish. Apply the finish according to the manufacturer’s instructions, making sure to coat the entire handle evenly. Allow the finish to dry completely before attaching the axe head.
By following these steps, you can create a Marbles No.5 axe handle that not only looks great but also provides optimal performance and durability. Remember to take your time and pay attention to detail during each stage of the process. With a little patience and effort, you’ll have a custom-made handle that will serve you well for years to come.
How to Create a Marble No5 Axe Handle
If you want to create a unique and beautiful axe handle, using marble can be a great option. The Marble No5 Axe Handle is a stylish and durable choice that will transform your ordinary axe into an eye-catching tool. Follow these steps to create your own Marble No5 Axe Handle:
- Start by choosing a high-quality marble slab that is suitable for an axe handle. Consider the size and weight of the axe head to ensure the marble slab can handle the force and impact.
- Measure and mark the desired length for your axe handle on the marble slab. Use a pencil or marker to make precise markings.
- Using an angle grinder or similar tool, carefully cut along the marked lines to shape the marble slab into the desired handle shape. Take your time and make slow, deliberate cuts to ensure accuracy.
- Smooth out the edges and surface of the marble handle using sandpaper or a sanding block. Gradually work your way from coarse-grit to finer-grit sandpaper for a polished and refined finish.
- Once you are satisfied with the shape and smoothness of the handle, use a drill to create a hole at one end for the axe head to be attached. Make sure the hole is the appropriate size and depth for the axe head’s mounting hardware.
- Apply a strong adhesive to the inside of the hole, then carefully insert the mounting hardware and attach the axe head securely. Follow the manufacturer’s instructions for the adhesive to ensure a proper bond.
- Allow the adhesive to dry and cure completely before using the Marble No5 Axe Handle. This will ensure the handle is fully secure and ready for use.
- Optional: If desired, you can apply a protective sealant or finish to the marble handle to enhance its durability and appearance. Follow the instructions provided by the sealant manufacturer for the best results.
With these simple steps, you can create your very own Marble No5 Axe Handle that is not only functional but also visually appealing. Take your time, use the proper tools and materials, and enjoy the process of crafting a unique handle for your axe.
Materials and Tools
Before you start creating a marbles no5 axe handle, it’s important to gather all the necessary materials and tools. Here’s a list of what you’ll need:
- Marbles No5 Axe head
- Wood for the handle (hickory, ash, or oak are recommended)
- Saw (handsaw or circular saw)
- Rasp
- Chisels
- Drill
- Wood glue
- Sandpaper (coarse and fine grit)
- Varnish or wood finish
- Measuring tape or ruler
- Pencil
- Clamps
- Protective eyewear
- Gloves
Make sure you have all these items ready before you begin. Having the right materials and tools will ensure that you can create a durable and functional marbles no5 axe handle.
Preparing the Wood
Before you can start creating a marbled No5 axe handle, you need to prepare the wood that will be used for the handle. This involves several steps to ensure the wood is suitable for the process and will result in a durable and beautiful handle.
Choosing the Wood
The first step is to choose the right type of wood for your axe handle. Traditionally, hickory, ash, and oak are popular choices due to their strength and durability. Make sure to select a piece of wood that is straight, free of knots, and has a consistent grain pattern.
Cutting and Shaping
Once you have selected the wood, you will need to cut it to the desired length for your axe handle. Use a saw to carefully cut the wood, making sure to follow the grain to prevent splitting. After cutting, use a woodcarving knife or chisel to shape the handle, creating a comfortable grip and tapering the edges for better control.
Sanding and Smoothing
After shaping, it’s important to sand the wood to a smooth finish. Start with a coarse-grit sandpaper to remove any rough spots or irregularities, then gradually move to a finer-grit sandpaper for a smoother finish. Focus on rounding the edges and corners for a comfortable grip.
Ensure that the entire surface of the handle is sanded evenly, paying extra attention to any knots or grain irregularities. This will not only enhance the appearance of the handle but also prevent any rough spots that could cause discomfort or splinters.
Applying Finish
Finally, consider applying a finish to seal and protect the wood. Linseed oil is a popular choice as it enhances the natural color and grain of the wood while also providing a protective layer. Apply the oil using a clean cloth, following the manufacturer’s instructions, and allow it to dry completely before moving onto the marbling process.
By properly preparing the wood for your marbled No5 axe handle, you are ensuring its strength, durability, and aesthetic appeal. Take your time during this process to create a handle that not only looks visually stunning but also provides a comfortable grip and reliable performance.
Shaping the Handle
Once you have obtained a suitable marble slab for your axe handle, you can start the process of shaping it to fit your needs. Shaping the handle involves removing excess material and refining its shape for a comfortable grip.
Tools Needed
Before you begin, gather the necessary tools for shaping the handle:
- Woodworking clamps
- Chisels of various sizes
- Carving knife
- Sandpaper (starting from coarse to fine grits)
Process
Follow these steps to shape the handle:
- Secure the marble slab in place using woodworking clamps. This will keep it stable during the shaping process.
- Begin removing excess material by using chisels. Start with wider chisels to remove larger portions and then switch to smaller ones for more precise shaping.
- Pay attention to the overall shape and feel of the handle as you work. Use your hands to hold and test the grip, ensuring it fits comfortably in your palm.
- Refine the shape further using a carving knife. This will allow you to make more intricate adjustments and add any desired details to the handle.
- Once you are satisfied with the shape, use sandpaper to smooth out any rough edges. Start with a coarse grit and gradually move to finer grits for a polished finish.
Remember to take breaks during the shaping process to avoid overexertion and to assess your progress. Take your time and be patient, as shaping a marble axe handle requires precision and attention to detail. When finished, you will have a unique and sturdy handle for your axe that will stand out in any woodworking project.
Finishing Touches
Once you have shaped and sanded your marble no5 axe handle to perfection, it’s time to add the finishing touches. These final steps will not only enhance the aesthetics of your handle but also ensure its durability and longevity.
Sealing: Before applying any finishes, it’s crucial to seal the wood to protect it from moisture and stains. Use a wood sealer or polyurethane varnish to create a protective barrier. Apply multiple coats, sanding lightly between each coat, to achieve a smooth and even finish.
Staining: If you want to add color to your handle, staining is an excellent option. Choose a wood stain that complements your project and apply it evenly using a brush or a cloth. Allow the stain to penetrate the wood for the recommended time, and then wipe off any excess. Let the stain dry completely before proceeding to the next step.
Applying Finish: To achieve a polished and lustrous look, apply a clear wood finish on top of the sealed and stained wood. You can choose between a glossy, satin, or matte finish depending on your preferences. Use a brush to apply an even coat, following the direction of the wood grain. Let the finish dry completely before applying additional coats. Sand lightly between each coat for a smooth finish.
Detailing: Adding intricate details or patterns can elevate the visual appeal of your handle. You can use carving tools, woodburning techniques, or even inlay materials like metal or mother-of-pearl for a truly unique handle. Take your time and pay attention to the details to create a handle that reflects your personal style.
Polishing: Once the finish has dried completely, you can use a high-grit sandpaper or steel wool to remove any imperfections and achieve a smooth, polished surface. Gently rub the surface in a circular motion until it feels silky smooth to the touch.
Final Assembly: After you have completed all the finishing touches, it’s time to attach your handle to the axe head. Follow the manufacturer’s instructions or use appropriate hardware such as wedges, screws, or epoxy glue to secure the handle firmly in place. Make sure to test the handle for stability and durability before using the marble no5 axe.
By following these steps and adding your own personal touch, you can create a stunning marble no5 axe handle that is not only functional but also a work of art. Enjoy the process and take pride in your craftsmanship!