


When it comes to axes, having a sturdy handle is essential for safe and effective use. Over time, the wooden handle of an axe can wear out or break, requiring replacement. Fitting a new wooden handle to an axe head can be a rewarding DIY project that will ensure your axe is in top shape for years to come.
Before you start fitting the handle, it’s important to choose the right type of wood. The wood needs to be strong enough to withstand the force exerted during chopping, yet flexible enough to absorb shock. Hickory is the most commonly used wood for axe handles due to its strength and durability. Once you have selected your wood, it’s time to start fitting the handle.
The first step is to remove the old handle from the axe head. This can be done by heating the metal of the axe head with a torch and then pulling the old handle out. Be sure to take all necessary safety precautions while using a torch. Once the old handle is removed, you can clean the axe head and prepare it for the new handle.
Next, you will need to shape the new wooden handle to fit the axe head. Start by taking measurements of the eye, or the hole in the axe head where the handle will be inserted. Use these measurements to shape the handle using a rasp or a belt sander. It’s important to make precise cuts and check the fit frequently to ensure a snug fit.
Once the handle is shaped to the correct size, you can begin fitting it into the axe head. Apply a thin layer of epoxy or wood glue to the eye of the axe head to help secure the handle. Then, carefully insert the handle into the eye and tap it lightly with a mallet to ensure a tight fit. Allow the glue to dry completely before using your axe.
Fitting a wooden axe handle may require some patience and precision, but the end result is a tool that is safe, reliable, and built to last. With the right materials and careful craftsmanship, you can enjoy the satisfaction of restoring your axe to its former glory and getting the most out of every swing.
How to Fit a Wooden Axe Handle
Fitting a wooden axe handle is an important task that requires precision and attention to detail. Follow these steps to ensure a proper fit:
1. Choose the right handle: Select a wooden handle that is made of a durable and strong wood, such as hickory or ash. It should be the correct length and thickness for your axe.
2. Remove the old handle: Use a saw or axe to carefully remove the old handle from the axe head. Be cautious not to damage the head or yourself during this process.
3. Prepare the handle: Sand the handle to remove any rough spots or splinters. Smooth the surface with sandpaper until it is comfortable to hold and free of imperfections.
4. Fit the handle: Apply a thin layer of wood glue to the inside of the axe head. Insert the handle into the head, making sure it is straight and centered. Lightly tap the end of the handle with a mallet to ensure a snug fit.
5. Secure the handle: Use wooden or metal wedges to secure the handle in place. Insert them into the slots in the axe head, starting with the top wedge and working your way down. Hammer the wedges firmly until they are tightly wedged and the handle is secure.
6. Finishing touches: After the handle is securely in place, trim off any excess length with a saw. Sand down the end of the handle to smooth any rough edges. Apply a protective finish, such as linseed oil or varnish, to protect the wood from moisture and wear.
Following these steps will ensure that your wooden axe handle is properly fitted and ready for use. Remember to always exercise caution when working with sharp tools and wear appropriate safety gear.
Choosing the Right Handle
When it comes to fitting a wooden axe handle, one of the most important steps is choosing the right handle for the job. While it may seem like a simple task, selecting the correct handle requires careful consideration.
Material: The first decision to make is what kind of wood to use for the handle. Common woods used for axe handles include hickory, ash, and oak. Each type of wood has its own unique characteristics and strengths, so it’s important to choose one that suits your needs.
Length: The length of the handle is another important factor to consider. Axes with shorter handles offer better control and maneuverability, while axes with longer handles provide more leverage and power. Consider the intended use of the axe when deciding on the appropriate length.
Grip: The grip of the handle is crucial for comfort and safety. Look for handles with ergonomic shapes and contours that fit comfortably in your hand. Additionally, consider whether you prefer a smooth or a textured grip for better control.
Finish: Lastly, consider the finish of the handle. Some handles come unfinished, allowing you to customize the appearance and feel. Others come pre-finished, which can save time and effort in the fitting process.
By taking the time to choose the right handle, you can ensure that your wooden axe will be comfortable to use and will last for years to come.
Gathering the Tools Needed
Before you begin fitting a wooden axe handle, it is important to gather all the necessary tools. Having the right tools on hand will make the process easier and ensure a successful fit. Here is a list of the tools you will need:
|
1. Replacement axe handle Must-Have
Durable Hickory Axe Handle Replacement Set Includes wooden and iron wedges
This set of four 36-inch hickory axe handles is perfect for replacing old handles or having spares handy. Made from durable hickory wood, they offer shock absorption and longevity for all your chopping needs.
|
|
2. Claw hammer |
|
3. Chisel |
|
4. Vice grip |
|
5. Bench vise |
|
6. Sandpaper |
|
7. Measuring tape |
Once you have gathered these tools, you will be ready to proceed with fitting the wooden axe handle.
Removing the Old Handle
Before you can fit a new wooden axe handle, you’ll need to remove the old one. Follow these steps to safely remove the handle without damaging the axe head:
Materials You’ll Need
– Pliers
– Hammer
– Safety glasses
– Gloves
– Vice grip
Step 1: Secure the Axe Head
To begin, clamp the axe head securely in a vice grip. This will prevent it from moving while you work on removing the handle. Make sure the axe head is held tightly and the blade is facing away from you to avoid any accidents.
Step 2: Remove the Wedges
Next, use pliers to carefully remove the wedges from the top of the axe handle. These wedges are typically made of wood and help to secure the handle in place. Gently pull them out using the pliers, taking care not to damage the handle or axe head in the process.
Step 3: Loosen the Handle
Use a hammer to tap the end of the handle, loosening it from the axe head. Start by tapping gently and gradually increase the force as needed. The goal is to separate the handle from the axe head without causing any damage.
Step 4: Remove the Handle
Once the handle is loose, pull it out of the axe head. You may need to wiggle it back and forth while pulling to free it completely. Be careful not to use excessive force, as this can cause the axe head to become damaged.
With the old handle removed, you can now proceed to fit the new wooden axe handle. Make sure to choose a handle that fits the axe head properly and follow the appropriate steps for securing it in place.
Preparing the New Handle
Before fitting the new handle, it is important to prepare it properly to ensure a secure and effective fit. Follow these steps:
- Inspect the new handle for any defects or imperfections. Make sure that it is straight and free from knots or cracks.
- Measure the length of the old handle and use a saw to cut the new handle to the same length.
- Sand down any rough edges or splinters on the new handle using sandpaper. This will ensure a smooth and comfortable grip.
- At one end of the handle, use a chisel or a knife to create a small notch or groove. This will help prevent the head of the axe from slipping off.
- If necessary, apply a coat of wood oil or varnish to protect the handle from moisture and prolong its lifespan.
Once you have completed these steps, the new handle is ready to be fitted onto the axe head. Proceed to the next section for instructions on how to do this.
Attaching the New Handle
Once you have chosen a replacement handle, it’s time to attach it to the axe head. Follow these steps to ensure a secure and durable fit:
1. Clean the axe head thoroughly. Use a wire brush or sandpaper to remove any rust, dirt, or old adhesive from the handle socket.
2. Apply wood glue to the end of the new handle. This will help create a strong bond when attaching it to the axe head.
3. Insert the handle into the socket of the axe head. Make sure it is aligned properly and fully inserted.
4. With a hammer, gently tap the end of the handle to secure it into place. Start by hitting it lightly, and gradually increase the force until the handle is firmly attached.
5. Allow the wood glue to dry completely. This usually takes several hours or overnight. It is important to let the glue set properly to ensure a strong and long-lasting fit.
6. Once the glue is dry, check the handle for any signs of movement or instability. If necessary, give it a few more taps with the hammer to tighten it further.
7. Finally, use sandpaper to smooth out any rough edges or unevenness along the edge of the handle. This will make it more comfortable to hold and grip.
By following these steps, you can easily attach a new wooden handle to your axe head. With proper care and maintenance, your axe will be ready for use in no time.
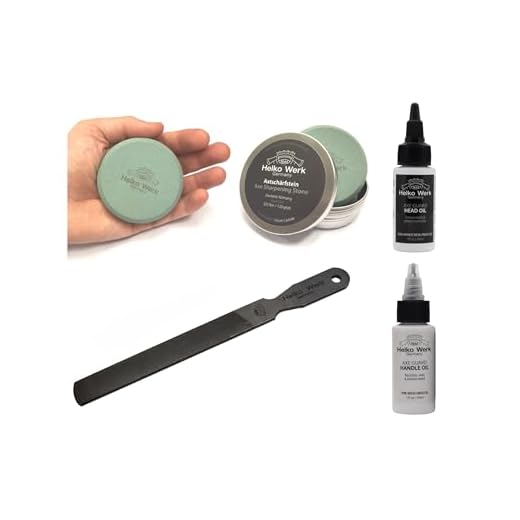
Finishing Touches and Maintenance
Once you have fitted the wooden axe handle, there are a few finishing touches you can apply to ensure its longevity and maintain its performance:
| 1. Sanding the Handle: | Using fine-grit sandpaper, gently sand the surface of the handle to smooth out any rough edges or imperfections. This step will not only enhance the appearance of the handle but also provide a comfortable grip. |
| 2. Applying a Protective Finish: | To protect the wooden handle from moisture and wear, consider applying a protective finish. Beeswax, linseed oil, or varnish are popular options for sealing and preserving the wood. Apply multiple thin coats and allow each coat to dry completely before applying the next. |
| 3. Regular Maintenance: | Inspect the handle regularly for cracks, splinters, or signs of damage. If you notice any issues, promptly address them to prevent further deterioration. Additionally, periodically check the tightness of the axe head and handle connection. If it becomes loose, resecure it to maintain a firm and safe grip. |
| 4. Proper Storage: | Store your axe in a dry and well-ventilated area to prevent moisture buildup and minimize the risk of rust or wood rot. Consider hanging it on a wall or using a protective sheath or case to keep it safe from accidental damage. |
By following these finishing touches and maintenance tips, you can ensure that your wooden axe handle remains in excellent condition for years to come, providing you with a reliable and comfortable tool for your woodworking needs.


