Glissading with an ice axe is a technique often used in mountaineering to descend steep slopes quickly and safely. It involves sliding down the mountain on your backside while using the ice axe to control your speed and direction. This skill is essential for mountaineers who want to navigate icy or snowy terrain with ease.
Glissading can be a thrilling and efficient way to descend steep slopes, but it requires proper technique and caution to avoid accidents. The first step is to find a suitable slope that is not too steep or too icy. Look for a slope with a consistent gradient and a runout area free of obstacles.
Before you begin glissading, make sure you have the necessary equipment, including an ice axe, a helmet, and proper clothing to protect against the cold and wet conditions. Your ice axe should be held in the self-belay position, with the pick facing forward and the shaft firmly gripped in both hands.

To start the glissade, position yourself securely on your backside with your feet pointing downhill. Your feet should be slightly apart for balance, and your knees should be bent. Use your ice axe as a brake by pressing the pick into the snow and ice. This will slow down your speed and help you to control your descent. You can also use the axe as a rudder by dragging the pick along the side of the slope, which will help you to steer in the desired direction.
What is glissading
Glissading is a technique used in mountaineering and hiking to rapidly descend a snowy or icy slope. It involves sliding down the slope on your feet or buttocks while using an ice axe to control your speed and direction.
Glissading can be a fast and fun way to descend a mountain, but it should only be attempted by experienced climbers or hikers who have proper training and equipment. It requires good balance and coordination, as well as an understanding of snow conditions and slope angles.
There are two common types of glissading techniques: the seated glissade and the standing glissade.
- Seated glissade: In a seated glissade, you sit down on your buttocks and slide down the slope while using your ice axe to slow yourself down or steer. To perform a seated glissade, you should have your ice axe in the self-arrest position in front of your body with the pick facing up and the shaft pressed against your thigh.
- Standing glissade: In a standing glissade, you slide down the slope on your feet while maintaining an upright position. You use your ice axe to control your speed and direction by planting the shaft in the snow and applying pressure against it. This technique requires good balance and stability.
It’s important to note that glissading can be dangerous if not done properly. It’s crucial to assess the snow conditions, slope angle, and potential hazards before attempting a glissade. Make sure to wear proper protective clothing and equipment, including a helmet and gloves, and always be aware of your surroundings.
Equipment
Glissading requires proper equipment to ensure your safety. Here is a list of essential items you will need:
| Item | Description |
|---|---|
| Ice axe | An ice axe is a crucial tool for glissading. It provides stability and control as you slide down the slope. |
| Crampons | Crampons are metal spikes that attach to your boots and help you navigate icy terrain. |
| Helmet | A helmet protects your head from potential falls or ice debris. |
| Goggles | Goggles protect your eyes from sun, snow, and ice particles as you slide down the slope. |
| Gloves | It is important to wear gloves to protect your hands from the ice and to improve your grip on the ice axe. |
| Layers of clothing | Wear layers of clothing to stay warm in cold conditions. This should include a waterproof and windproof outer layer. |
| Boots | Choose boots that provide good ankle support and have a sturdy sole with good traction. |
| Backpack | A backpack is essential for carrying your equipment and any additional supplies you may need. |
| Sunscreen | Apply sunscreen to protect your skin from the sun’s harmful rays, as snow can intensify UV exposure. |
| Snacks and water | Bring snacks and water to stay hydrated and energized during your glissade. |
| Map and compass | Always carry a map and compass to navigate and ensure you stay on the right path. |
Make sure to check the condition of your equipment before glissading and replace any worn-out or damaged items. It is also advisable to take a glissade training course to learn the proper techniques and safety measures.
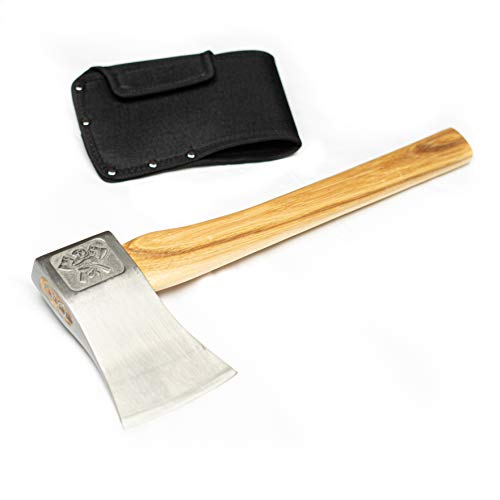
Ice Axe
An ice axe is a crucial tool for mountaineering and ice climbing. It is designed to provide stability, balance, and safety on icy terrain. The ice axe consists of a long shaft made of lightweight yet durable materials, such as aluminum or carbon fiber, with a sharp pick and a adze at one end.
The pick is the pointed metal tip that is designed to penetrate the ice, creating a secure anchor point for climbers. It is essential for self-arrest maneuvers, which involve stopping a fall by plunging the pick into the snow or ice and using it as a brake. The adze, on the other hand, is a flat blade located on the opposite side of the pick. It is used for cutting steps into the ice or snow, as well as for building anchors and clearing away loose snow.
To use an ice axe safely, climbers must learn proper technique and practice their skills regularly. The axe should be held with the pick facing backward when traversing flat or moderately steep terrain. In this position, it acts as a balance aid and can be used to provide additional stability by digging it into the snow or ice. When encountering steeper slopes, the ice axe must be held with the pick facing forward. This allows the climber to self-arrest in case of a slip or fall by driving the pick into the slope and applying pressure to slow down and regain control.
It is important to note that using an ice axe requires proper training and experience. Climbers should familiarize themselves with the specific techniques and conditions of their intended route before attempting to use an ice axe. Additionally, climbers should always wear a helmet and use appropriate safety equipment, such as crampons and a harness, while using an ice axe.
Techniques
Glissading with an ice axe requires a combination of proper technique and careful control. Here are a few key techniques to keep in mind:
1. Secure your grip: Before attempting a glissade, make sure you have a firm grip on your ice axe. Hold it with both hands, with one hand on the head of the axe and the other hand on the shaft near the pick.
2. Position yourself correctly: Sit down on your heels with your feet facing forward and your knees bent. Lean back slightly to maintain balance.
3. Use your ice axe for control: Dig the pick of your ice axe into the snow behind you to help slow down or stop your descent. Be careful not to let the pick get caught in the snow, as this can cause you to lose control.
4. Keep your feet off the ground: Lift your feet off the ground as you slide down the slope. This will help prevent your boots from catching on the snow and causing you to lose balance.
5. Monitor your speed: Glissades can quickly pick up speed, so it’s important to constantly monitor your speed and use your ice axe for control as needed.
6. Choose your route wisely: Look for a route that is free of obstacles such as rocks or trees. Avoid steep slopes or areas with crevasses.
7. Practice in a controlled environment: Before attempting glissading on a more challenging terrain, it’s a good idea to practice in a safe and controlled environment to familiarize yourself with the technique and gain confidence.
By following these techniques and using your ice axe for control, you can enjoy a safe and thrilling glissade down a snowy slope.
Body Position
When glissading with an ice axe, it is important to maintain the correct body position to ensure stability and control throughout the descent. The following guidelines will help you achieve the proper body position:
Sit down
Begin by sitting down on the slope with your weight evenly distributed on your buttocks. This will lower your center of gravity and provide a stable base for glissading.
Lean back
Next, lean back slightly, keeping your upper body relaxed and your shoulders aligned with your hips. This posture will help you control the speed and direction of your descent.
Additionally, make sure to keep your legs extended out in front of you, with your feet pointed downhill. This will act as a rudder, allowing you to steer and brake as needed.
| Correct Body Position |
|---|
 |
Avoid sitting too far forward, as this can cause your feet to dig into the snow and result in a loss of control. Similarly, leaning too far back can make it difficult to steer and brake effectively.
Remember to maintain a firm grip on the ice axe, using it as both a brake and a stability tool. Keep your arms relaxed, and adjust your grip as necessary to maintain control.
By following these guidelines and practicing proper body position, you can enjoy a safe and exhilarating glissade down snowy slopes with your ice axe.
Safety
Glissading with an ice axe can be a thrilling adventure, but it’s important to prioritize safety to prevent accidents and injuries. Here are some safety considerations to keep in mind:
- Always wear appropriate protective gear, including a helmet and gloves, to prevent head and hand injuries.
- Choose a slope that is suitable for glissading, avoiding areas with rocks, crevasses, or other hazards.
- Make sure you have a clear path and enough space to come to a stop at the bottom of the slope.
- Check the stability of the snow before glissading, as unstable snow can increase the risk of avalanches.
- Hold the ice axe firmly and pay attention to its proper usage, keeping it in self-arrest position.
- Keep your feet and legs raised and avoid dragging them on the ground to prevent injuries and snow build-up.
- Always maintain control of your speed while glissading and be prepared to self-arrest if necessary.
- Glissading alone is not recommended. Always go with a partner or in a group and keep each other in sight.
- Practice proper glissading techniques and familiarize yourself with self-arrest techniques before attempting glissading on steep slopes.
- Be aware of weather conditions and avoid glissading in poor visibility or during inclement weather.
- Listen to your body and stop glissading if you feel tired, fatigued, or uncomfortable.
By prioritizing safety and following these guidelines, you can enjoy the exhilaration of glissading while minimizing the risks involved.
Avalanche Risk
Glissading with an ice axe can be an exhilarating and efficient way to descend steep snowy slopes. However, it’s important to be aware of the potential risks, especially when it comes to avalanches. Here are some key points to consider:
1. Terrain: Choose your glissade route carefully, avoiding areas with a high risk of avalanches such as steep slopes, convexities, and gullies. Stick to open areas with a gentle slope if possible.
2. Weather conditions: Check the weather forecast before attempting a glissade. Avalanches are more likely to occur during or shortly after snowfall, when the snowpack is unstable. Also, be cautious of warming temperatures, as this can increase the risk of wet avalanches.
3. Snowpack stability: It’s crucial to assess the stability of the snowpack before glissading. Look for signs of recent avalanches, cracking or collapsing snow, or significant wind loading. If in doubt, it’s best to avoid glissading altogether.
4. Avalanche equipment: Always carry essential avalanche safety equipment, such as a transceiver, shovel, and probe. Make sure you know how to use them effectively and practice with them regularly.
5. Travel with a buddy: Glissading alone can be risky, so it’s recommended to go with at least one other person. If an avalanche does occur, having someone to assist in rescue efforts can make a significant difference.
6. Education and training: Take the time to educate yourself on avalanche safety and glissading techniques. Consider attending a formal avalanche safety course or hiring a professional guide to enhance your skills and knowledge.
7. Get local information: Check in with local authorities or park rangers to gather information on current avalanche conditions and any specific precautions or warnings for the area you plan to glissade.
Remember, glissading is a thrilling activity, but safety should always be the priority. By being proactive and taking into account avalanche risk factors, you can enjoy the adventure with peace of mind.
Tips
- Ensure that your ice axe is securely attached to your wrist using the leash.
- Choose a slope that is safe and suitable for glissading. Avoid slopes with obstacles and hazards.
- Wear appropriate clothing and gear for glissading, including a helmet, gloves, and sturdy boots.
- Before starting the glissade, assess the slope for potential hazards such as crevasses or rocks.
- Position yourself properly on the slope, with your feet pointed downhill and slightly apart.
- Hold the ice axe firmly in your uphill hand, with your palm facing downwards.
- Lean back slightly and apply pressure on the ice axe with your hand, using it to control your speed and direction.
- Keep your knees slightly bent and your body relaxed, allowing you to absorb any bumps or obstacles on the slope.
- Use your ice axe as a brake by gently pressing the pick into the snow or ice, slowing down or coming to a stop.
- Practice your glissading technique on slopes of increasing difficulty to gain confidence and control.
- Always glissade in a group or with a trusted partner and communicate with each other to ensure safety.