
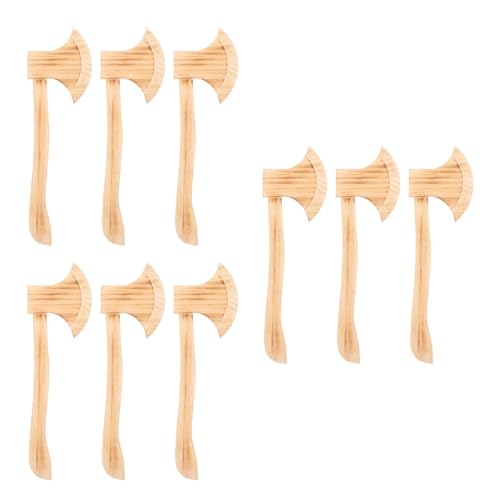


Are you ready to unleash your inner lumberjack? With just a few simple materials and a little bit of creativity, you can make your very own cardboard lumberjack axe. Whether you’re planning a costume party or just want to add some rustic charm to your home decor, this DIY project is sure to impress.
To make your cardboard lumberjack axe, you’ll need a few basic supplies. First, gather some cardboard boxes or sheets of cardboard. You’ll also need a ruler, a pencil, a utility knife or scissors, and some strong adhesive like hot glue or duct tape. Optionally, you can also add some paint or markers to give your axe a more realistic look.
Once you have your supplies ready, it’s time to start crafting your cardboard lumberjack axe. Begin by drawing the shape of your axe head on a piece of cardboard. Make sure to include the handle and any details you want to add, such as a blade or an engraved pattern. Use your ruler to ensure the proportions are correct and the lines are straight.

Next, carefully cut out the shape of the axe head using a utility knife or scissors. Be sure to follow the lines you’ve drawn and take your time to make clean cuts. Once you have the shape cut out, repeat the process to create a second identical piece for the other side of the axe head. Then, use the adhesive to attach the two pieces together, sandwiching a sturdy piece of cardboard or a wooden dowel in between to serve as the handle.
Step-by-Step Guide: Making a DIY Cardboard Lumberjack Axe
In this step-by-step guide, we will show you how to create your own cardboard lumberjack axe. This simple and fun DIY project is perfect for crafts enthusiasts of all ages.
Materials You Will Need:
- Cardboard
- Utility knife
- Ruler
- Pencil
- Acrylic paint (brown and silver)
- Paintbrushes
- Hot glue gun
- Scissors
Step 1: Designing the Axe Shape
Start by drawing the shape of your axe on a piece of cardboard. Use a ruler to ensure straight lines and symmetrical design. You can model the axe after a classic lumberjack axe or get creative and design your own unique shape.
Step 2: Cutting Out the Axe Head
Once you are satisfied with the design, use a utility knife to carefully cut out the axe head from the cardboard. Take your time and follow the lines precisely to achieve accurate results.
Step 3: Adding Details to the Axe Head
Using scissors, cut out smaller details such as the blade edge and any decorative elements you wish to include on your axe head design.
Step 4: Painting the Axe Head
Now it’s time to bring your axe head to life with some paint. Start by applying a coat of brown acrylic paint to the entire surface of the cardboard. Let it dry completely before moving on to the next step.
Step 5: Adding Silver Details
Using a smaller paintbrush and silver acrylic paint, add details and highlights to the axe head. Focus on the blade edge and any other areas where you want to create a metallic look. Let the paint dry completely before proceeding.
Step 6: Creating the Axe Handle
Measure and cut a long piece of cardboard for the axe handle. It should be approximately the length you desire for your finished axe.
Step 7: Connecting the Handle to the Axe Head
Apply hot glue to the base of the axe head and carefully attach the cardboard handle to it. Hold it in place until the glue sets and the pieces are securely joined together.
Step 8: Finishing Touches
Inspect your cardboard lumberjack axe for any rough edges or imperfections. Use scissors or a utility knife to trim and refine the shape if necessary.
Now you have your very own DIY cardboard lumberjack axe! It’s a great prop for costumes, plays, or simply for display. Get creative and have fun customizing your axe with your own unique style!
Materials and Tools Needed
To make a cardboard lumberjack axe, you will need the following materials and tools:
Materials:
- A large piece of cardboard
- Cardboard tubes (such as from paper towel or wrapping paper rolls)
- An empty cereal box
- Duct tape
- Scissors
- A craft knife
- A ruler
- A pencil
- A glue stick
- Acrylic paint
- Paintbrushes
Tools:
- A cutting mat or a work surface that can be cut on
- A hot glue gun (optional)
Make sure to gather all the materials and tools listed above before starting the project. Having everything ready will help ensure a smoother and more enjoyable crafting experience.
Prepare the Cardboard
Before you start making your cardboard lumberjack axe, you need to gather the necessary materials and prepare the cardboard. Follow these steps:
- Gather all the materials you will need: a piece of cardboard, a pencil, a ruler, a utility knife, and a cutting mat to protect your working surface.
- Place the cardboard on the cutting mat and use the ruler to measure and mark the desired length and width for your lumberjack axe. The average length of a lumberjack axe is around 30 inches, but you can adjust it according to your preference.
- Using the ruler as a guide, draw the outline of your axe on the cardboard with a pencil. Make sure the blade and the handle are proportionate to each other.
- Once you are satisfied with the shape, carefully cut along the outline using a utility knife. Take your time and be cautious to avoid any injuries. Remember to keep your fingers away from the path of the blade.
- After cutting the main shape of the axe, assess the cardboard’s thickness. If you believe it needs reinforcement, you can cut additional pieces of cardboard and glue them together to create a sturdier structure.
- Smooth out any rough edges using sandpaper or a file. This will give your cardboard axe a more polished look and prevent any accidental cuts.
- Clean up your work area and dispose of any cardboard scraps. You are now ready to move on to the next step: assembling the cardboard lumberjack axe.
By following these steps, you will have a well-prepared piece of cardboard ready to be turned into a realistic-looking lumberjack axe.
Cut Out the Axe Shape
Once you have gathered all the necessary materials and tools, it’s time to start creating the cardboard lumberjack axe. The first step is to cut out the shape of the axe using the provided template.
To begin, print out the template and carefully cut it out along the outline. Make sure to use a sharp pair of scissors or a craft knife to ensure clean and precise cuts.
Next, place the template onto the cardboard and trace the outline using a pencil or marker. This will serve as a guide for cutting out the axe shape.
Now, take your scissors or craft knife and carefully cut along the traced outline. It’s important to be cautious and take your time to ensure accuracy and avoid any mistakes.
Remember to cut out both the main body of the axe as well as the handle. The handle should be slightly longer to give it a realistic look.
Once you have cut out the axe shape, you may notice some rough edges or imperfections. Use a sandpaper or a file to smooth out these rough edges and give the axe a cleaner finish.
Tip: If you want to add some extra details to your cardboard lumberjack axe, you can use a pencil or marker to draw in the details such as wood grain or metal accents.
Now that you have successfully cut out the axe shape, you are ready to move on to the next step of assembling and decorating your cardboard lumberjack axe!
Reinforce the Axe
After you have assembled the basic shape of the lumberjack axe using cardboard, it’s important to reinforce it to make it more durable and sturdy. Follow these steps to reinforce your cardboard axe:
1. Add Extra Layers of Cardboard
Take additional pieces of cardboard and cut them into strips or shapes that fit along the edges or weak points of your axe. Apply a layer of glue to the area where you want to reinforce, then carefully attach the cardboard pieces. Press down firmly to ensure good adhesion.
2. Use Duct Tape
Another way to reinforce the axe is by using duct tape. Wrap the tape around the handle and along the blade, covering any weak areas or seams. Make sure to pull the tape tightly to provide maximum support.
3. Apply Epoxy Resin or Craft Glue
If you want to make your axe even stronger, consider applying epoxy resin or strong craft glue to hold the cardboard layers together. Apply it to the edges or weak points and let it dry according to the product’s instructions.
By reinforcing your cardboard lumberjack axe, you can ensure that it will withstand more rigorous play or use. Remember to take precautionary measures while handling any sharp or pointy edges. Now you’re ready to paint and decorate your axe!
Paint and Decorate
After assembling your cardboard lumberjack axe, it’s time to make it look like the real deal by painting and decorating it. Use acrylic or poster paint in colors that resemble a wooden handle and a metal blade.
Start by painting the handle. Use a medium or dark brown paint and apply it evenly all over the cardboard surface. Let the paint dry completely before moving on to the next step.
Next, paint the blade of the axe. Use a silver or gray paint to create a metallic effect. Apply multiple coats if needed, allowing each coat to dry before adding the next. You can also add some black or dark gray paint to create a weathered or aged look to the blade.
Once the paint is dry, you can add some additional decorative details. Use a fine-tipped paintbrush or a marker to add wood grain textures to the handle. You can also add some details to the blade, such as scratches or rust spots, to make it look more realistic.
If you want to take the decoration a step further, you can use stickers or decals to customize your axe. Look for forest-themed or lumberjack-related stickers and apply them to the handle or blade. This will give your cardboard lumberjack axe a unique and personalized touch.
Finally, to protect your paint job and add some durability to the cardboard, you can apply a clear sealant or varnish. This will also give your axe a shiny finish.
| Materials Needed: |
|


