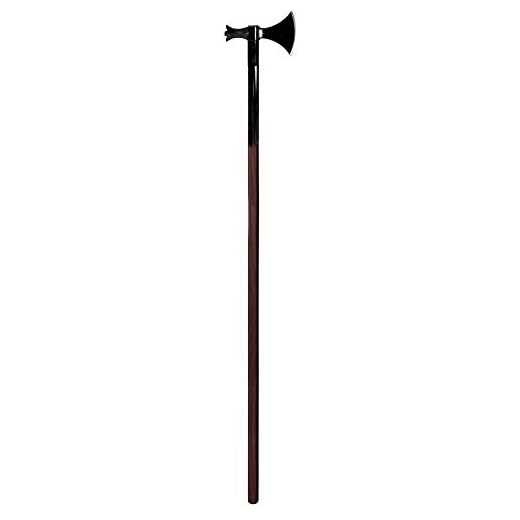
A pole axe, also known as a polearm, is a weapon that combines the features of an axe with a long pole, allowing for both cutting and thrusting attacks. Historically, pole axes were widely used by knights and foot soldiers in medieval Europe.
While pole axes are no longer used in modern warfare, they are still popular among historical reenactment enthusiasts and collectors. If you’re interested in creating your own pole axe, this guide will provide you with step-by-step instructions on how to make one.
Before you begin, it’s important to emphasize that making a pole axe requires some intermediate-level woodworking and metalworking skills, as well as access to the necessary tools and materials. If you’re not comfortable with these tasks, it’s always best to seek assistance from a professional or experienced craftsman.
Now, let’s get started on the process of making a pole axe!
Choosing the Right Materials
When it comes to making a pole axe, choosing the right materials is crucial. The quality of your materials will determine the durability and effectiveness of your weapon. Here are some important factors to consider:

1. Handle:
The handle of the pole axe should be made of a strong and sturdy material that can withstand heavy impacts. Traditional options include hardwoods like oak or ash, which are known for their strength and resilience. These woods also provide a good grip, making them ideal for a weapon that requires precision and control.
2. Head:
The head of the pole axe is one of the most important components, as it is responsible for delivering the cutting or piercing force. For the best results, it is recommended to use high-carbon steel for the head. This type of steel is known for its strength and durability, making it suitable for withstanding the rigors of combat. Additionally, high-carbon steel can be sharpened to a fine edge, enhancing the weapon’s effectiveness.
3. Fasteners:
When assembling your pole axe, using the right fasteners is essential. The fasteners should be made of a material that can securely hold the different parts of the weapon together. Common options include brass or steel screws and rivets, which are known for their strength and corrosion resistance.
4. Decorative Elements:
While not essential for the functionality of the pole axe, adding decorative elements can enhance its aesthetics. These elements can include ornate metalwork, carvings on the handle, or custom paintjobs. Be sure to choose materials that complement the overall design of the pole axe and reflect your personal style.
By carefully considering these factors and choosing the right materials, you can create a pole axe that is not only functional but also visually impressive. Remember to prioritize durability, strength, and precision in your material selection to ensure the best possible result.
Designing and Shaping the Axe Head
When it comes to making a pole axe, designing and shaping the axe head is a crucial step. The axe head is the main component of the pole axe and determines its efficiency and effectiveness. Here are some important considerations to keep in mind:
Choosing the Right Material
The material you choose for your axe head will greatly affect its durability and performance. Common materials used for axe heads include steel, iron, and bronze. Steel is often preferred due to its strength and ability to hold a sharp edge. Iron and bronze are also good options but may require more maintenance to prevent rusting.
Creating the Design
The design of the axe head should be carefully planned to ensure it meets your specific needs and preferences. Consider factors such as the size and weight of the axe head, as well as the shape of the blade and the angle of the cutting edge. These factors will determine the axe’s balance, maneuverability, and cutting ability.
It is important to strike a balance between the size and weight of the axe head. A larger head may provide more power but can be cumbersome to handle, while a smaller head may be easier to maneuver but may lack cutting power. Experiment with different design variations to find the perfect balance for your needs.
Shaping the Axe Head
Shaping the axe head requires precision and skill. Start by marking the design on a piece of steel or iron, and then use a combination of grinding and filing to shape the metal. It is important to work slowly and carefully to avoid removing too much material at once.
Once the basic shape of the axe head is achieved, refine the edges and smooth any rough surfaces. This can be done using a variety of tools, such as files, sandpaper, and grinding stones. Pay attention to the sharpness and smoothness of the cutting edge, as this will directly impact the axe’s cutting performance.
| Material | Pros | Cons |
|---|---|---|
| Steel | High strength, holds sharp edge | May require maintenance to prevent rust |
| Iron | Durable, easy to shape | Prone to rusting |
| Bronze | Good balance, corrosion-resistant | Requires regular maintenance |
Creating the Pole
To create the pole for your pole axe, you will need a straight and sturdy piece of wood. The ideal wood to use is ash or hickory, as they are strong and durable.
Start by measuring the desired length of your pole axe and mark it on the wood. Use a saw to carefully cut the wood to the correct length.
Next, you will need to shape the pole. This can be done using a drawknife or a rasp. Start by removing any rough bark or splinters from the wood.
Once the surface is smooth, begin shaping the pole to your desired specifications. Keep in mind that the end of the pole that will attach to the axe head should be slightly narrower to allow for a secure fit.
As you shape the pole, periodically check the balance by holding it in your hands. It should feel comfortable and well-balanced.
After shaping the pole, use sandpaper to smooth out any remaining rough spots. This will also help to give the pole a polished finish.
Finally, apply a finish to protect the wood and enhance its appearance. You can use a clear varnish or oil finish to achieve this. Apply the finish according to the manufacturer’s instructions and allow it to dry completely before attaching the axe head.
Creating the pole is an important step in making a pole axe. Take your time and ensure that the wood is properly shaped and finished for a strong and functional pole axe.
Assembling the Pole Axe
Once you have gathered all the necessary materials and tools, it’s time to start assembling your pole axe. Follow the steps below to ensure you build a sturdy and functional weapon.
Step 1: Prepare the Axe Head
Begin by attaching the axe head to the pole. Use a strong adhesive or screws to secure it firmly in place. Make sure the axe head is aligned properly with the pole and that there are no gaps between them.
Step 2: Secure the Axe Head
Next, reinforce the attachment of the axe head by wrapping a strong wire or leather straps around it. This will provide additional support and prevent the head from loosening over time.
Step 3: Attach the Spike
If your pole axe includes a spike, now is the time to attach it. Similar to the axe head, securely fix the spike to the pole using adhesive or screws. Double-check its alignment and ensure it is parallel to the axe head.
Step 4: Reinforce the Spike
To enhance the strength of the spike attachment, wrap wire or leather straps around it just like you did with the axe head. This will add stability and durability to your pole axe.
Step 5: Test and Adjust
Before using your pole axe in combat or for any practical use, it’s crucial to test its stability and adjust if necessary. Swing it gently to see if any parts come loose or if there is any imbalance. Make any required adjustments to ensure the weapon is well-balanced and functional.
Step 6: Finish and Polish
Lastly, you can finish and polish your pole axe to improve its appearance. Sand or file any rough edges, and apply a coat of paint or varnish to protect the wood from moisture and enhance its overall aesthetics.
Remember, safety is paramount when using a pole axe. Always handle it with care and exercise caution to prevent accidents or injuries. Enjoy your new pole axe responsibly!